EasyManua.ls Logo

Morita Lubrina 2 - User Manual

Morita Lubrina 2
48 pages
Print Icon
To Next Page IconTo Next Page
Loading...

Questions and Answers

  • Y
    ywrightAug 13, 2025
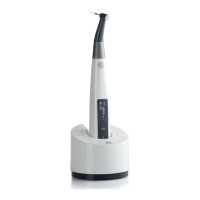
    What to do if Morita Lubrina 2 has no power when turned on?
    • R
      Ryan WagnerAug 13, 2025
      If your Morita Dental equipment isn't powering on, check if the power cord is securely plugged into both the power outlet and the device. Ensure the power cord is properly connected to the power outlet; connect the power cord correctly.
  • W
    williamsantonioAug 17, 2025
    What to do if process stops immediately on Morita Lubrina 2?
    • M
      Miguel ChapmanAug 17, 2025
      If the process stops immediately when you press the Start/Stop Switch, all Line Selection Lamps blink, and you hear a triple beep, it's likely that the front door is open or dislocated. Ensure the front door is properly closed and press the Start/Stop Switch again. If the front door is dislocated or the hinge isn't inserted properly, remove the front door and reinstall it, making sure to insert the hinge straight until it snaps on.
  • M
    Michael CuevasAug 21, 2025
    Why does my Morita Dental equipment release oil mist and make surfaces oily?
    • A
      Alyssa AndersonAug 21, 2025
      Oil mist release and oily surfaces can occur due to several factors. The handpiece shape can cause more oil scattering, so reduce air pressure to 0.3 MPa. Ensure the handpiece is correctly attached. Adjust the regulator if the air pressure setting is too high to stay within the specified range. If using a straight attachment, refer to the handpiece manual to check if a bur needs to be inserted, as some handpieces release oil mist without one.
  • S
    stephaniejohnsonAug 25, 2025
    What to do if Morita Lubrina 2 process stops before lubrication?
    • B
      brentgentryAug 25, 2025
      If the process stops before lubrication, the selected Line Selection Lamp and corresponding Empty Spray Can Lamp blink, and a short series of beeps sound, it could be due to several reasons. First, replace the spray can with a new one if it's empty. Also, ensure the spray can and spray stand are properly installed. Check that compressed air is supplied by connecting the air tube correctly. Adjust the regulator to set the air pressure within the specified range, and ensure the air tube isn't bent; fix the air tube if it is.
  • J
    John GonzalezAug 28, 2025
    How to fix odd odor and unusual dirtiness of Morita Lubrina 2?
    • M
      Miss Jamie Li PhDAug 29, 2025
      An odd odor and unusual dirtiness from your Morita dental equipment may arise if the handpiece wasn't connected to the lubrication line; select only lines with connected handpieces. Another potential cause is a saturated oil absorbent pad or a dirty oil absorbent sheet; in either case, remove the old pad or sheet, clean the device, and set a new one. Also, ensure the spray can is properly installed. Check that the air pressure is set within the specified range by adjusting the regulator.
  • T
    Tracy BartlettSep 1, 2025
    Why can't I attach handpieces to my Morita Dental equipment?
    • S
      Stephen LopezSep 1, 2025
      If you're unable to attach handpieces, it might be because the coupling or handpiece connection is deformed; in this case, have it repaired. Another reason could be debris on the coupling or handpiece connection, or a dislocated O-ring; remove any debris and replace the O-ring with a new one. Also, check if the handpiece was forcibly detached without unlocking; if so, pull up the release ring.
  • M
    millerronnieSep 4, 2025
    Why can't I set a spray can in my Morita Lubrina 2 Dental equipment and why is oil leaking?
    • C
      cassandragordonSep 4, 2025
      If you can't set a spray can and oil is leaking, ensure you're using properly shaped spray cans. Readjust the spray stand height if it's not properly adjusted. Verify that the spray stand is designed for the spray can you're using, and replace it if necessary. Only use spray cans approved by J. MORITA.
  • D
    David BrownSep 9, 2025
    Why lubrication does not start on Morita Lubrina 2 Dental equipment?
    • M
      Matthew WebsterSep 9, 2025
      Lubrication may not start when pressing the Start/Stop Switch if no line is selected. Select at least one line before pressing the Start/ Stop Switch.

Summary

Accident Prevention

Preventing Accidents

Guidelines to avoid operational hazards and injuries during device use.

Disclaimers

Manufacturer's limitations of liability regarding product use and maintenance.

Precautions

General Safety Precautions

Alerts users to severe injury, device damage, and critical safety measures.

Intended Use and Usage Flow

Intended Use

Specifies the device's purpose for handpiece lubrication and flushing.

Usage Flow Overview

Outlines the sequence of handpiece maintenance procedures.

Device Components

Main Unit Description

Description of the primary device hardware and its appearance.

Included Accessories

Lists parts and consumables provided with the device.

Parts Identification

Component Identification

Identifies and labels device components across front, front view, and rear sections.

Operation Panel

Control Switches and Functions

Explains the function of switches like Start/Stop and mode selectors.

Recommended Lubrication Modes

Guidance on selecting the correct lubrication mode for different handpieces.

Indicator Lamps

Status Indicator Lamps

Details the meaning of various indicator lamps on the control panel.

Setup - Main Unit

Main Unit Installation

Instructions for physically placing and preparing the main unit.

Setup - Air Tube

Air Tube Connection Procedure

Steps for connecting the air supply tube to the device.

Setup - Power Cord

Power Cord Connection Procedure

Instructions for connecting the device to a power source.

Spray Can Setup

Spray Can Installation

How to install spray cans for lubrication.

Spray Stand Setup

Spray Stand Setting and Adjustment

Details on setting up, adjusting, and replacing spray stands.

Spray Can Installation Details

Installing Spray Cans

Step-by-step guide for inserting spray cans into the device.

Spray Stand Adjustment

Adjusting Spray Stand Height

How to adjust the spray stand height for proper can fit.

Couplings

Coupling Attachment and Removal

Step-by-step guide for connecting and disconnecting couplings.

Coupling Compatibility

Information on compatible and incompatible couplings for the device.

Maintenance Components

Oil Absorbent Sheets and Pads

Placement and function of oil absorbent sheets and pads.

Oil Collection Tray Usage

How to use the oil collection tray and absorbent pad.

Door Maintenance Components

Door Oil Absorbent Sheet Installation

Installing the door oil absorbent sheet and stopper.

Usage Conditions

Operating, Transport, and Storage Environments

Specifies conditions for device operation, transport, and storage.

Maintenance Categories Overview

Overview of different maintenance types and their purposes.

Basic Operation

Powering On;Off

Steps for turning the device power on and off.

Chuck Lubrication Procedure

Step-by-step guide for lubricating the handpiece chuck.

Handpiece Body Lubrication

Attaching Handpieces

Process for attaching handpieces to the lubrication couplings.

Starting Lubrication Process

Steps to initiate the handpiece lubrication cycle.

Handpiece Detachment

Detaching Handpieces After Lubrication

Steps for safely removing lubricated handpieces from the unit.

Handpiece Removal Details

Air Turbine Handpiece Removal

Specific instructions for removing air turbine handpieces.

Micromotor Attachment Removal

Specific instructions for removing micromotor attachments.

Switching Maintenance Modes

Mode 1;Mode 2 Switching Procedures

How to change lubrication modes between Mode 1 and Mode 2.

Other Maintenance Modes

Air Blow Mode

Procedure for using Air Blow Mode to remove excess oil.

Flushing Mode

Flushing Mode Procedure

Procedure for using Flushing Mode for debris removal.

Cleaning Procedures

Daily Cleaning of Main Unit and Couplings

Routine cleaning tasks for the main unit and couplings.

Regular Monthly Cleaning

Front Door and Air Regulator Cleaning

Monthly cleaning procedures for the front door and air regulator.

Parts Replacement

Oil Absorbent Sheets and Pads Replacement

Guidance on replacing oil absorbent sheets and pads.

Component Replacement

Nozzle Skirt and O-rings Replacement

Instructions for replacing nozzle skirts and coupling O-rings.

Spray Can Replacement

Guidance on replacing spray cans when indicated by lamps.

Troubleshooting

Common Issues and Remedies

Lists common problems, their causes, and remedies with page references.

Specific Troubleshooting

Troubleshooting Oil Mist and Lamps

Addresses specific issues like oil mist and indicator lamp behavior.

Maintenance and Service

Regular Inspection and User Maintenance

Details regular inspection and user maintenance tasks.

Service and Repair Information

Information on who can service and repair the device.

Consumables

Available Consumable Parts

Lists available consumable parts and their product codes.

Technical Specifications

Device Specifications Data

Provides detailed technical data including dimensions, power, and pressure.

User and Symbol Information

Intended User Profile

Defines the target users and their required experience and understanding.

Manual Symbols Glossary

Explains various symbols used throughout the instruction manual.

Electromagnetic Compatibility (EMC)

EMC Emissions Guidance

Manufacturer's statement on electromagnetic emissions and usage environment.

Electromagnetic Immunity

EMC Immunity Guidance

Manufacturer's statement on electromagnetic immunity and usage environment.

Cable Specifications

Power Cable Details

Details on the AC power cable length and classification.

Morita Lubrina 2 Specifications

General IconGeneral
BrandMorita
ModelLubrina 2
CategoryDental equipment
LanguageEnglish

Related product manuals