Do you have a question about the Motomaster 011-1975-8 and is the answer not in the manual?
Crucial safety precautions and warnings to be read before using the charger.
Instructions for connecting the charger to a battery installed in a vehicle.
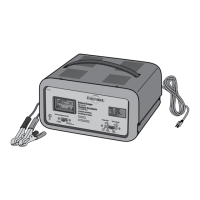
Details the information shown on the digital display, including Volts, Amps, and Battery State of Charge.
Describes the meaning of the CHARGING, CHARGED/MAINTAINING, and Fault LEDs.
Overview of the different charging modes available on the charger.
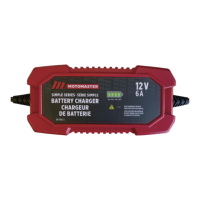
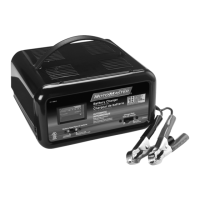
This MotoMaster Classic Series Battery Charger is an advanced device designed to make battery charging faster, easier, and safer, while also helping to maximize the performance and life of your batteries. It is suitable for use with all types of 12-volt lead-acid batteries, including Wet (flooded), Maintenance-free (MF), Calcium (Ca), Enhanced Flooded (EFB), Absorbed Glass Mat (AGM), and Gel batteries. The charger is capable of charging batteries rated from 10 to 300 Amp-hours and maintaining batteries from 10 to 400 Amp-hours.
The charger features a digital display that alternates between showing Volts (V), Amps (A), and the Battery State of Charge (%). It can also display Fault Codes if a charging error is detected. The actual charging voltage will be displayed, which can reach up to 14.4 V, a normal and necessary level for effectively charging a 12-volt battery. The actual charging amperage will also be displayed. While you can select 2 A, 8 A, or 15 A charge modes, these are maximum currents, and the battery charger will automatically reduce the actual current delivered to the battery based on feedback and other factors.
The approximate battery state of charge is displayed, with "LO" indicating a charge below 50%. Above 50%, the percentage will display in 10% increments from 60% to 90% capacity. Once fully charged, the display will read "100%". Approximately 30 minutes after reaching full charge, the battery charger will enter a power-saving mode, and the digital display will turn off.
The charger continuously monitors charge progress and collects feedback from the battery. In the event of an abnormal condition, charging will stop, and a fault code (e.g., "F01") may be displayed, along with an illuminated LED.
Charge status is indicated by LEDs: a CHARGING LED indicates the battery is charging, and a CHARGED/MAINTAINING LED indicates charging is complete and the charger has entered the Maintain stage. An additional LED indicates one of three possible error conditions:
There are four charging modes to choose from, which can be cycled through by pressing the MODE button. Charging will automatically begin about 5 seconds after a mode is selected. The charger retains the last selected mode in memory, and if AC power is disrupted, it will restart in the last selected mode once power is restored.
The available charging modes are:
To charge your battery:
The charger employs a multi-stage charging process to optimize battery health and performance:
For maintenance and care, it is recommended to wipe clean the cords and clamps after each use. Store the power and output cables neatly to prevent damage. The charger housing can be cleaned using a damp cloth and a mild cleaning agent. Always unplug the charger when not in use and store it in a cool, dry place.
| Model Number | 011-1975-8 |
|---|---|
| Battery Type | Lead-Acid |
| Input Voltage | 120V AC |
| Output Voltage | 12V DC |
| Charging Current | 2A |