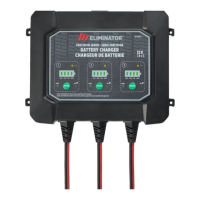
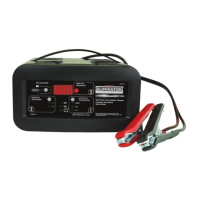
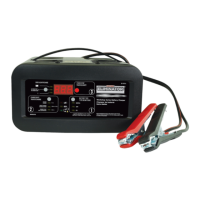
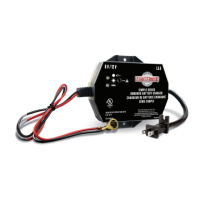
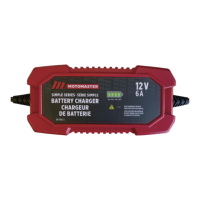
The device is a MotoMaster Classic Series Battery Charger, model no. 011-1977-4. It is designed for charging and maintaining 12 V lead-acid batteries, including those found in cars, trucks, motorcycles, and boats. The charger incorporates advanced microprocessor technology to make battery charging faster, easier, and safer.
Function Description
The MotoMaster Classic Series Battery Charger is primarily used for charging lead-acid batteries. It offers multiple charging rates and modes to accommodate different battery conditions and sizes:
- 6 A Charge: Suitable for charging small and large batteries.
- 40 A<>15 A Boost Charge: Designed for quickly adding energy to severely discharged or large capacity batteries, or for fast charging larger batteries. This mode can also be used prior to using the Engine Start feature.
- 200 A Engine Start: Provides additional amps for cranking an engine with a weak or run-down battery. This feature should always be used in combination with a battery and not to start an engine without a battery installed.
The charger also includes intelligent features such as:
- Desulfation Mode: If a battery has been discharged for an extended period and become sulfated, the charger will automatically switch to a special desulfation mode to attempt to restore it. This process can take up to 10 hours.
- Maintain Mode (Float Mode Monitoring): Once a battery is fully charged, the charger enters a maintain mode, keeping the battery at an optimal charge level by delivering current when necessary. This allows for safe, extended periods of battery maintenance.
- Power-Up Auto Start: If the Start button is not pressed within 30 seconds of power-up, the charger will automatically detect a properly connected battery, set the rate to Boost Charge, and begin the charging process.
Important Technical Specifications
- Input Voltage: 120 V AC
- Input Frequency: 60 Hz
- Input Current: 6 A continuous, 65 A intermittent
- Output Voltage: 12 V DC
- Output Current: 6 A/15 A continuous, 40 A/200 A intermittent
Usage Features
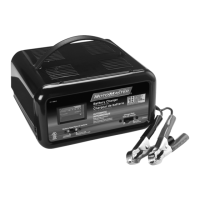
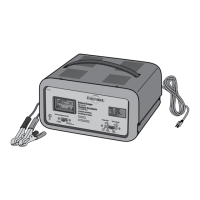
The charger is designed for ease of use with a clear interface:
- START/STOP Button: Initiates charging immediately. If not pressed, charging begins automatically within 30 seconds.
- RATE SELECTION Button: Allows the user to select between 6 A Charge, 40 A<>15 A Boost Charge, and 200 A Engine Start.
- LED Indicators:
- Charging (yellow) LED lit: Indicates the battery is currently charging.
- Charged/Maintaining (green) LED lit: Indicates the battery is fully charged and the charger is in maintain mode.
- Red LED solid: Signals reversed connections. The charger will not begin charging in this state.
- Red LED blinking: Indicates a problem with the battery, requiring troubleshooting.
Connecting the Battery:
The manual provides detailed instructions for connecting the charger to batteries both in and removed from a vehicle, for both negative and positive grounded systems. Key safety precautions include:
- Always removing the AC plug from the electrical outlet before connecting or disconnecting DC output clamps.
- Ensuring proper polarity (positive to positive, negative to chassis/ground).
- Avoiding contact between DC output clamps to prevent sparks.
- Working in a well-ventilated area.
- Not charging a frozen battery.
- Not operating the charger if it has received a hard blow or is damaged.
Engine Start Feature:
To use the engine start feature, the charger is connected to the battery and chassis, then plugged into an AC outlet. The user selects the Engine Start rate and presses the Start button. The charger goes through a sequence of "Wait for ready," "Wait for cranking," "Cranking," and "Cool Down" periods to safely assist in starting the engine. It's important not to crank the engine during the cool down period and to allow the battery and charger to cool.
Maintenance Features
The MotoMaster battery charger requires minimal maintenance to ensure long-term proper functioning:
- Cleaning Clamps: Clean the clamps after each use to remove any battery fluid and prevent corrosion.
- Cleaning Case: Periodically clean the charger's case with a soft cloth to maintain its finish and prevent corrosion.
- Cord Storage: Coil the input and output cords neatly when storing to prevent accidental damage.
- Storage Location: Store the charger unplugged from the AC power outlet, in an upright position, in a cool, dry place. Avoid storing the clamps clipped together, on or around metal, or clipped to the cables.
The manual emphasizes safety throughout, particularly regarding the risk of explosive gases from lead-acid batteries and the importance of proper ventilation and personal protective equipment. It also provides a troubleshooting section for common issues indicated by the LED lights.