headline bars
continuation tabs
notes
warnings
9
headline bars
continuation tabs
notes
warnings
headline bars
continuation tabs
notes
warnings
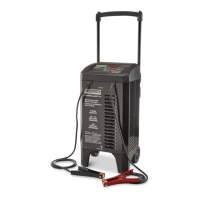
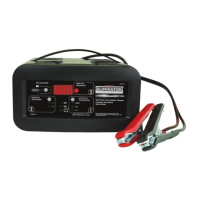
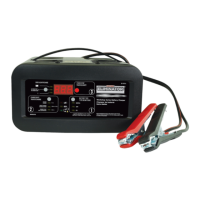
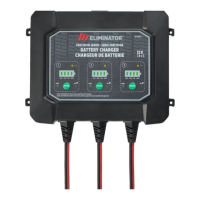
KNOW YOUR CHARGER
®
MD
START/STOP BUTTON
Press to immediately begin charging your properly
connected battery. If the button is not pressed,
charging should begin automatically in 30 seconds.
DIGITAL DISPLAY
The Digital Display gives a digital indication of
voltage, % of charge, or alternator status. If you
manually start or stop the charging process (by
pressing the Start/Stop button), the display will
show ON or OFF respectively for a few seconds
before displaying the battery voltage.
DISPLAY MODE BUTTON
Battery % – The digital display shows an
estimated charge percentage of the battery
connected to the charger’s battery clamps.
Alternator % (12 V only) – The digital display
shows an estimated output percentage of the
vehicle’s charging system connected to the
charger’s battery clamps, compared to a properly
functioning system. The alternator percent range
is from 0% to 100%. Readings below 0%
(13.2 V) will read LO and readings above 100%
(14.6 V) will read HI. If you get a HI or LO reading,
have the electrical system checked by a qualified
technician.
Voltage – The Digital Display shows the voltage
at the charger battery clamps, in DC volts.
RATE SELECTION BUTTON
Use this button to select one of the following:
• 6 A Charge – For charging small and large
batteries. Not recommended for industrial
applications.
• 50 A<>15 A Boost Charge – For quickly
adding energy to a severely discharged or
large capacity battery prior to Engine Start,
or for fast charging of larger batteries.
• 250 A Engine Start – Provides additional
amps for cranking an engine with a weak or
run-down battery. Always use in combination
with a battery.
LED INDICATORS
• Charging (yellow) LED lit:
The charger is charging the battery.
• Charged/Maintaining (green) LED lit:
The battery is fully charged and the charger is
in maintain mode.
• Red LED solid: The connections are reversed.
• Red LED blinking: The charger has detected
a problem with the battery.
See the Troubleshooting section for more
information.
 Loading...