AP-621 Series Access Point Installation Guide
12
c. Connect the power supply line cord to the power adapter.
d. Attach the power adapter cable to the DC-48V power connector on the access point.
e. Attach the power supply line cord to a power supply.
5. Verify the behavior of the access point LEDs. For more information, see “
LED Indicator” on
page 15.
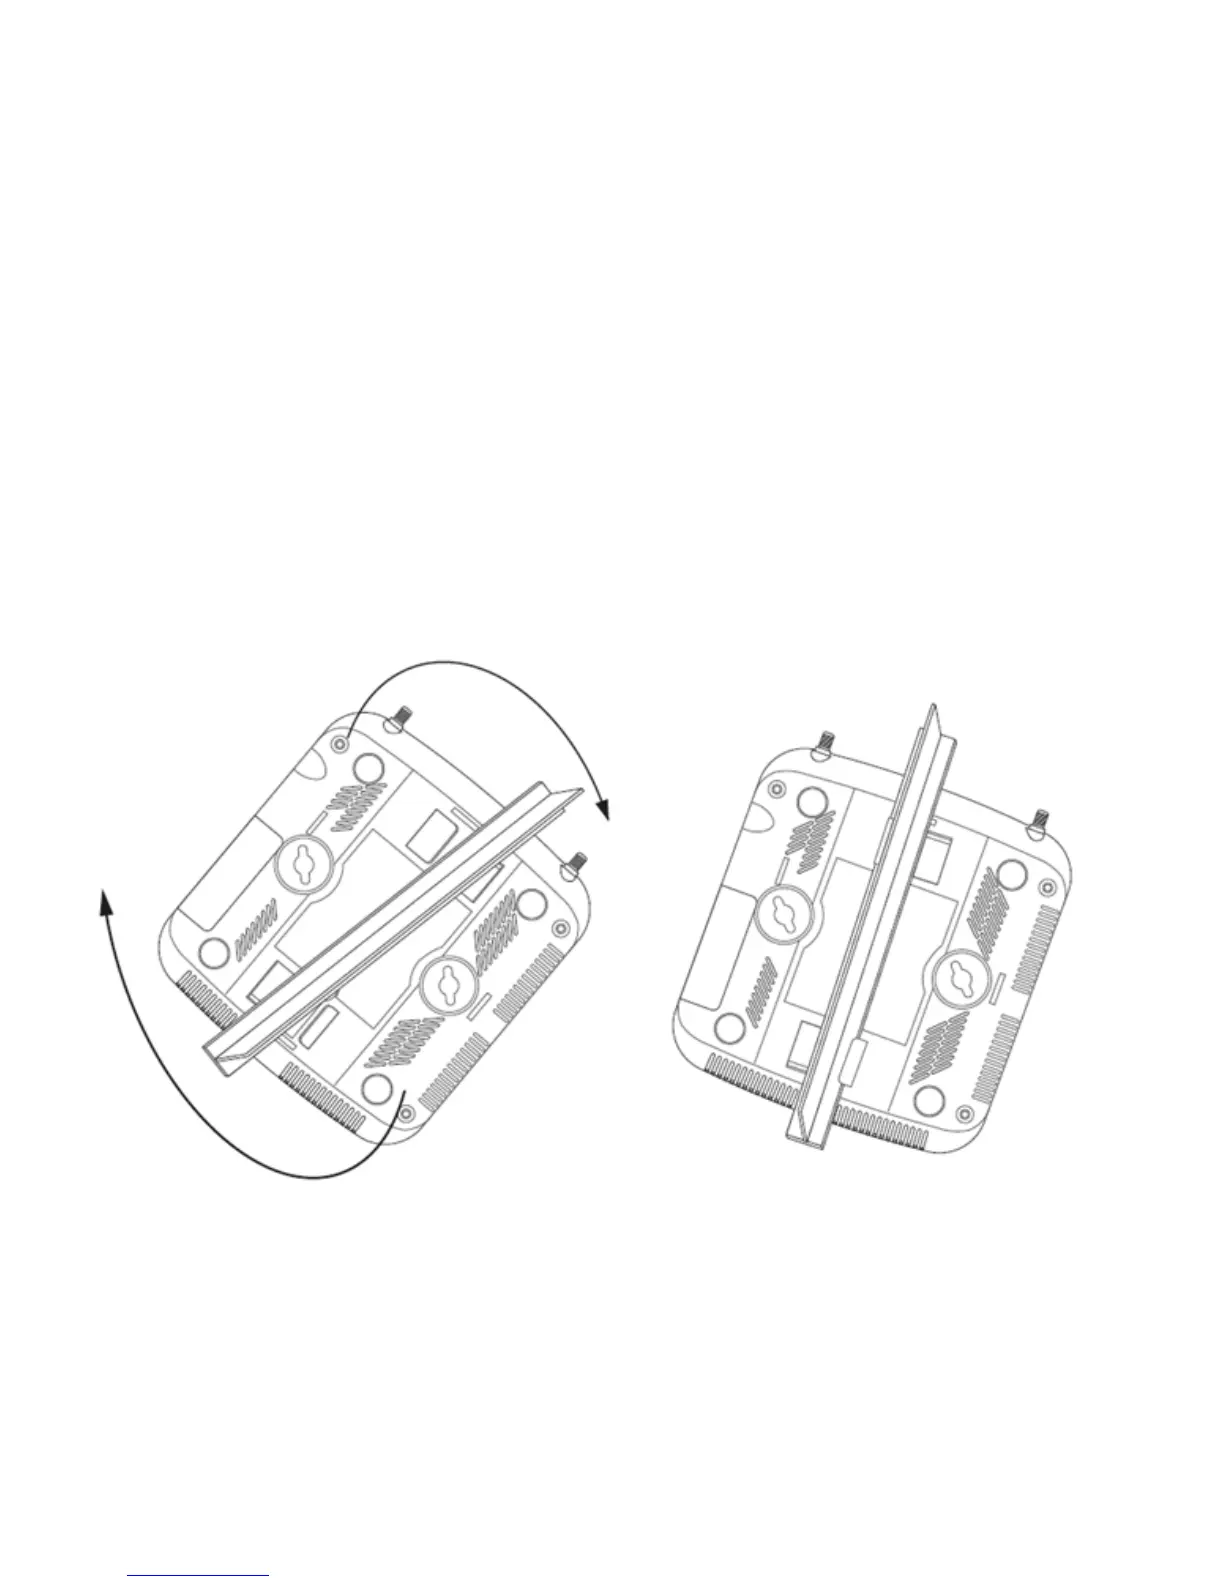
6. Align the bottom of the ceiling T-bar with the back of the access point.
7. Orient the access point chassis by its length and the length of the ceiling T-bar.
8. Rotate the access point chassis 45 degrees clockwise.
9. Push the back of the access point chassis on to the bottom of the ceiling T-bar.
10. Rotate the access point chassis 45 degrees counter-clockwise. The clips click as they fasten
to the T-bar.
11. Verify the behavior of the LEDs. For more information, see “
LED Indicator” on page 15.
12. The access point is ready to configure. For information on basic access point device
configuration, see “
Defining a Basic Configuration” on page 17.
AP621 IG.book Page 12 Tuesday, September 20, 2011 3:18 PM

 Loading...