3. Aachin g the mount to your wal l: Once the
two holes are pre-drilled, fix the wall plate to the
w a l l w i t h t h e t w o l a g b o l t s a n d wa s h e r s a s
sho wn. The inc lud ed plas c a nch o rs DO N OT
need to be u sed for wood stud installaon. Do
not over ghten the lag bolts.
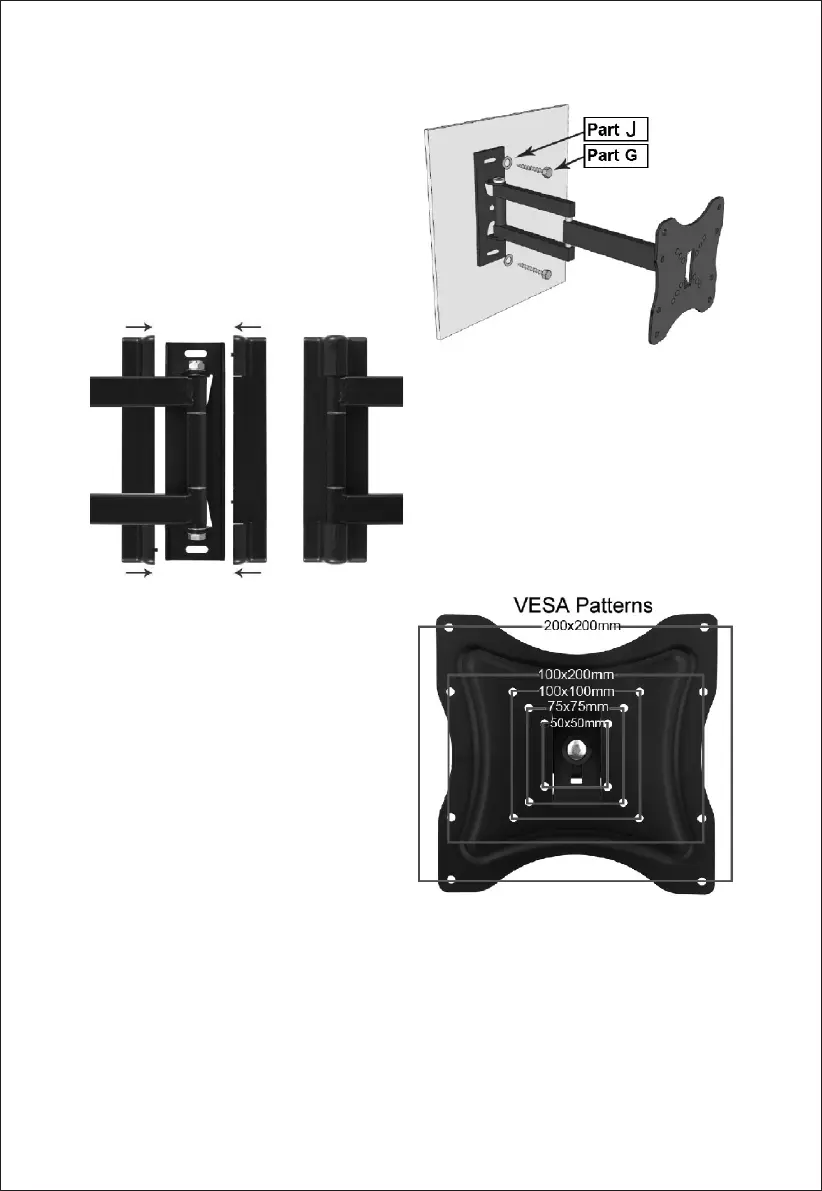
4.Aaching the plate covers: Aach the two
plate covers to each other as shown to the le.
Snap them together to lock in place.
Dete rmining the correct hole paer n to us e:
The mount fits 5 different VESA standard hole
paerns which are shown to the right. Use the
h o l e p a e r n w h i c h c o r r e s p o n d s t o t h e
moun ng ho l e s on th e b a ck of yo u r TV. The
mounng holes will be centered on the back of
your TV in a square or rectangular paern. They
m a y b e flus h o r re c e s s e d a n d t h e y m a y b e
covered with plasc caps. If you are unfamiliar
wit h mm sizes, the s pec ificaons table shows
the standard VESA sizes converted to inches (1"
= 25.4mm).
6