9
Secon B: Concrete and Masonry Installaon:
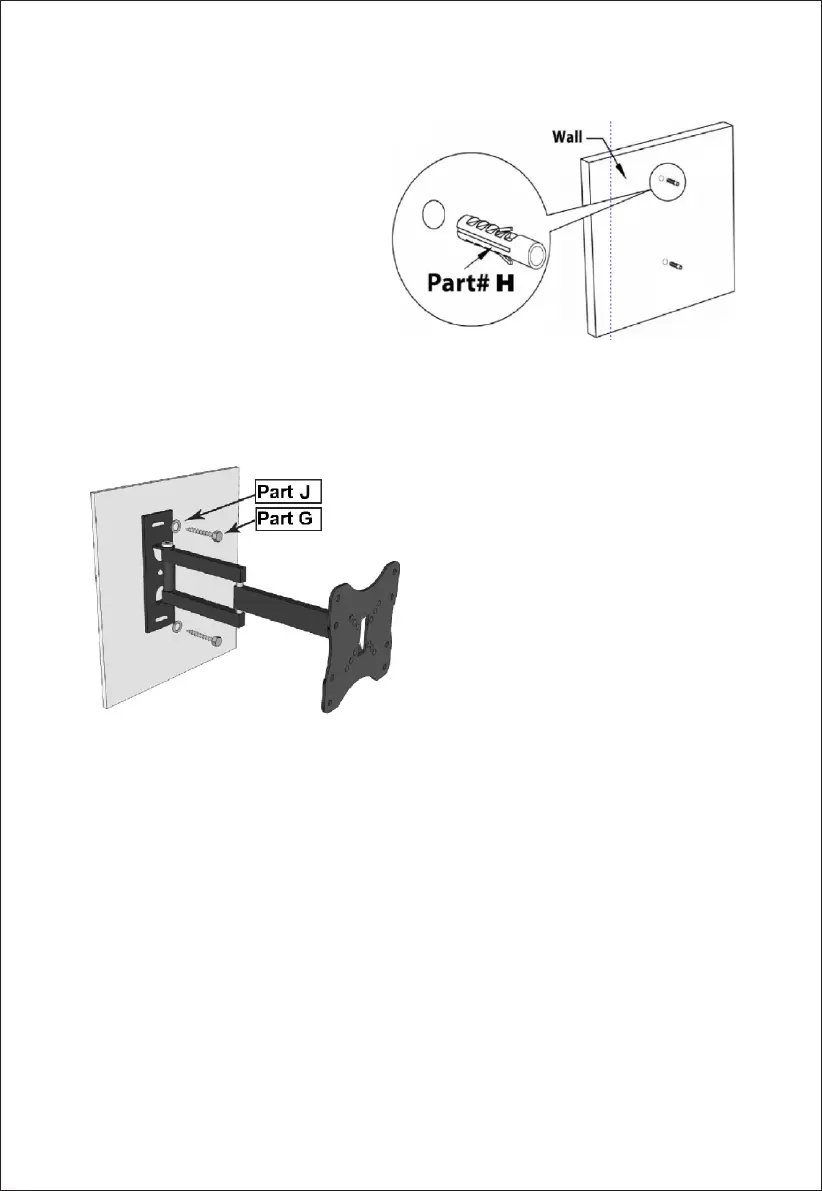
1 . M ar k Inst al lao n Points : O nc e you
have selected the locaon for your mount, mark
the exact locaon of where the two anchors and
lag bolts will be installed.
2. Pre-Drill Installaon Points: Pre-drill
the holes using a mason ry 1 0mm drill bit to a
d e p t h o f 2 " t h e n i n s e r t t h e s u p p l i e d t w o
anchors. See Figure to the right. If you do not
have a metric drill bit a 3/8" drill bit will work.
Drilling into Concrete: When drilling into concrete or masonry, you have to use a special masonry drill bit.
Using a standard drill bit will not penetrate the concrete and it will just dull your drill bit. If you do not have
a masonry drill bit, you can purchase one at the local hardware store. It is not recommended to drill and
mount into concrete block or mortar joints. The supplied plasc anchors are rated for use up to 165LBS,
but if you prefer, you can go to your local hardware
store and purchase metal concrete anchors.
3. Aaching the mount to your wall: Once the holes
are pre-drilled and both plasc anchors are inserted,
fix the wall plate with the two supplied lag bolts and
washers into the wall. See Figure to the le.
At this point please connue with Step 4 in the wood stud installaon secon as the rest of the steps
apply to both.
ATTEN TION:
This mount must be installed using the supplied hardware with at least two lag bolts screwed into a stud
for wood stud installaon or two anchors and screws for masonry installaon.
Revision Date: 04/11/2016