Quick start guide
1. Charge the battery by sliding it into the
tracks on the charging cradle (g 1) and
plugging it into the mains.
• When the light is constant red, it is charging.
• When the light is constant green, it is ready
to use.
2. Prepare the bath/tub by removing:
• Non-slip mats, oil and cleaner residues;
• Obstructions such as handles (or t side ap
protectors), handrails and soap dishes;
• Overhead obstructions at the rear and over
the bath/tub such as cupboards, shelves.
3. Install the bath lift by:
• Placing it with the suction feet on the at
bottom of the bath/tub and at the opposite
end to the taps/faucets;
• Checking for any obstructions likely to
interfere with the bath lift’s movement
(move the bath lift forward if there are xed
overhead obstacles);
• Pressing rmly on the seat to secure the
suction feet to the bath/tub;
Then:
• Unfold the two side aps to rest against the
sides of the bath/tub;
• Run water to any level under the actuator
casing (g 2).
4. Use the bath lift by:
• Sliding the charged battery fully into the
tracks on the hand control (g 3);
• Pressing the UP button.
Please ensure both yourself and any helpers read these operating instructions
carefully and in full before using your bath lift. These operating instructions
should be retained for future reference.
This bath lift is designed and manufactured to assist individuals in getting in and out of the
bath/tub. It should not be used for any other purpose. Do not use it in combination with
other lifting or moving devices. If you are unable to get out of the bath/tub unaided, do
not bathe without someone on call to help in an emergency.
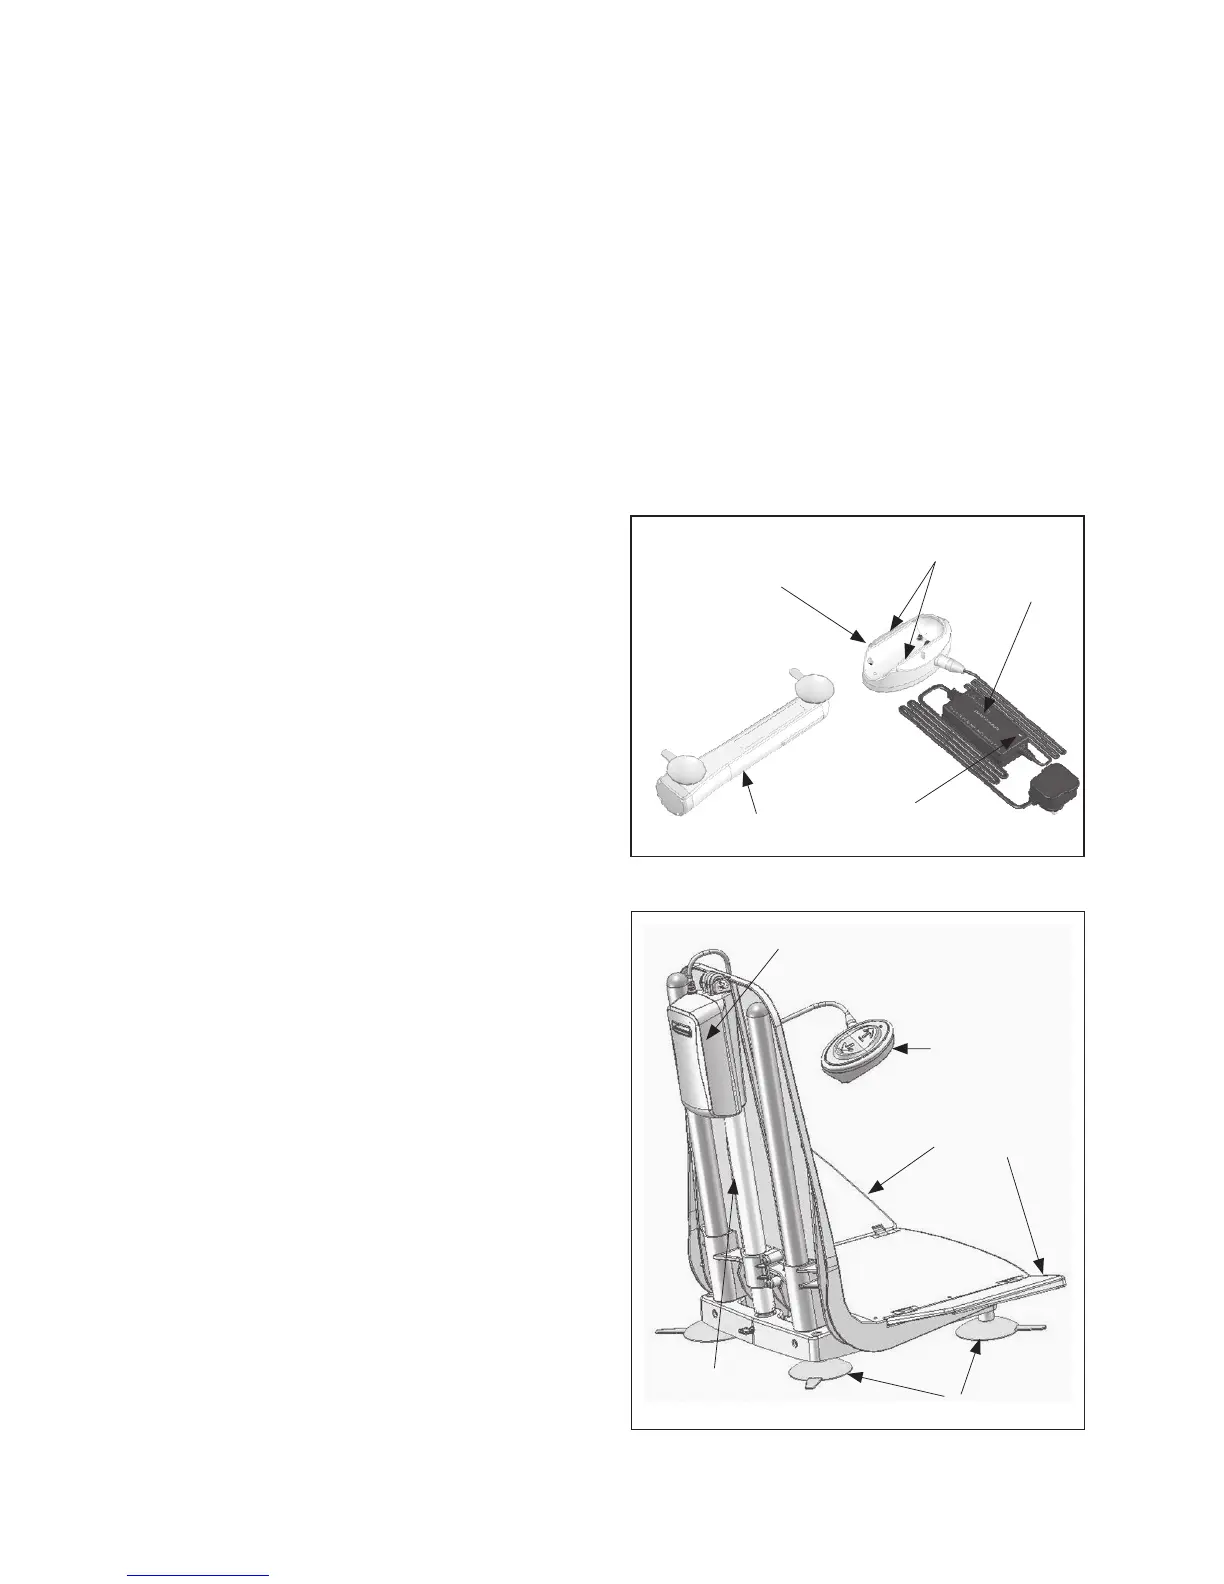
Hand control
Side aps
Actuator
Actuator casing
Suction feet
Figure 2
Charger
Tracks
Light indicator
Charging cradle
Battery
Figure 1
This guide should be read in conjunction with your bath lift’s full operating
instructions, which start on page 4.
2