Below the main steps required to mount and dismount 553 FlexTop modular belt.
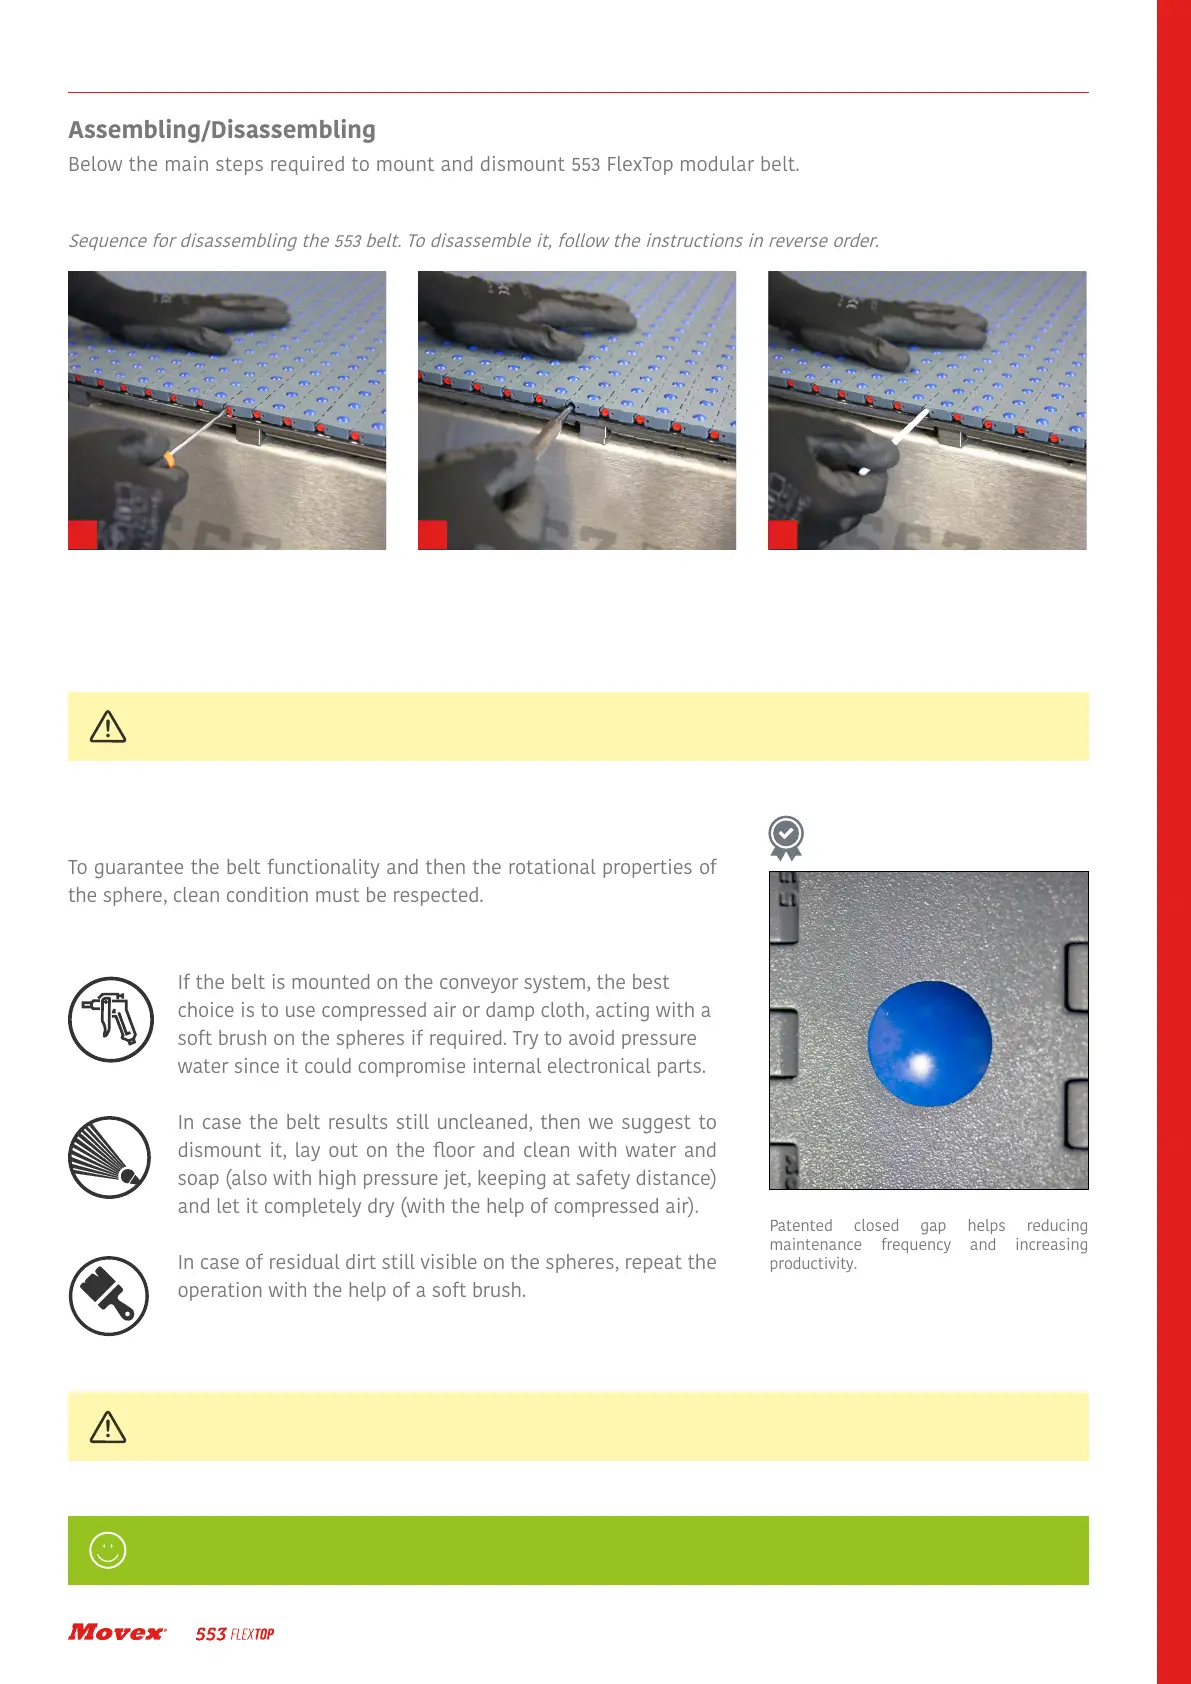
Sequence for disassembling the 553 belt. To disassemble it, follow the instructions in reverse order.
Maintenance
ENGINEERING MANUAL
31
Insert a flat screw driver into the red clip
mounted at the sides of the belt, turn it
by 90° to leave it from the clip fixation and
remove it.
Insert a pin punch and push to extract the
white rod from the opposite side.
Once the white rod is removed, the belt can
be opened easily.
1 2 3
Minimize Downtime and increase Productivity thanks to the patented system.
Pay attention: a non-dry belt housing will compromise the belt functionality and non-cleaned belt housing spheres will not
guarantee correct performances of the required movement.
Before proceeding to remove the rod, ensure that the belt ends cannot slip away due to its weight.
Patented closed gap helps reducing
maintenance frequency and increasing
productivity.
PATENTED
CLOSED GAP
Cleaning
To guarantee the belt functionality and then the rotational properties of
the sphere, clean condition must be respected.
If the belt is mounted on the conveyor system, the best
choice is to use compressed air or damp cloth, acting with a
soft brush on the spheres if required. Try to avoid pressure
water since it could compromise internal electronical parts.
In case the belt results still uncleaned, then we suggest to
dismount it, lay out on the floor and clean with water and
soap (also with high pressure jet, keeping at safety distance)
and let it completely dry (with the help of compressed air).
In case of residual dirt still visible on the spheres, repeat the
operation with the help of a soft brush.