- 8 -
• 2 10/100BaseT(X) Ethernet ports
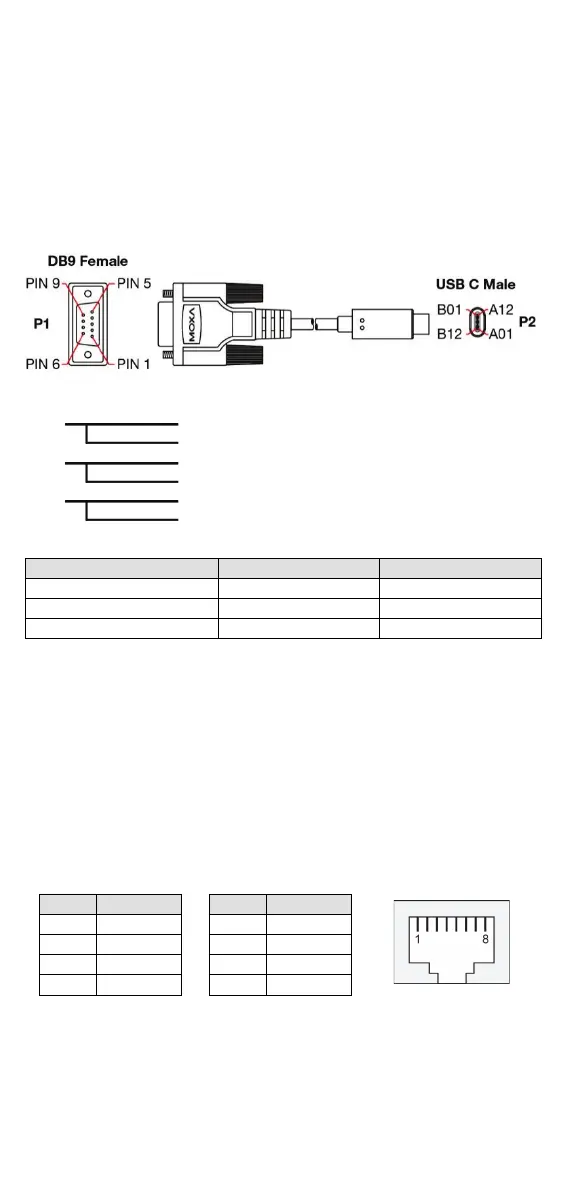
TYPE-C Console Port Connection
The NAT-102 Series provides one TYBP-C console port located on the
top panel. Connect the industrial secure router to a PC COM port using
the Type-C-to-DB9 connection cable, and then launch a console
terminal software, e.g. Moxa PComm Terminal Emulator, to access the
NAT-102 Series’ console configuration utility.
TYPE-C-to-DB9 Cable Wiring
5
PIN Definition
10/100BaseT(X) Ethernet Port Connection
The 10/100BaseT(X) ports located on the NAT-102 Series front panel
are used to connect to Ethernet-enabled devices. Most users will choose
to configure these ports for Auto MDI/MDI-X mode, in which case the
port’s pinouts are adjusted automatically depending on the type of
Ethernet cable used (straight-through or cross-over), and the type of
device (NIC-type or HUB/Switch-type) connected to the port. No matter
which case you are connecting, we share pinouts for both MDI (NIC-
type) ports and MDI-X (HUB/Switch-type) ports.
10/100Base T(x) RJ45 Pinouts
The Reset Button
Using a pointed object such as a straightened paperclip or toothpick,
depress the Reset button for five seconds to load the factory default
settings. When pressing down, the STATE LED will start to blink about
once per second. Continue to depress until the STATE LED begins
 Loading...