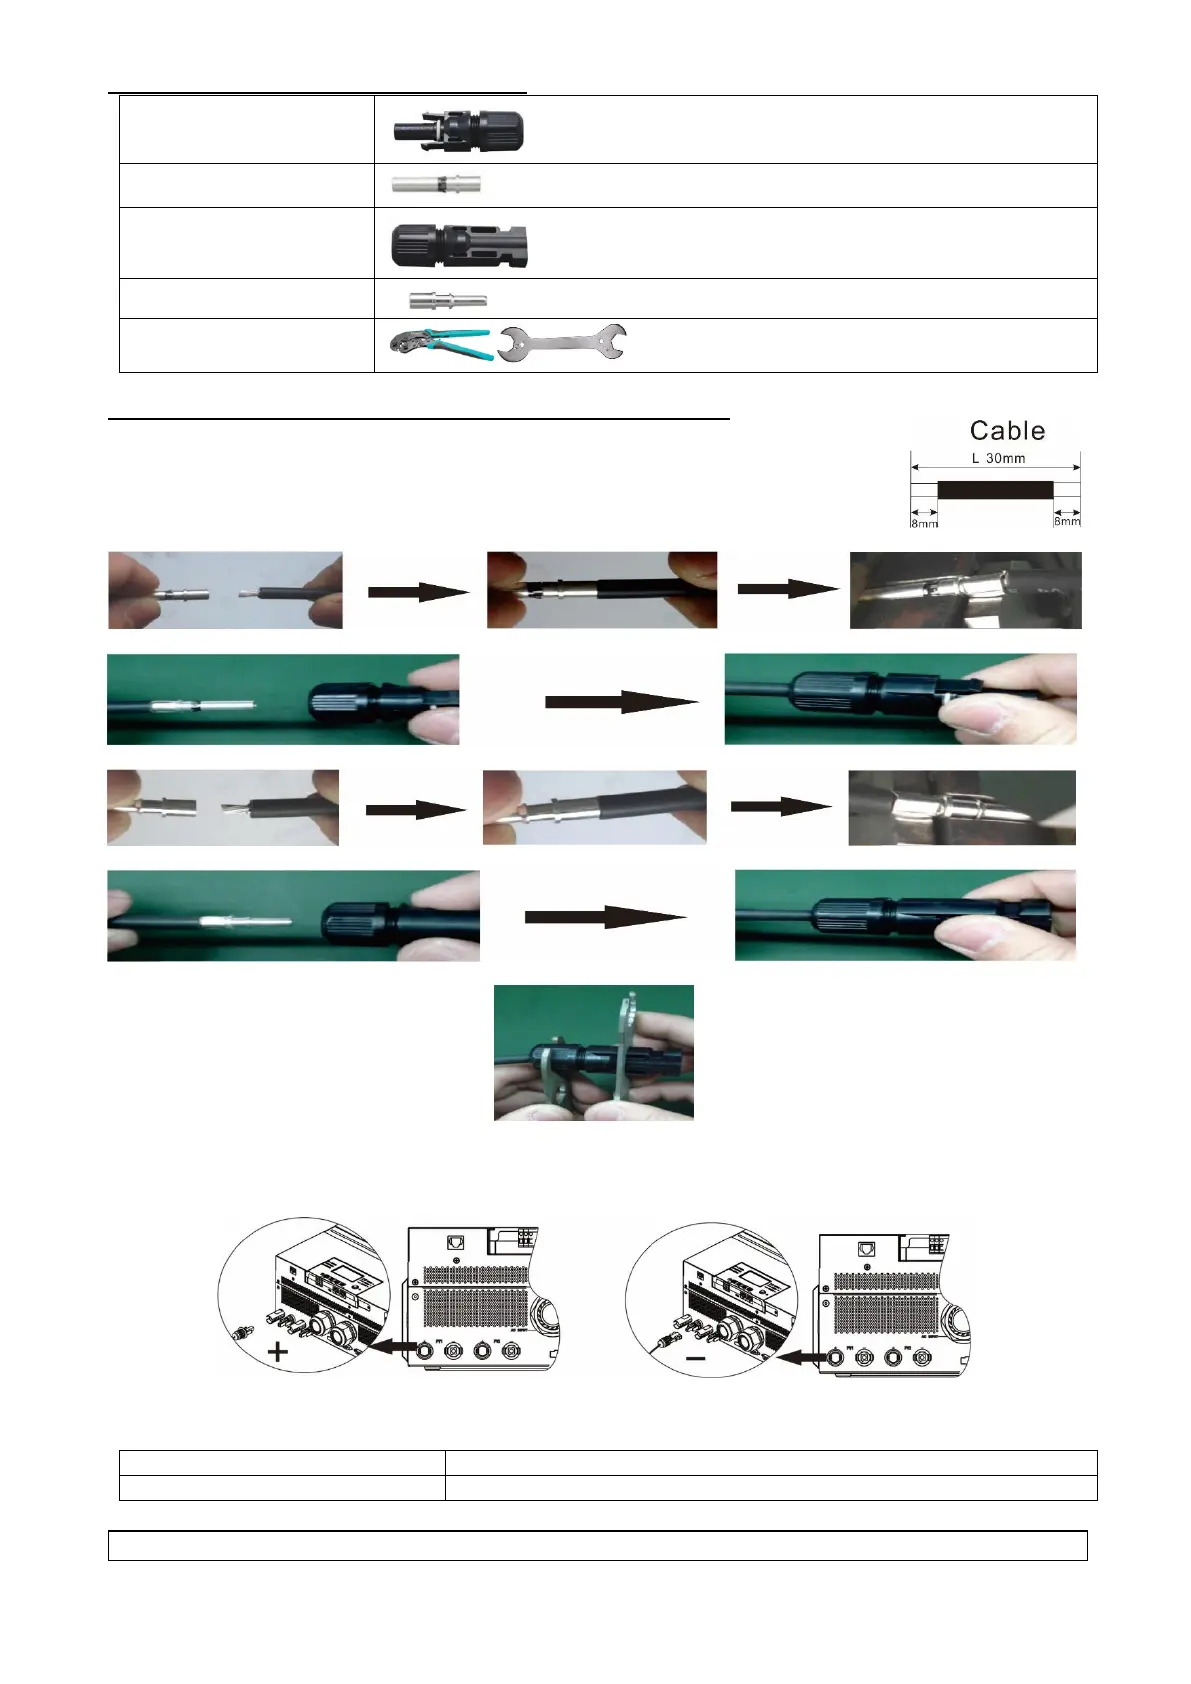
Prepare the cable and follow the connector assembly process:
Insert striped cable into female terminal and crimp female terminal as shown below.
Insert assembled cable into female connector housing as shown below.
Insert striped cable into male terminal and crimp male terminal as shown below.
Insert assembled cable into male connector housing as shown below.
Then, use spanner to screw pressure dome tightly to female connector and male connector as shown below.
Step 4: Check correct polarity of connection cable from PV modules and PV input connectors. Then, connect
positive pole (+) of connection cable to positive pole (+) of PV input connector. Connect negative pole (-) of
connection cable to negative pole (-) of PV input connector.
WARNING! For safety and efficiency, it's very important to use appropriate cables for PV module connection.
To reduce risk of injury, please use the proper cable size as recommended below.
 Loading...