Page 27 mrcool.com
Refrigerant Piping Connection
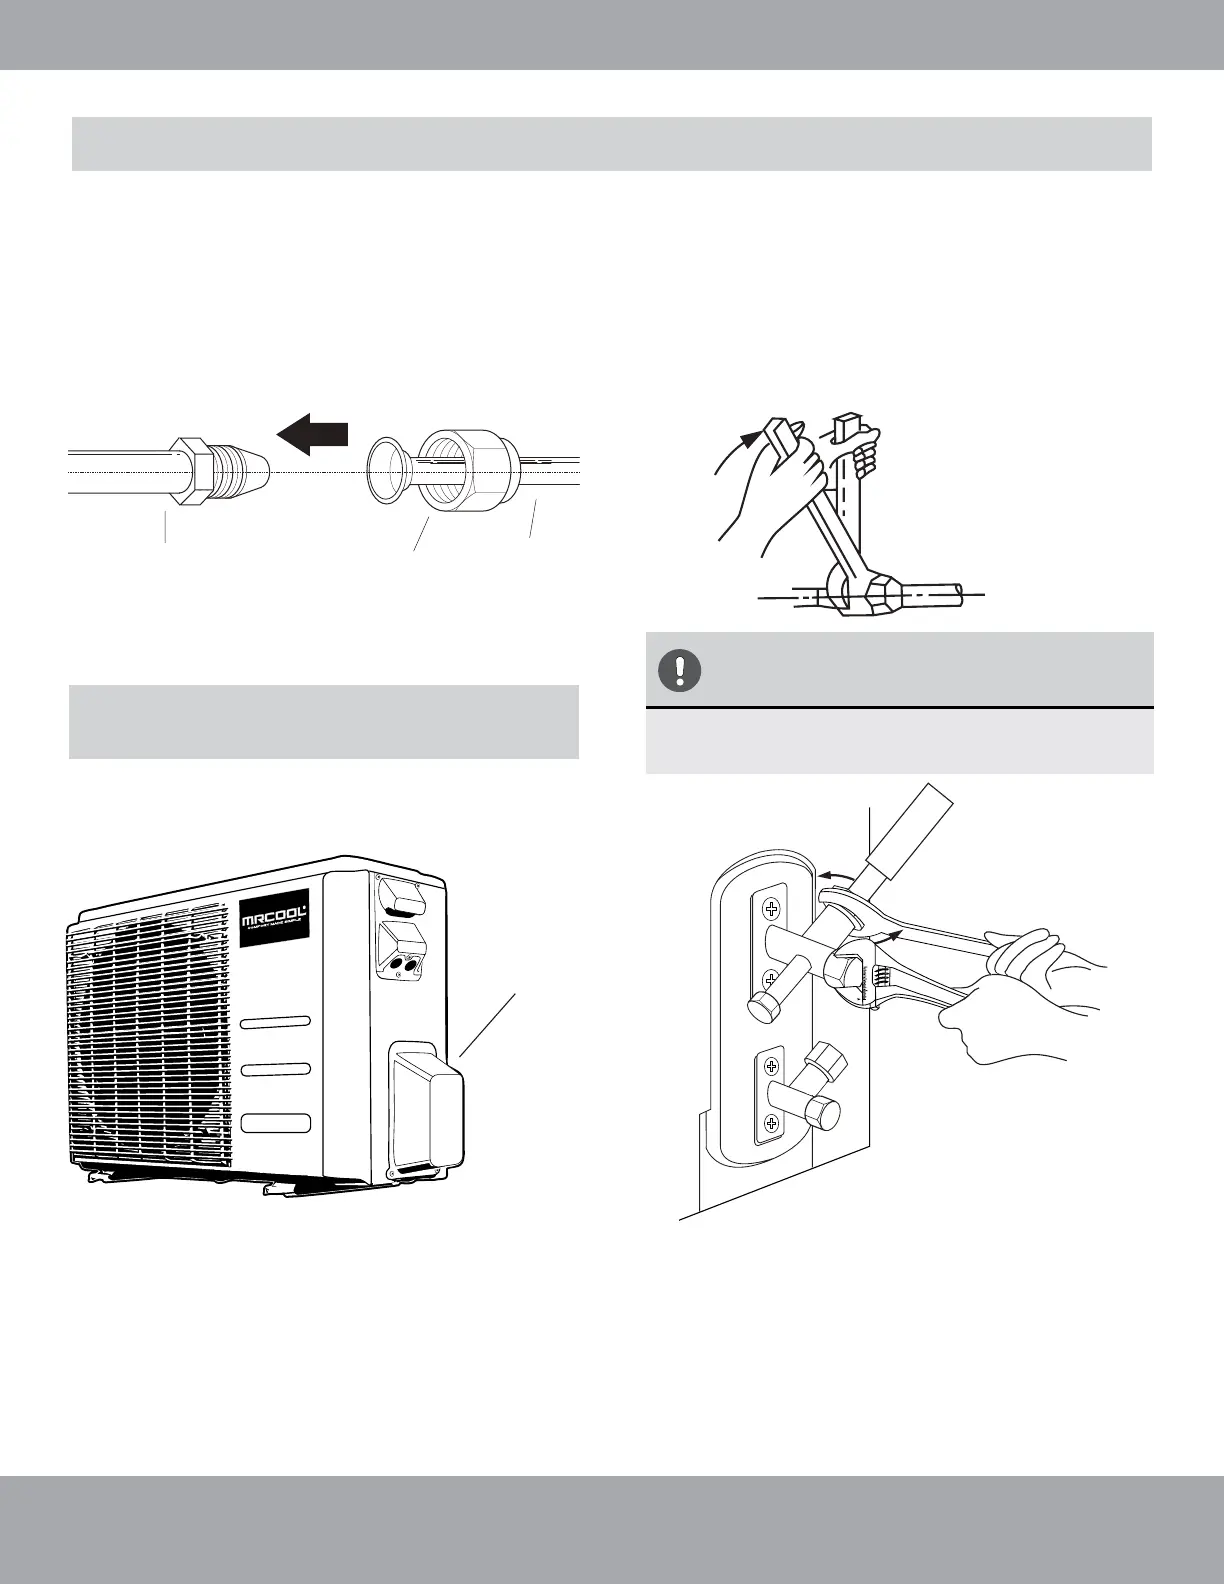
1. Unscrew the cover from the packed valve on the
side of the outdoor unit. (See Fig. 6.9)
Valve cover
Fig. 6.9
2. Remove protective caps from ends of valves.
3. Align flared pipe end with each valve, and tighten
the flare nut as tightly as possible by hand.
4. Using an adjustable wrench, grip the body of the
valve. Do not grip the nut that seals the service
valve. (See Fig. 6.10)
Instructions for Connecting
Piping to Outdoor Unit
USE ADJUSTABLE WRENCH TO
GRIP MAIN BODY OF VALVE
Torque from tightening the flare nut can snap
off other parts of valve. See Fig. 6.10.
Fig. 6.10
5. While firmly gripping the body of the valve, use
a torque wrench to tighten the flare nut
according to the correct torque values.
6. Loosen the flaring nut slightly, then tighten
again.
7. Repeat Steps 3 to 6 for the remaining pipe.
Indoor unit tubing Flare nut Pipe
Fig. 6.7
Instructions for Connecting Piping to Indoor Unit
Fig. 6.8
1. Align the center of the two pipes that you will connect. See Fig. 6.7.
2. Tighten the flare nut as tightly as possible by hand.
3. Using an adjustable wrench, grip the nut on the unit tubing.
4. While firmly gripping the nut on the unit tubing, use a torque wrench to tighten the flare nut according to
the torque values in the Torque Requirements table. Loosen the flaring nut slightly, then tighten again.
 Loading...