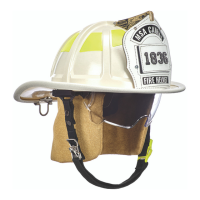
18 MSA Cairns® 1836 US
4 Maintenance
4 Shell 12 Faceshield
5 Impact Cap 13 Headband Assembly
6 Defender Visor 14 Earlaps
7 Chinstrap
Soft Goods 1. Remove the ratchet pad by unfastening the hook and loop surfaces.
2. Remove the rear of the cushion liner by unfastening the hook and loop strap and
pulling it through the suspension strap loop.
3. Remove the sides of the cushion liner by disconnecting the tabs from the inside of
headband assembly.
4. Remove the sides of the cushion liner by disconnecting the tabs from the outside of
headband assembly.
5. Remove the front of the cushion liner by unfastening the hook and loop surfaces
and disconnecting the tab from the inside of headband assembly.
6. Remove the Ear-laps by pulling the center of the ridge piece inside of the earlap,
unfastening both headband adjustment tabs; repeat for the other side.
Headband Assembly 1. Disconnect all five headband adjustment tabs on the front, side, and rear-side
locations by removing in the direction of the arrow until the headband adjustment
tabs release from the impact cap.
2. Do not disassemble the headband assembly further.
Goggles (optional) 1. Use a Phillips-head screwdriver to remove the goggle clips, then remove the
goggles.
Defender Visor Assembly 1. Move the visor to the "as-worn" position (pulled down completely).
2. Squeeze the quick locking arms together and pull the visor assembly out of the
helmet impact cap. Refer to 4 Maintenance.
Impact Cap 1. Using a small, flat tool, firmly push both Slide-Loks rearward approximately 1/4
inch. (6mm) until they stop.
NOTE: When re-attaching the Impact Cap to the Shell ensure the Anchor Base is
flush against the shell, then use your thumb to push each Slide-Lok forward, to
engage the Anchor Base, until it is flush in the pocket. Do not use excessive force
or strike.
2. Separate the helmet shell from the impact cap.
3. DONOTattempt to remove the foam cap from the plastic liner.
Suspension Assembly 1. Unsnap all 6 suspension attachment points from the retaining tabs on the impact
cap.
NOTE: The front and rear center tabs of the suspension straps are identical and
can be inserted in either location.
WARNING!
When reassembling the Suspension Assembly, Pull on the suspension straps to ensure
the suspension attachment points are fully engaged and secure.
Failure to follow this warning can result in serious personal injury or death.
To reassemble, reverse the steps for each component.
 Loading...