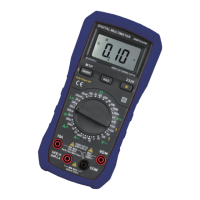
3.2.2 Resistance measurement
To avoid electrical shock and/or damage to the
instrument, disconnect circuit power and
discharge all high-voltage capacitors before
measuring resistance.
Resistance is an opposition to current flow.
The unit of resistance is the ohm ().
The Meter's resistance ranges are 200.0, 2.000k,
20.00k, 200.0k, 2.000M, 20.00M and 200.0M.
To measure resistance:
1. Set the rotary switch to proper range.
2. Connect the black and red test leads to the COM and
terminals respectively.
3. Connect the test leads to the circuit being measured
and read the displayed value.
Some tips for measuring resistance:
The measured value of a resistor in a circuit is often
different from the resistor's rated value. This is because
the Meter's test current flows through all possible paths
between the probe tips.
In order to ensure the best accuracy in measurement of low
resistance, short the test leads before measurement and
memory the test probe resistance in mind. This necessary
to subtract for the resistance of the test leads.
On 20M and 200M ranges, the meter may take a few
seconds to stabilize reading. This is normal for high
resistance measuring.
When the input is not connected, i.e. at open circuit, the
figure "1" will be displayed for the overrange condition.
3.2.3 Diode Test
To avoid electrical shock and/or damage to the
instrument, disconnect circuit power and
discharge all high-voltage capacitors before
testing diodes.
Use the diode test to check diodes, and other semi-
conductor devices. The diode test sends a current through
the semiconductor junction, and then measures the voltage
drop across the junction; a good silicon junction drops
between 0.5V and 0.8V.
To test a diode out of a circuit:
1. Set the rotary switch to range.
2. Connect the black and red test leads to the COM and
terminals respectively.
3. For forward-bias readings on any semiconductor
component, place the red test lead on the
component's anode and place the black test lead on
the component's cathode.
4. The meter will show the approx. forward voltage of the
diode. If the test lead connection is reversed, only
figure "1" displayed.
In a circuit, a good diode should still produce a forward bias
reading of 0.5V to 0.8V; however, the reverse-bias reading
can vary depending on the resistance of other pathways
between the probe tips.
3.2.4 Continuity Check
To avoid electrical shock and/or damage to the
instrument, disconnect circuit power and
discharge all high-voltage capacitors before
testing for Continuity.
Continuity is a complete path for current flow.
The beeper sounds if a circuit is complete. These brief
contacts cause the Meter to emit a short beep.
To test for continuity:
1. Set the rotary switch to range.
2. Press the yellow key twice to activate Continuity Check.
3. Connect the black and red test leads to the COM and
terminals respectively.