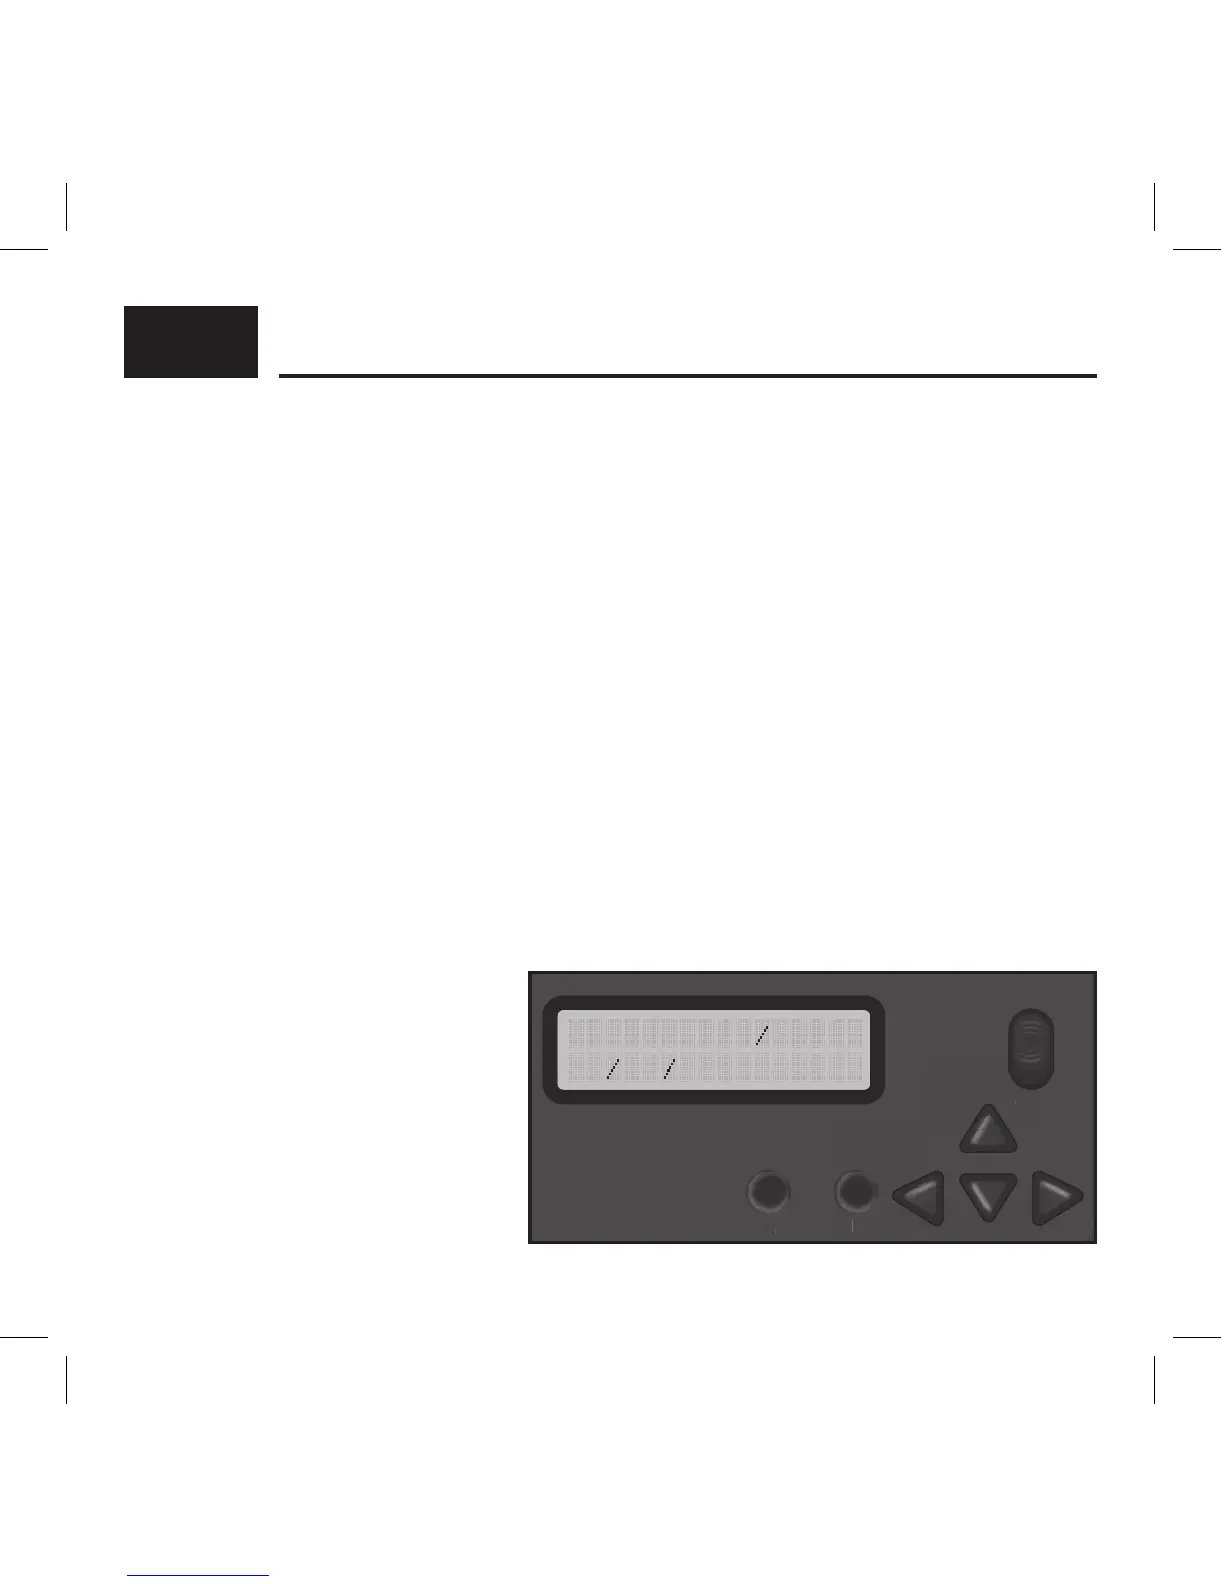
10
Slide the power button from OFF to ON position to activate the camera and view the user
setup screen.
Setting the functions is easy;
1. Simply press the M button to access the menus, and use the UP or DOWN arrows to scroll
through the menu settings.
2. To select the menu setting you want to adjust, press the OK button.
3. Make your adjustments, and press OK button to accept the settings and change to another
menu.
*Note: any changes you make to settings are not saved until you hit the OK button. If you
power the camera o prior to hitting the OK button, settings will remain unchanged.
TIME AND DATE:
Sets the Date, Year, and Time of day to be imprinted on your photos (not video).
Press the OK button for the month setting to ash. Use the UP and DOWN arrows to change.
Press the LEFT or RIGHT arrows to move to the DATE and set this accordingly. Next, press
the LEFT or RIGHT arrows to move
to the year and set accordingly.
Continue to adjust the hour,
minute, and am/ pm on the time.
Press the OK button when nished,
and press the UP or DOWN arrows
to go on to another menu.
ADVANCED SETTINGS:
ON
OFF
M KO