The tailwheel assembly should now be attached to the tailwheel
support 56 in the fuselage using the two M3 x 20 mm retaining
screws 57.
Fig. 25
7.
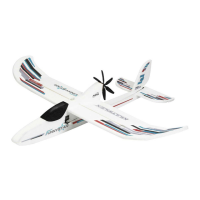
Completing the wings (KIT)
Glue one tubular carbon ! bre spar 123/124 in the channel in each
of the wing panels 8 and 9. Any excess glue which is squeezed
out should be wiped away using a paper towel, otherwise there is
a danger that the spar cover will not ! t " ush.
Glue the rear spar covers 12 and 13 in place, taking care to avoid
glue running inside them. At this stage we turn to the landing " aps
14 and 15: clip the offset hinge components 64 and 65 together,
and the " ap horn components 63 and 64. Glue the offset hinges
and horns in the appropriate recesses in the wings and " aps.
Fig. 27 + 28
The strut brackets 98 can now be glued to the wings. Glue the
horns 61 to the ailerons at the same time.
Figs. 29 + 30
Set the aileron servos (HiTec HS-225BB # 11 2225) to centre
from the transmitter, ! t the output arms on them, and secure the
arms with the retaining screws provided. Place the servos in the
recesses in the wings, and secure them with a little hot-melt glue
applied to the mounting lugs. Attach the swivel pushrod connectors
66 to the aileron horns 61, together with the 2 mm I.D. washers
69 and M2 nuts 70; ensure that the swivel barrel rotates smooth-
ly, but without any trace of lost motion. When you are satis! ed,
secure the nuts 70 with a drop of Zacki. Connect the servo lead
to the 150 mm extension lead # 8 5019 and press the cable into
the channel in the wing.
The servos can now be connected to the aileron horns using
the metal pushrods 114. With the servos and ailerons at centre
(neutral), tighten the M3 x 3 mm grubscrews 68 in the connector
barrels; tighten them ! rmly.
Figs. 31 + 32
Connect the " ap servos to the receiver, and run them to the ‘re-
tracted’ end-point from the transmitter. Fit the output lever on the
servo in such a way that the metal " ap pushrod 117 is exactly in
line with the servo output arm when the landing " ap is at neutral,
as shown in Fig. 33; the servo is not under stress in this position.
Attach the swivel pushrod connector, consisting of parts 66 and
68 - 70, to the " ap horn as described in the preceding step, and
connect the pushrod 117 as shown in Fig. 34. Check the " ap
linkages repeatedly until you are con! dent that they work reliably,
then apply a little hot-melt glue to the servo lugs to ! x the servos
in the wing recesses. Allow the glue to set hard, then tighten the
M3 x 3 mm grubscrews 68 ! rmly.
Figs. 33 - 35
8. Installing the POWER-MULTIlight lighting system in the
wings (KIT+RR)
The FunCub XL is designed to accept the POWER-MULTIlight
system # 7 3030. Cables are already present in the wings of the
RR version.
Place one white LED on the wing at the landing light position, lay
the cable on the wing surface along the line of the cable duct, and
cut it off at a point about 10 cm past the root rib; this leaves spare
cable for soldering to a central M6 plug.
If you wish to keep the option of ! tting a lighting system at a later
date, we recommend that you install cables, or cords for pulling
cables through the structure, at this stage.
The best method of securing the LED is to apply a drop of Zacki.
If the LED is now in the correct position - or if you don’t intend to
! t a lighting system - the next step is to ! x the clear LED landing
light cover 96 to the wing by applying a little glue to its edges.
Fig. 36
The anti-collision lights and the " ashing lights on the underside
of the wings are installed using the same basic procedure as
described for the landing lights. Glue the lamp brackets 95 to the
wingtips as shown. Screw the navigation light covers 93 + 94 to
the brackets 95 using the 1.7 x 14 mm screws 97.
Fig. 37
9. Completing the wing wiring (KIT+RR)
Glue the connector box frames 82 + 83 in the wings, and deploy
the cables as shown in Fig. 39.
The front spar covers 10 + 11 can now be glued in the recess in
the underside of the wings
Fig. 40
Glue the connector supports 86 + 87 in the frames 82 + 83 using
a small amount of Zacki, as shown in Fig. 41. Now lay the lighting
system cables and the connectors on the support, and ! x the con-
nector clamp 88 over the top, securing it with the screws 90 (2.4 x
8 mm). The plugs must be clamped in a de! ned position as shown.
Figs. 41 + 42
Solder an M6 plug to the lighting cables at a point about 5 cm from
the wing root rib, and apply hot-melt glue all round the soldered
joints to seal them, so that no bare contacts are exposed. Alterna-
tively you can use heat-shrink sleeves to insulate the joints. Take
care when assigning the wires to the connector pins in the wing and
the fuselage: please ensure that the correct LEDs are connected.
!Caution!: the LEDs of the POWER-MULTIlight system operate
on different voltages and " ashing sequences, so it is not possible
to connect together the positive (+) and negative (-) wires.
Figs. 43 + 44
Fit the covers 84 + 85 on the cable boxes, and secure them with
the 2.7 x 12 mm screws 91.
Figs. 45 + 46
10. Installing the wing retainer system (KIT)
Push an M5 nut 81 (M5) into each wing root ! tting 78 + 79, and
secure them with a drop of Zacki; take care to prevent glue running
into the threads. The wing root ! ttings can now be glued to the
wing roots as shown.
Figs. 47 + 48
11. Completing the wing struts (KIT)
Locate the two parts of the lower strut ! ttings 106 + 107, insert
the aluminium spigot 103, and secure the parts with the M2 x 8
mm screws 108 and M2 nuts 110. Please note that the arrows on
parts 106 and 107 must face forward. For the sake of appearance
the screws should be on the top surface.
Screw the strut end-piece 104 to the assembly. Slide the CFRP
main struts 111 into the open holes, and glue them securely using
Zacki. In the interests of safety an M2 x 6 mm screw 109 and an
M2 self-locking nut 110 should be ! tted between the carbon ! bre
struts as shown, to provide additional clamping pressure to the
strut ! tting.
Repeat the procedure to produce two sets of struts, remembering
to reverse the position of the screws and nuts.
Fig. 49
Fix the ball-links 100 to the strut brackets in the wings using the
M2 x 8 mm screws 101 and M2 nuts 102. Note that the linkage
balls should face inwards, towards the centre of the wing.
Fig. 50
Fit the upper strut end ! ttings 99 on the CFRP struts ‘dry’ (no glue),
and clip them onto the linkage balls 100. Check that the ! ttings
99 are at the correct angle before gluing them permanently to the
CFRP strut tubes 111, ideally using thin Zacki. Take great care
not to let glue run onto the linkage balls$
Figs. 51 + 52