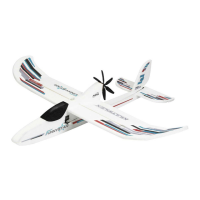
18. Installing the receiving system components (KIT+RR)
Plug all the servo leads into the receiver, and program the model
at the transmitter so that the control surface travels are as stated
(Point 19). The socket sequence for MULTIPLEX radio control
systems - assuming that you have not re-assigned the channels
- is as follows:
1. L.H. aileron
2. Elevator
3. Rudder
4.
Throttle
5. R.H. aileron
6. L.H. fl
ap
7. R.H. fl
ap
8.
Aero-tow release
9. Cargo bay doors
10. POWER-MUL
TIlight
Fix the receiver to the inside of the cabin window using hook-and-
loop tape. The tape will adhere more strongly to the ELAPOR
®
surface if you apply a few drops of Zacki to the sticky surface fi rst.
19.
Assembling the model (KIT+RR)
Fit the wing joiner 125 through the fuselage facing ribs with
the
plastic
stop-piece 130 on the left-hand side. Slide the rear
spar
126
into one wing panel, and push that wing fully onto the
wing
joiner
. Take care not to allow the struts (attached to the wings)
to
damage the fuselage.
Push
the second wing fully into place, then secure both
wings
with
the two M5 x 15 mm retaining screws 80, fi tting them
through
the facing ribs.
Fig. 82
C
onnect the wing struts to the brackets on the undercarriage,
and push a folding spring bolt 105 through the strut fi tting and the
bracket on each side. Fold the spring bolts over to secure the struts.
Within certain limits it is possible to adjust the length of the struts
at the threaded ends. Make any adjustments required at this point,
to ensure that the wing is not under stress.
Fig. 83
20. Balancing (KIT+RR)
Fit
the fl ight battery and battery tray in the fuselage, and adj
ust
their
position until the model balances at the 85 mm point
(Centre
of
Gravity measured back from the wing leading edge close to
the
f
uselage). Secure the battery with the hook-and-loop tape 143 an
d
144 supplied, and the hook-and-loop strap 145.
T
o ensure that the tape adheres well to the bottom of the
fuselage
w
e recommend applying a few drops of Zacki to the sticky surface.
!CAUTION!: if you place a heavy payload, such as sweets, in
the
cargo
bay, the additional weight will move the model’s Centre
of
G
ravity further aft (back). If you intend to use the cargo bay, it is im-
portant to check the CG with the payload installed in the fuselage.
21. Recommended control surface travels (KIT+RR)
Rudder:
right / left 30 mm ~35°, approx. 40% Expo
Elevator: up 25 mm, down 12 mm, approx. 50% Expo
Aileron: up 13 mm, down 12 mm approx. 50% Expo
Landing fl aps: down 90°, down-elevator compensation approx. 4
mm, approx. 0.8 sec. delay
22. Safety
Safety is the First Commandment when fl ying any model aircraft.
Third party insurance is mandatory. If you join a model club,
suitable cover will usually be available through the organisation.
It is your personal responsibility to ensure that your insurance is
adequate (i.e. that its cover includes powered model aircraft). Make
it
your job to keep your models and your radio control system
in
perfect
order at all times. Check and observe the correct
charging
p
rocedure for the batteries you are using. Make use of all sensibl
e
s
afety systems and precautions which are advised for your system
.
An
excellent source of practical accessories is the MUL
TIPLEX
main catalogue or our website www.multiplex.de
MUL
TIPLEX products are designed and manufactured exclusi-
vely by active modellers for practising modellers. Always fl y with
a responsible attitude. You may think that fl ying low over other
people’s heads is proof of your piloting skill; others know better.
The real expert does not need to prove himself in such childish
ways. Let other pilots know that this is what you think too, as it is in
all our interests. Always fl y in such a way that you do not endanger
yourself or others. Bear in mind that even the best RC system in
the world is subject to outside interference. No matter how many
years of accident-free fl ying you have under your belt, you have
no idea what will happen in the next minute.
Before every fl ight, check that the battery, the wings and the
tailplane are attached and fi rmly seated. Check in turn that
each control surface is operating correctly!
We - the MULTIPLEX team - hope you have many hours of ple-
asure building and fl ying your new model.
MULTIPLEX Modellsport GmbH &Co. KG