PAGE 24 — J36/B46-M30 SERIES WALK-BEHIND TROWELS • OPERATION MANUAL — REV. #1 (11/17/17)
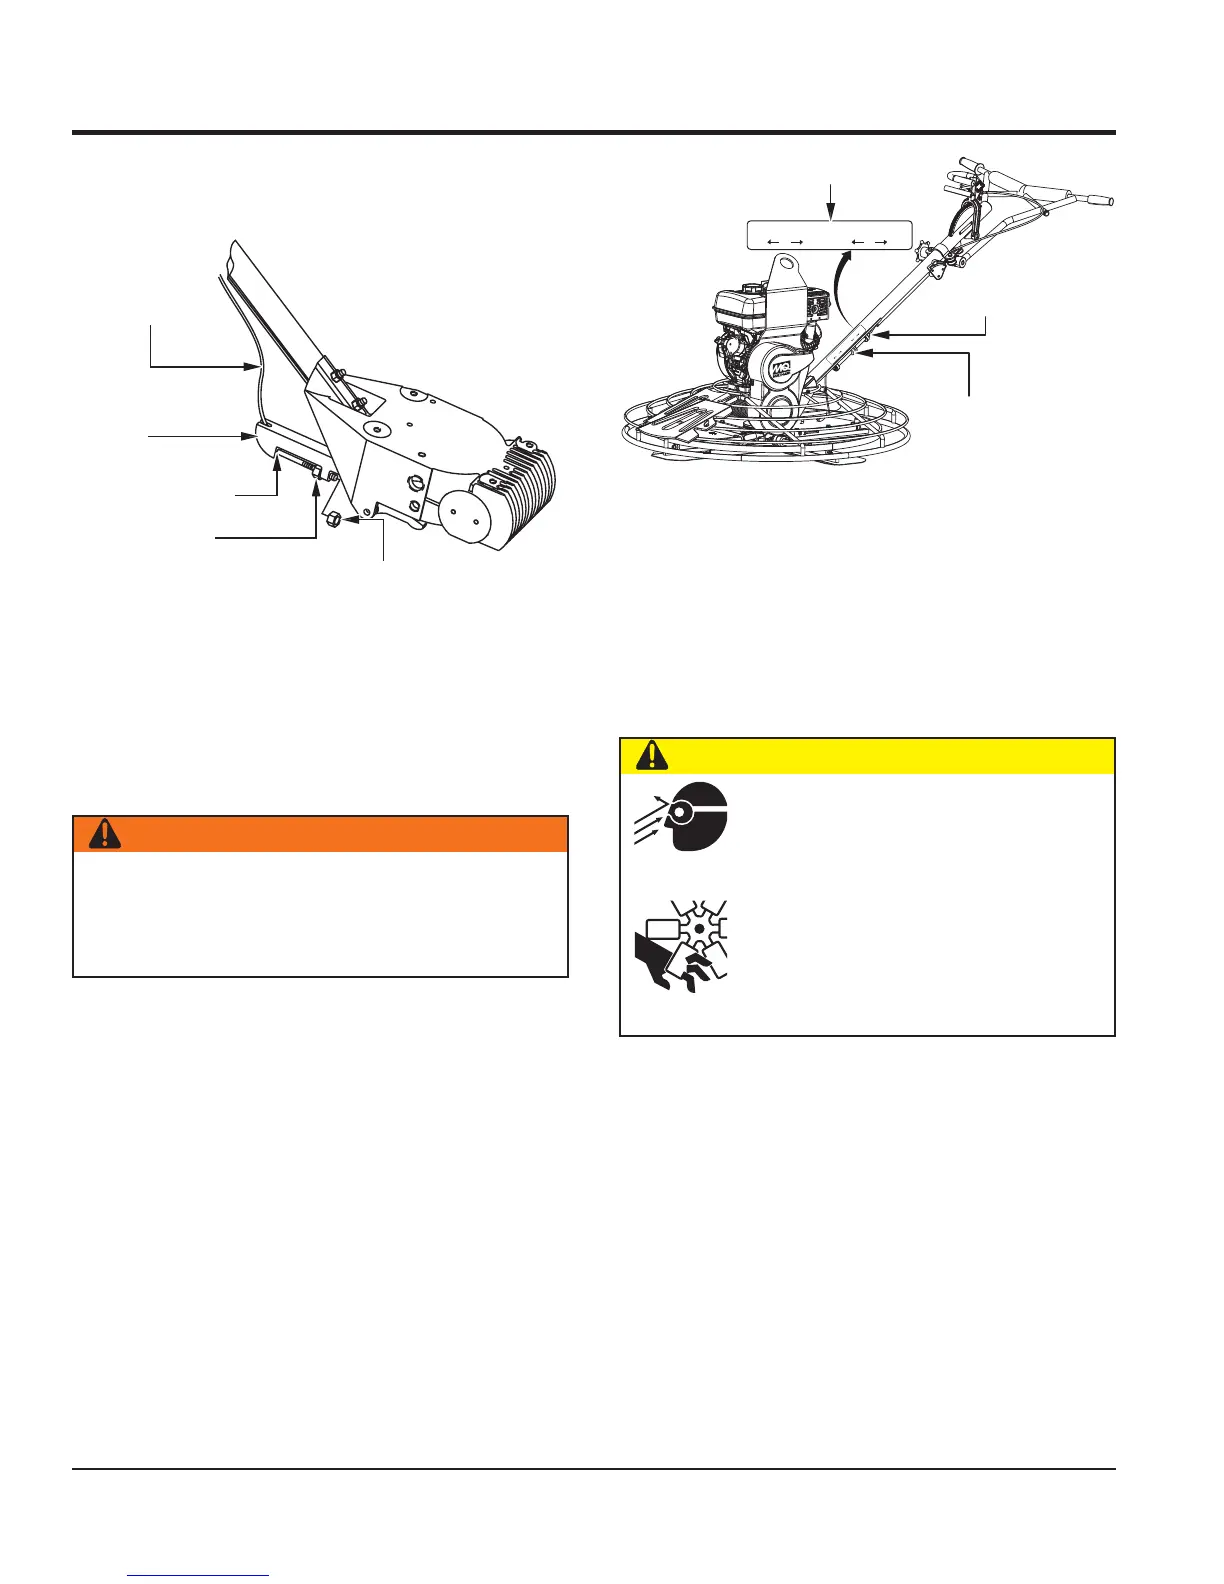
5. Insert the blade pitch cable end through the yoke eyelet
(Figure 14). Tighten brass set nut #1 by hand to remove
all slack from the cable.
Figure 14. Cable Yoke Attachment
6. Tighten brass set nut #2 against the yoke boss to
secure the cable in place.
7. Tighten brass set nut #1 against the yoke boss.
Pre-Load Adjustment (Quick Pitch™ Handle Only)
After the Quick-Pitch™ handle has been installed, spring
pre-load adjustment is required.
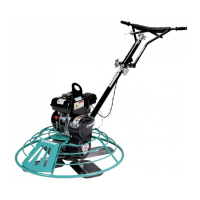
1. Locate the spring pre-load adjustment screw (Figure 15)
on the underside of the handle tube.
BLADE
PITCH
CABLE
YOKE
YOKE
EYELET
BRASS SET
NUT #2
BRASS SET
NUT #1
WARNING
The Quick Pitch™ handle is spring-loaded. Personal
injury or damage can result from improper handling,
installation, or adjustment. Use extreme caution when
handling this component.
SET-UP
Figure 15. Spring Pre-Load Adjustment
2. An alignment decal (Figure 15) has been placed on
the side of the handle tube to assist the user in the
adjustment of the Quick-Pitch™ handle spring. If using
a J36 series trowel, align the groove on the slider with
the letter “J” on the decal. If using a B46 series trowel,
align the groove on the slider with the letter “B” on the
decal.
ADJUSTMENT
SCREW
SLIDER
GROOVE
ALIGNMENT
DECAL
FINISH
J
COMBO
PRELOAD TRIM INDICATOR
FINISH
B
COMBO
FINISH
J
COMBO
PRELOAD TRIM INDICATOR
FINISH
B
COMBO
CAUTION
ALWAYS wear approved eye and hearing
protection while operating the trowel.
NEVER place hands or feet inside the
guard ring while the engine is running.
ALWAYS shut the engine down before
performing any maintenance service on
the trowel.


 To Next Page