Section 78 00-02-1018
2017-05-23 - 2 -
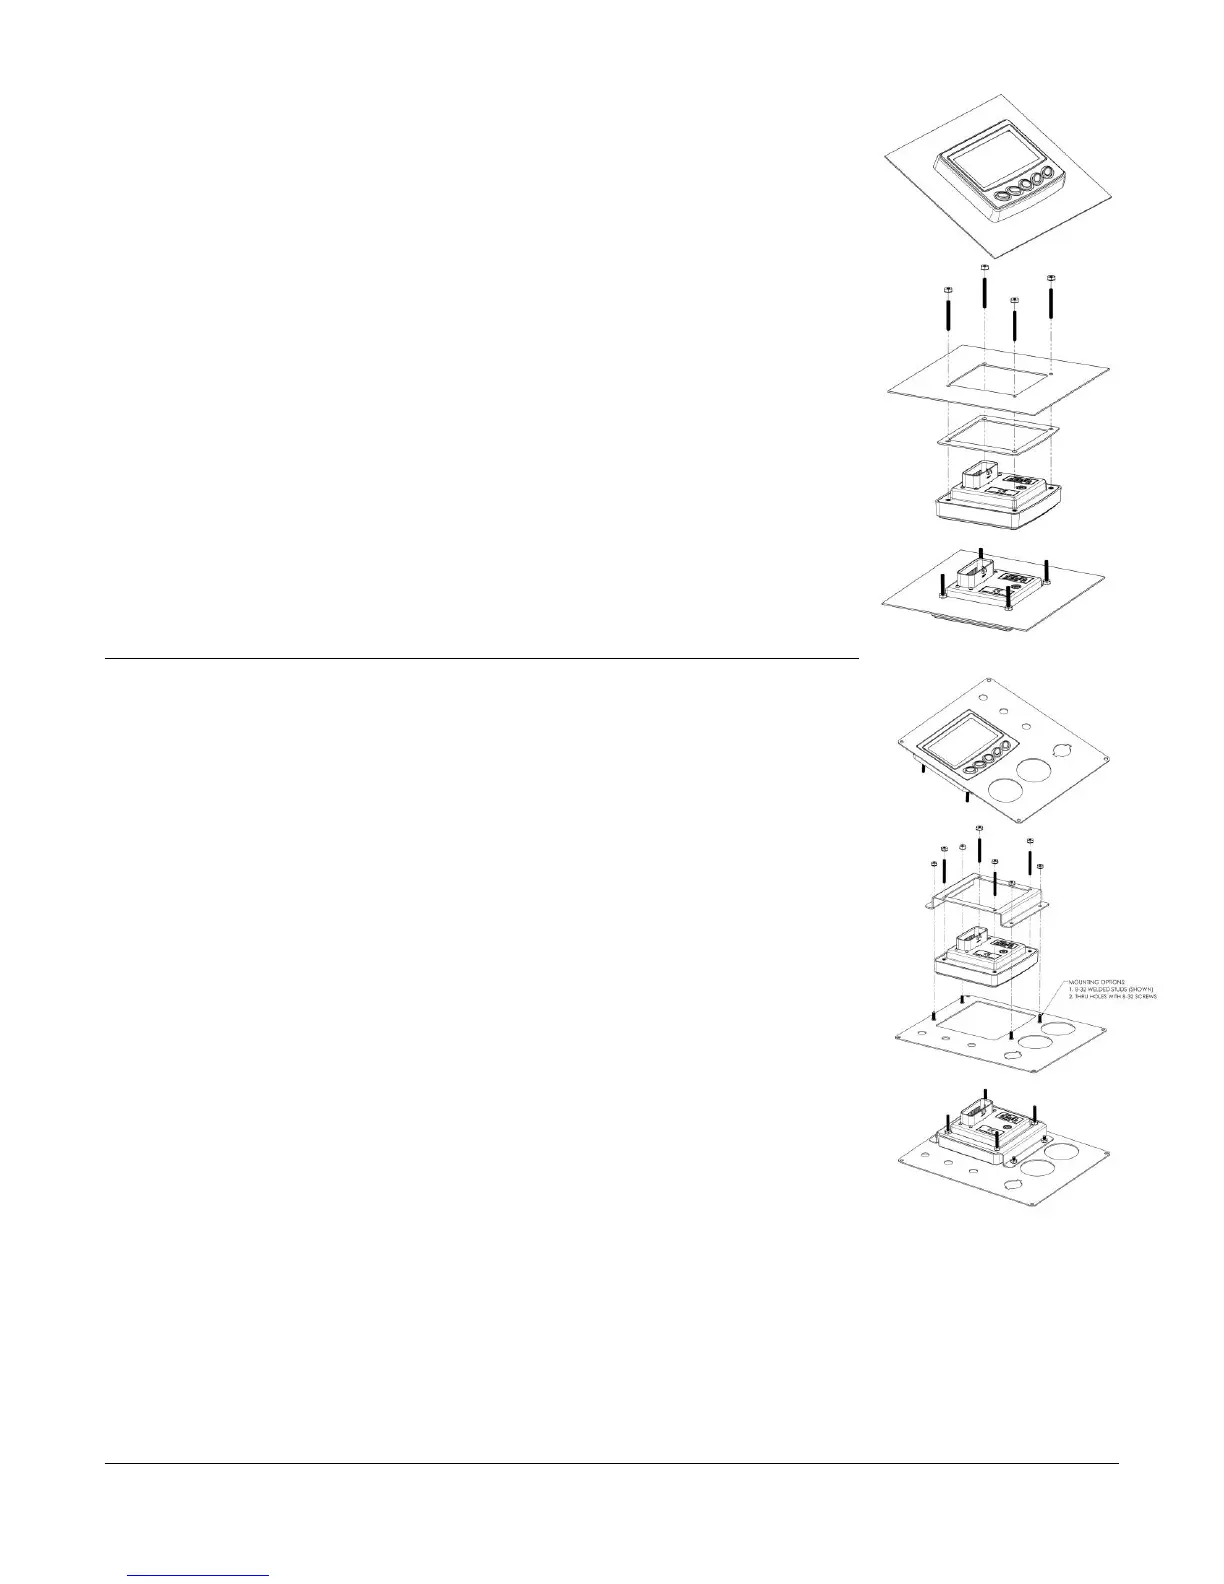
Installing the Display
Place the back side of the display through the opening in the dash.
1. Use the 4 screws to line up the unit with the drilled holes.
2. Push the unit through the opening and screws through the
drilled holes until the back of the case is flush.
3. Use the Keps nuts provided to tighten unit to the dash. Use the
appropriate wrench or socket to tighten. Torque lock nuts to 8-
10 inch pounds.
Rear-Mounted Installation (Optional)
Attach the Rear-mount bracket (P/N 78-00-0815) to the backside of the
unit.
1. Use the 4 screws to line up the rear-mount bracket with the
drilled holes.
2. Push the unit through the opening and screws through the drilled
holes until the back of the case is flush.
3. Use the Keps nuts provided to tighten unit to the dash. Use the
appropriate wrench or socket to tighten. Torque lock nuts to 8-10
inch pounds.
Mounting Options
Screws
1. Use the Installation Template (included at the end of the manual)
as a guideline to cut a hole in the mounting plate to the specified
dimensions and drill holes where indicated on the template for
the mounting screws.
2. Place the display behind dash and line up the four mounting holes on the rear-mount
bracket with the holes in dash.
3. Install four 8-32 screws (not provided) and torque lock nuts to 8-10 inch pounds.