Page 9www.wineenthusiast.com
PREPARING THE INSTALLATION LOCATION
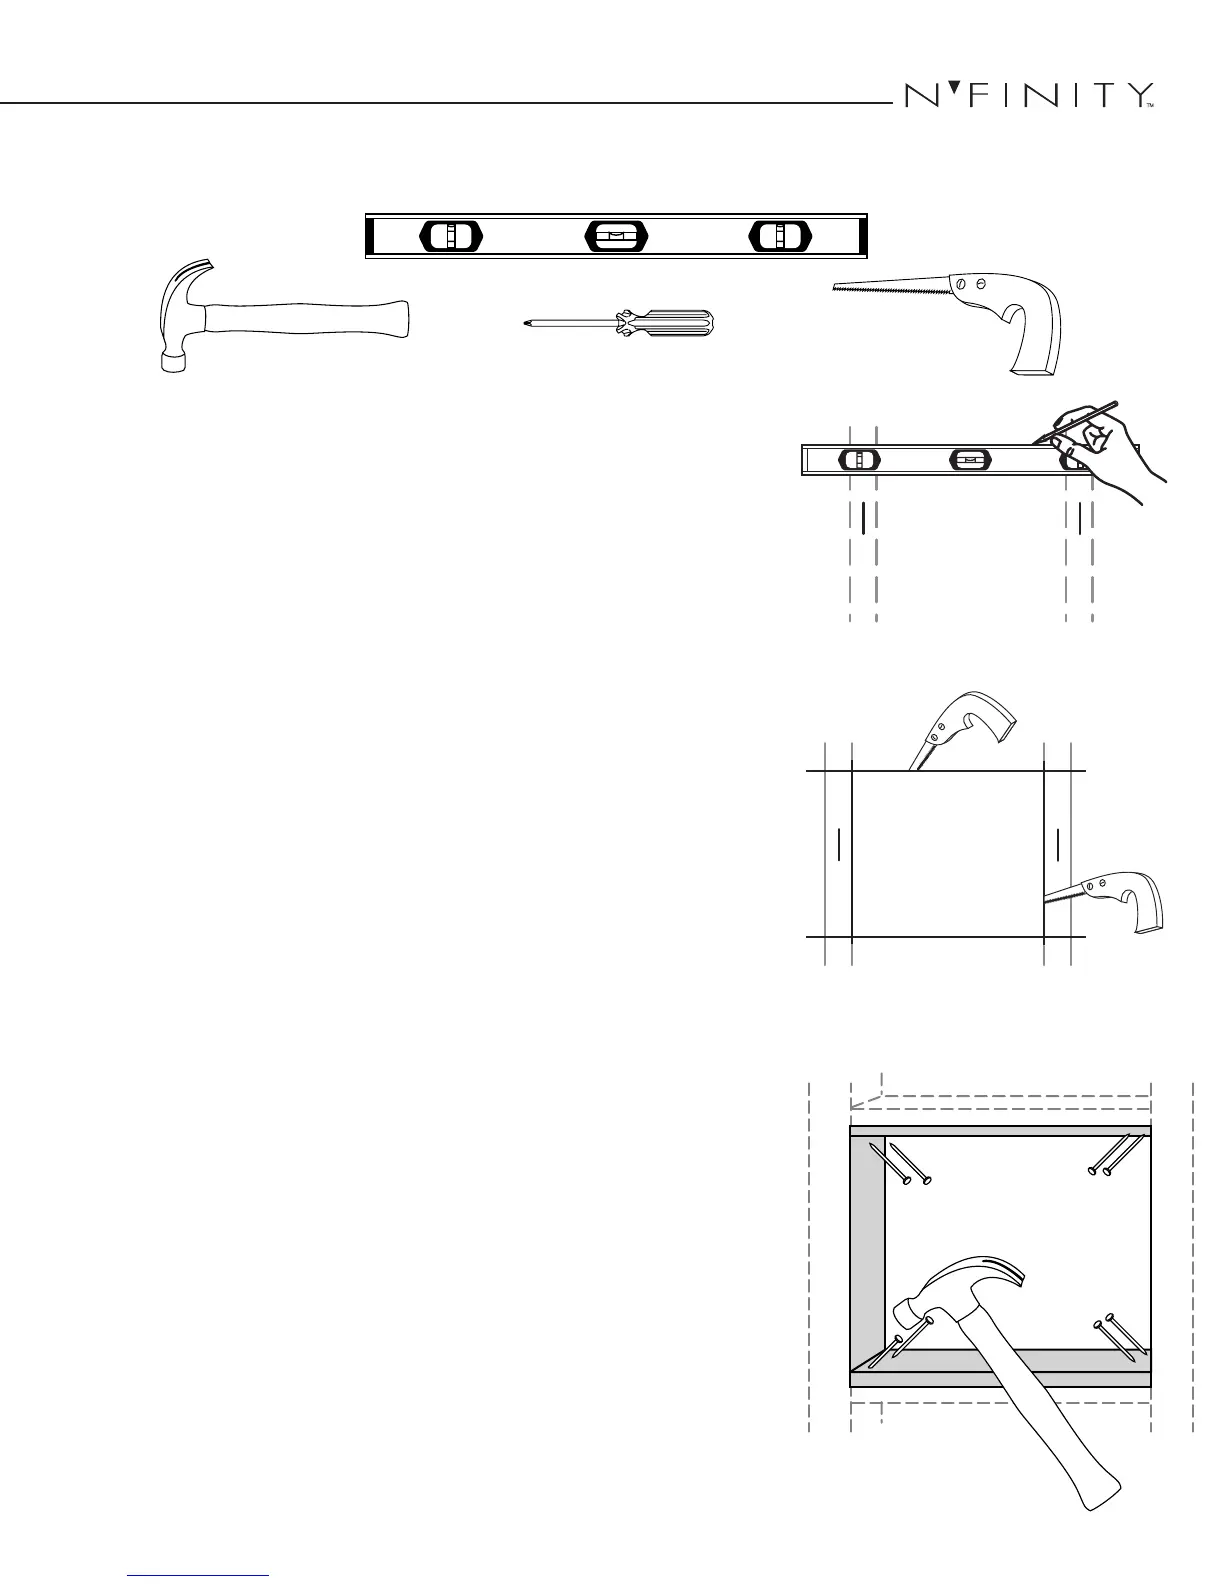
Minimum Tools Needed:
Locate the desired installation location (no lower than 18 inches from the ceiling).
Using a stud nder, locate the studs on either side of the center point, and mark
them with vertical lines.
Using a level and a pencil, mark a horizontal line on the wall between the two studs,
no less than 1½ inches and no more than 18 inches from the ceiling.
Using a ruler or measuring tape, measure 16 inches down and mark another
horizontal line parallel to the rst one.
Using a saw, cut along the uppermost horizontal line until your saw reaches the stud.
Turn the saw around, inserting it into the cut you have just made, and cut toward
the opposite stud. Be careful not to cut into the studs themselves. You should now
have a clean, horizontal cut between the two studs.
Next, make the second horizontal cut from stud to stud on the line 16 inches below
the rst cut.
Once the horizontal lines have been cut, make vertical cuts using the inside edge
of the studs as a guide. Once you have made both vertical cuts, you should have
a rectangular hole in the sheetrock. Now you have to make the same hole on the
other side of the wall. Since you already have one hole, this is an easy process.
Using a nail, mark all four corners of the rst hole by making nail holes through
the sheetrock. en, on the other side of the wall, connect the holes with a pencil
mark and cut.
Sheetrock alone cannot support the weight of a cooling system. erefore, it is
necessary to frame the hole that you have just cut with upper and lower supports.
ese supports also provide solid material for the mounting bracket screws.
Using two 2x4s (each 14.5 inches in length) and eight 6d nails, secure the upper and
lower supports to the right and le studs, just inside the sheetrock. Make sure that
the internal height remains at 16 inches so that the system will t snugly through
the framed cut-out.
Hammer SawScrewdriver
Level