Page 10 WE 060517
INSTALLING THE SYSTEM
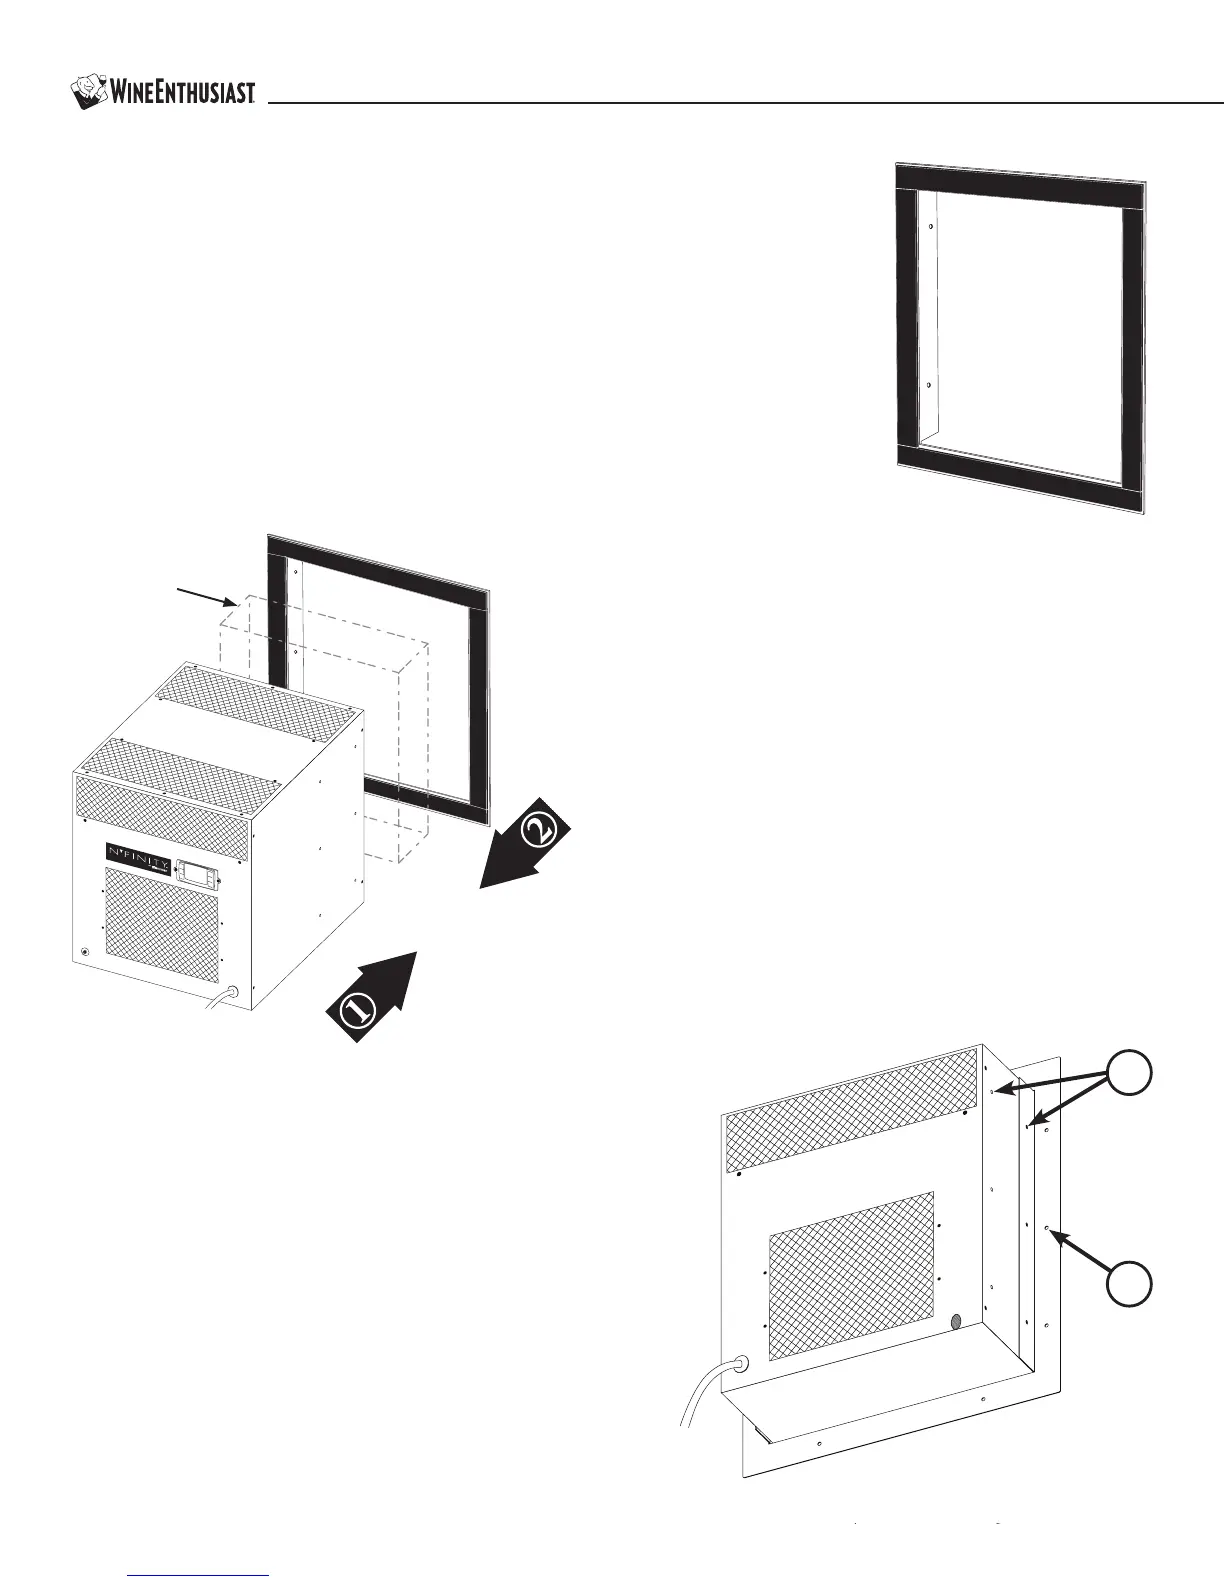
rough-the-Wall
1. Slide the unit into the installation location from inside the
cellar. Make sure the controller side of the unit is inside of the
cellar.
2. Slide the prepared single-piece mounting bracket onto the
unit from outside the cellar.
3. On each side of the side of the unit you will notice six (6)
indents. ese mark the two dierent installation depths.
Select one of the two mounting depths and attach the single-
piece mounting bracket to the unit with the six (6) supplied ½"
self-tapping screws. DO NOT use self-tapping screws longer
than ½" in length.
4. Finally, secure the mounting bracket to the wall through
the pre-drilled holes using the ten (10) supplied #6
1¾" hex-head screws. e screws should penetrate the
studs as well as the upper and lower supports to provide
adequate support for the unit.
5. Seal all cracks and gaps around the unit on the cellar side with an
airtight sealant and caulking to prevent air leakage. e hole that
the unit is installed through is basically a break in the vapor barrier.
An airtight seal is imperative.
NOTE: If you use decorative moulding, it should be attached to the
walls and never to the cooling unit itself. e moulding itself should be
removable in case the unit needs servicing.
Cellar Wall
3
4
Single-Piece Mounting Bracket
e unit utilizes a single-piece mounting bracket. is sturdy bracket frames the installation
location and secures the unit to the wall.
Applying Insulation Tape
Locate the four (4) precut pieces of black foam tape included with the system, two larger pieces
and two smaller pieces. To apply, simply peel back the white paper adhesive covering and place
on the mounting bracket. e large pieces are applied to the top and bottom while the smaller
pieces are for the sides. is foam creates a tight seal between the bracket and the wall.