Do you have a question about the NAD T 778 and is the answer not in the manual?
Guidelines on proper unit placement to ensure adequate ventilation and prevent overheating.
Information regarding compliance with FCC rules for digital devices and potential interference.
Instructions for responsible disposal of the product at the end of its life cycle.
Initial steps and essential information for setting up and using the T 778.
Lists all components and accessories included with the T 778 unit.
Recommendations for selecting an optimal and well-ventilated placement for the T 778.
Details the factory default assignments for audio and video inputs for each source.
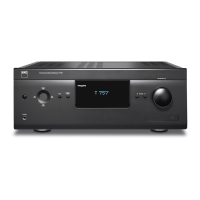
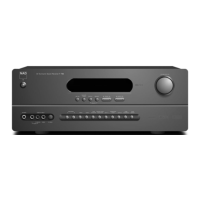
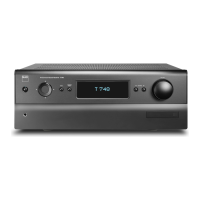
Detailed explanation of the controls and indicators located on the front panel of the T 778.
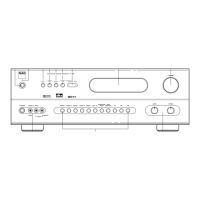
Identification and description of all connectivity ports and inputs on the rear panel.
Guide to navigating and configuring the T 778 using the on-screen display menus.
Configuration settings for Digital Signal Processing features like Lip Sync Delay.
Adjusting audio delay to synchronize with video for optimal viewing.
Adjusting bass, treble, and center dialog levels for audio output.
Managing and configuring Zone 2 audio output and source selection.
Assigning surround back channels for Zone 2 speaker-level output.
Selecting volume control mode (Variable/Fixed) for Zone 2 audio.
Displaying firmware versions, serial number, IP address, and temperature status.
Indicator for available firmware updates for the T 778.
Procedure to initiate and perform firmware updates over the internet.
Guide to customizing T 778 operation using the setup menu.
Configuration options for auto standby, CEC, LAN, and other control features.
Configuration for Audio Return Channel function for TV audio.
Example demonstrating independent control of NAD devices using IR channels.
Setting and assigning alternate IR channels for remote control.
Configuring input sources, including naming, audio, and video assignments.
Guide to managing and setting up speakers for optimal acoustics.
Settings for speaker size, crossover, and mode (e.g., Small, Large, Off).
Adjusting the relative balance of loudspeaker levels for surround sound.
Guidance on using a sound pressure level meter for accurate speaker calibration.
Setting speaker distances for precise delay and imaging optimization.
Introduction to the integrated room correction technology.
Requirements and connection details for the measurement microphone.
Setup requirements for using a computer with Dirac Live calibration.
Instructions for adjusting the master volume and channel levels.
How to mute all audio channels completely using the remote.
Making quick adjustments to center, surround, and subwoofer levels.
Configuration options for Zone 2 volume control (Variable or Fixed).
Configuring amplifier assignments for surround back channels.
Enabling automatic power toggling for linked components via trigger signals.
Configuring Dolby audio formats, dynamic range, and center spread.
Configuring DTS audio formats, dynamic range, and dialog control.
Listening mode for two-channel stereo audio playback.
Listening mode to play audio sources in their native, unprocessed format.
Listening mode that utilizes the maximum speaker complement for stereo output.
Listening mode bypassing DSP for analog signals, retaining tone controls.
Configuration for Dolby audio processing and dynamic range control.
Description of Enhanced Stereo listening mode and its use with front panel display.
Customizing brightness, temporary display, and source view options.
Overview of the front panel display when the BluOS source is active.
Explanation of menu options accessible via the front panel display.
Displaying album art, song title, artist name, and other metadata.
Configuring how source information, like simple or detailed view, is presented.
Functionality of the VU meter for monitoring BluOS source audio levels.
Configuring the front panel display for non-BluOS sources.
Guide to saving custom settings configurations as A/V Presets.
Step-by-step example for creating and configuring A/V Presets.
Adjusting audio tone settings including defeat, bass, treble, and center dialog.
Customizing display brightness, temporary display, and source view settings.
Detailed guide for configuring speaker size, levels, and distance.
Selection of various listening modes for different audio formats.
Configuration of Digital Signal Processing parameters like Lip Sync Delay.
Adjusting audio tone settings (bass, treble, dialog) via the menu.
Customizing front panel display features and options.
Instructions on how to recall saved A/V Presets using the remote control.
Options for upgrading BluOS, performing factory resets for BluOS and System.
Choosing the display language for the On-Screen Display (OSD).
Information on MQA audio technology and its playback indicators.
Navigating and configuring the T 778 using its intuitive front panel touch display.
Using the BluOS App to program and manage favorite radio stations, streams, and sources.
Overview of parameters and functions configurable via the front panel display.
Accessing and configuring core functions like DSP Options and Tone Controls via front panel.
Accessing and configuring various operational parameters of the T 778.
Configuration options for auto standby, CEC, LAN, and IR channel.
Detailed guide for configuring speaker size, levels, distance, and Dirac Live.
Configuring input sources, including naming, analog/digital audio, and video assignments.
Selecting and configuring various listening modes for optimal audio playback.
Customizing front panel display brightness, temporary display, and source views.
Creating and managing custom A/V Presets for different listening scenarios.
Managing system firmware updates and performing factory resets.
Comprehensive guide to operating the T 778 using the HTR 8 remote control.
Features and capabilities of the HTR 8 remote control.
Understanding the sections and basic functions of the HTR 8 remote.
Procedure for teaching the HTR 8 remote to control other devices.
Copying functions from one key to another on the HTR 8 remote.
Creating and using macro commands for automating sequences.
Step-by-step process for recording and assigning macro commands.
How to trigger and run recorded macro commands on the HTR 8.
Setting the duration for key illumination on the HTR 8 remote.
Restoring the HTR 8 remote to its factory default settings.
Deleting learned or copied commands from the HTR 8 remote.
Changing the default NAD codes for controlling components.
Using search mode to find compatible code-libraries for components.
Retrieving the current code-library assigned to a device selector key.
Overview table of HTR 8 modes and associated key presses.
Operating Zone 2 features using the dedicated ZR 7 remote.
Explanation of the functions of the ZR 7 remote, including ON/OFF, Source, Mute, Volume, and Presets.
Technical specifications for the NAD T 778 AV Surround Amplifier.