IOM-EZVAVQSIG
Date: 9-2015 Supersedes: NEW
Page 2 of 4
Quick Start Installation Guide – EZvav Sensors & Controllers
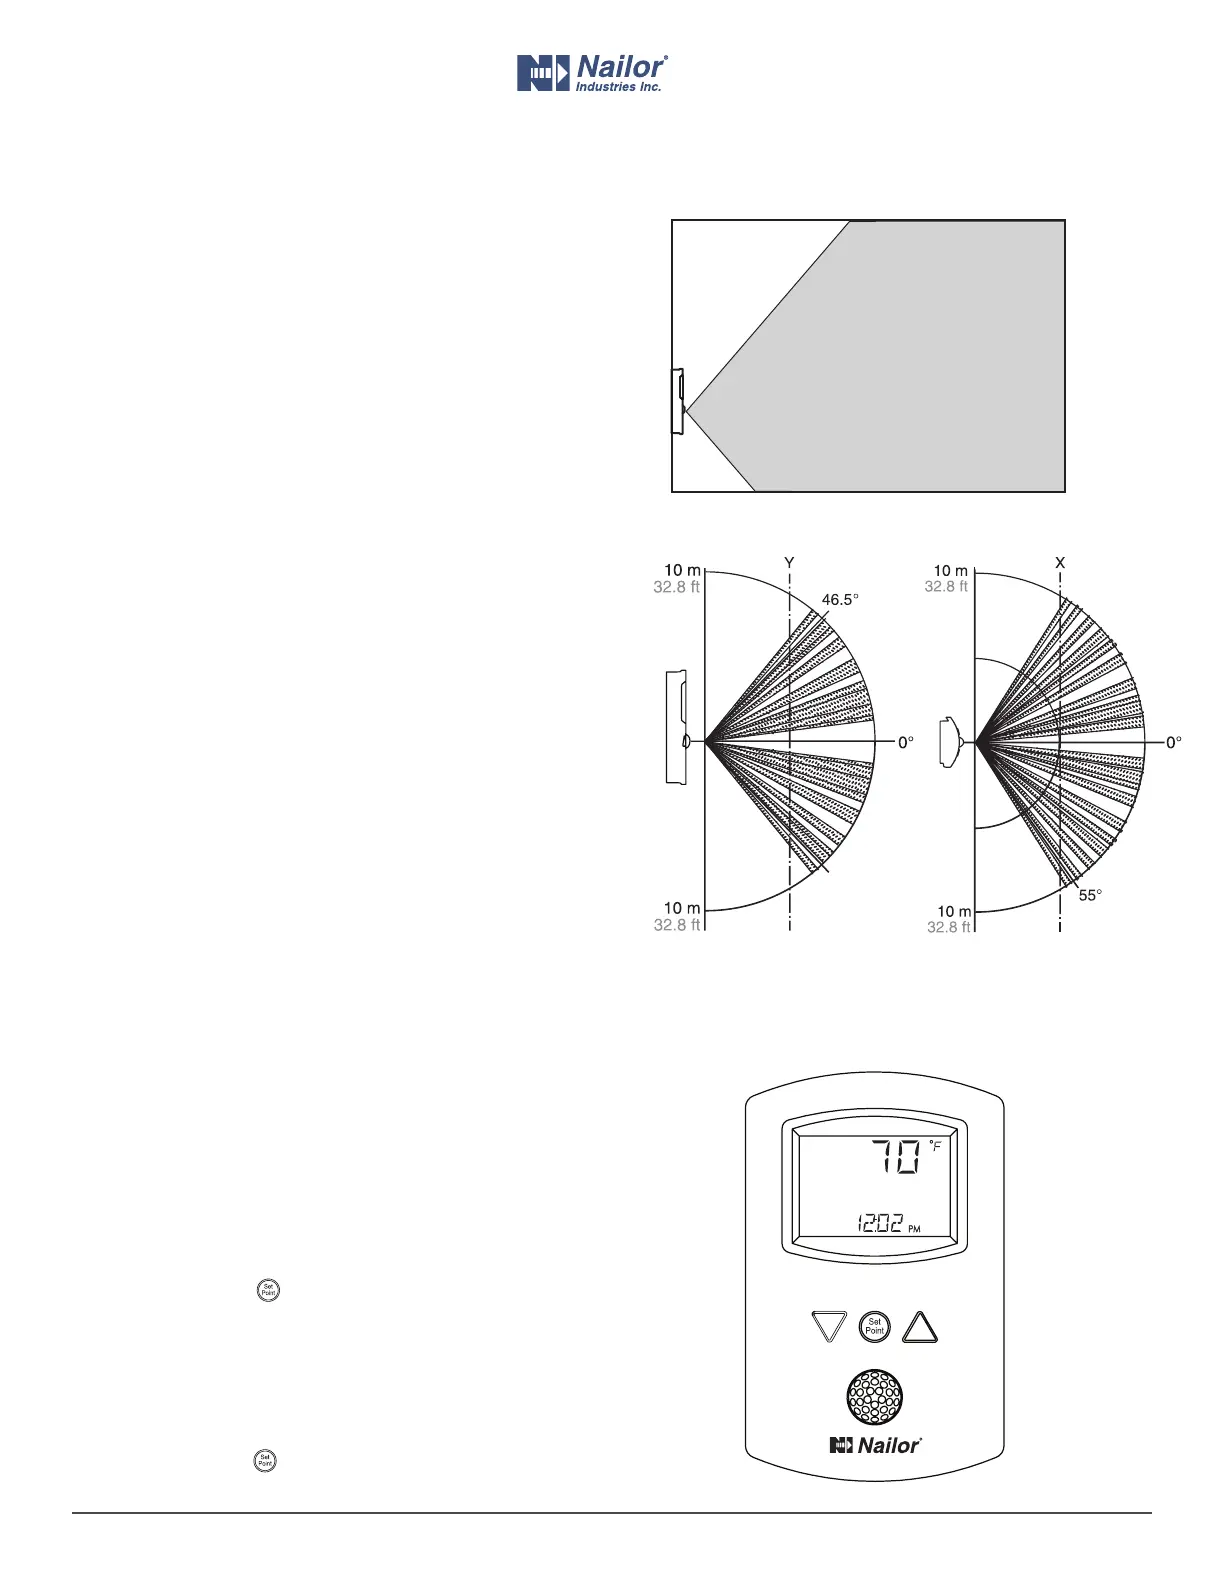
Planning for moon sensing
Typical moon sensing coverage
Motion sensor vertical and horizontal patterns
Side view Top view
For moon sensing models only — Mount the sensor on a wall
that will have an unobstructed view of the typical trac in the
coverage area. When choosing a locaon, do not install the sensor
in the following areas.
• Behind curtains or other obstrucons.
• In locaons that will expose it to direct sunlight or heat
sources.
• Near a heang or cooling inlet or outlet.
The eecve detecon range is approximately 33 feet (10 meters).
Factors that may reduce the range may include the following
items.
• The dierence between the surface temperature of the
object and the background temperature of the room is too
small.
• Object movement in a direct line toward the sensor.
• Very slow or very fast object movement.
• Obstrucons in the shaded area of the diagram Typical
moon sensing coverage.
False detecons may be triggered by any of the following
condions.
• The temperature inside the detecon range suddenly
changes because of the entry of cold or warm air from an air-
condioning or heang unit.
• The sensor being directly exposed to sunlight, an
incandescent light, or other source of far-infrared rays.
• Small animal movement.
Changing room set points
Room set points are changed using the buons and display on the
front of the sensor.
1. Press any buon to begin changing set points.
2. If required, enter Password 1. New installaons do not have a
password.
3. When the display advances to the cooling set point, press the
up
∆
or down buon to change the cooling set point.
4. Press the set point
buon to save the cooling set point and
advance to the heang set point.
5. Press the buon to save the value or advance to the next
funcon.
6. When the display advances to the heang set point, press the
up
∆
or down buon to change the heang set point.
7. Press the set point
buon to save the heang set point and
return to the temperature display.
∆
∆
Nailor reserves the right to change any information concerning product or specification without notice or obligation.