What to Use
• Ferrite
• Screwdriver, 2.54 mm (0.10 in.) flathead
• Primary power supply, 9 V to 30 V, 46 W minimum
• (Optional) Secondary power supply, 9 V to 30 V, 46 W minimum
NI recommends the power supplies listed in the following table for the cRIO-9039.
Table 3. NI Power Supplies
Power Supply Part Number
NI PS-15 Industrial Power Supply
(24 VDC, 5 A, 100 VAC to 120 VAC/200 VAC to 240 VAC input)
781093-01
NI PS-10 Desktop Power Supply
(24 VDC, 5 A, 100 VAC to 120 VAC/200 VAC to 240 VAC input)
782698-01
What to Do
Complete the following steps to connect a power supply to the cRIO-9039.
1. Ensure that your power supply is powered off.
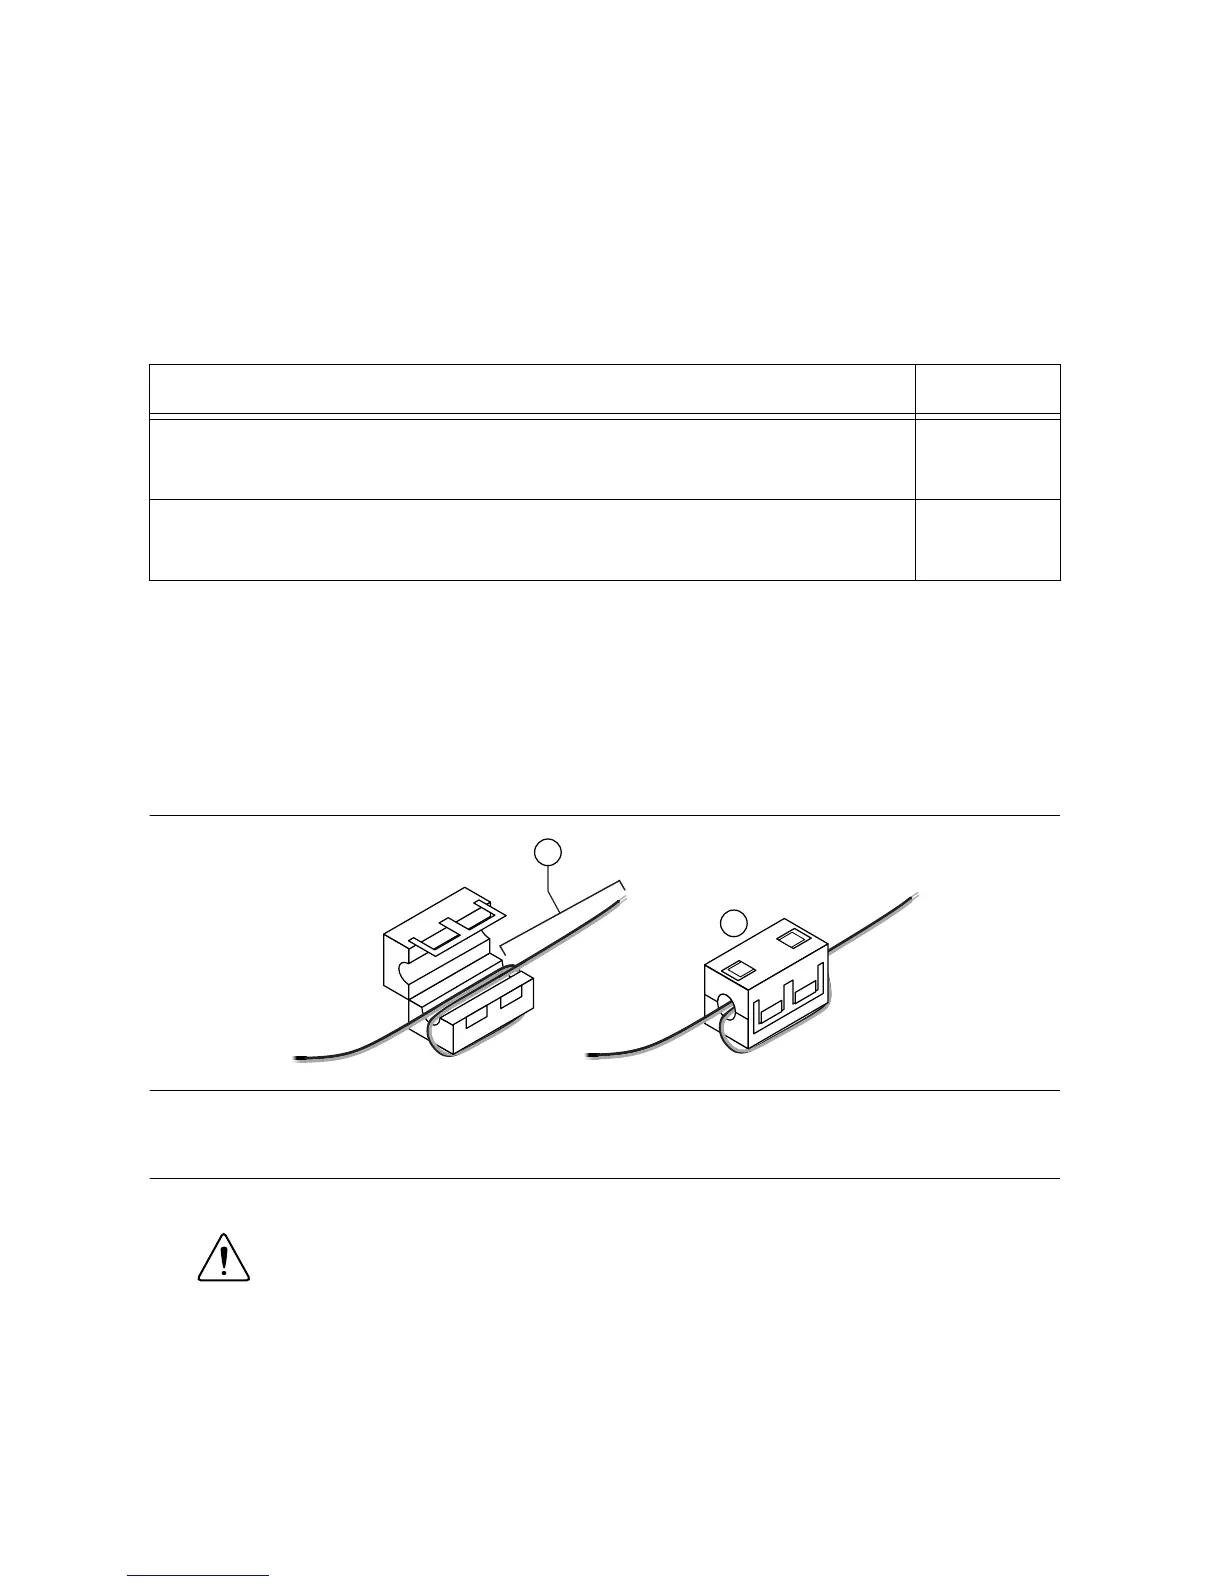
2. Install the ferrite on the negative and positive leads of the power supply, as shown in the
following figure.
Figure 3. Installing a Ferrite on the Power Leads
1. Pass the leads through the ferrite twice, leaving 50 mm to 75 mm (2 in. to 3 in.) between the ferrite and
the end of the leads.
2. Close the ferrite around the leads.
3. Remove the power connector from the cRIO-9039.
Caution Do not tighten or loosen the terminal screws on the power connector
while the cRIO-9039 is powered on.
4. Connect the primary power supply and optional secondary power supply to the power
connector, as shown in the following figure.
NI cRIO-9039 Getting Started Guide | © National Instruments | 9
 Loading...