EasyManuals Logo
Home>National Instruments>Computer Hardware>GPIB-USB-HS

National Instruments GPIB-USB-HS Installation Guide

National Instruments GPIB-USB-HS
35 pages
To Next Page IconTo Next Page
To Previous Page IconTo Previous Page
Page #12 background imageLoading...
Page #12 background image
GPIB Hardware Installation Guide and Specifications | © National Instruments | 11
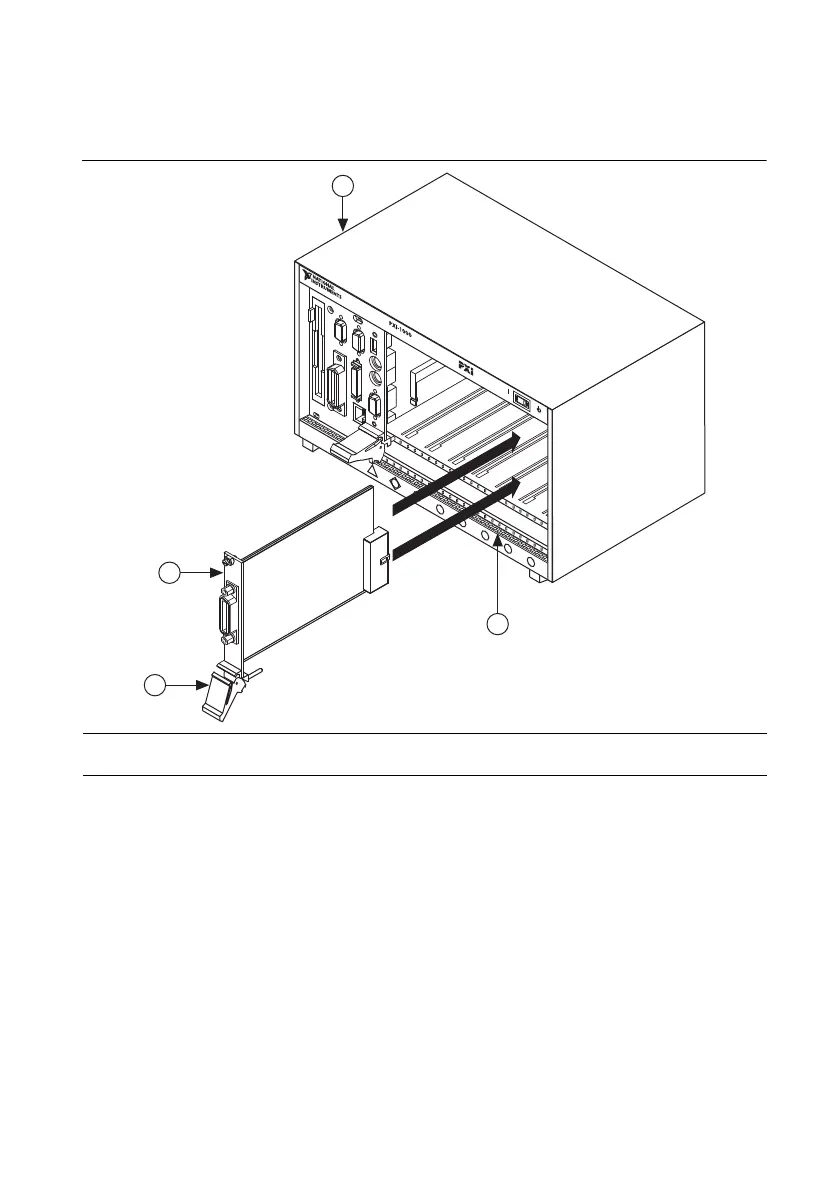
5. Insert your PXI card into the selected 5 V slot. Use the injector/ejector handle to fully inject
the device into place. Figure 5 shows how to install your PXI card into a PXI or
CompactPCI chassis.
Figure 5. Installing Your PXI Card
6. Screw the front panel of the PXI card to the front panel mounting rail of the PXI or
CompactPCI chassis.
7. Power on your PXI or CompactPCI chassis.
The PXI card installation is now complete.
1 Injector/Ejector Handle (In Down Position)
2 Your PXI Card
3 PXI Chassis
4 Injector/Ejector Rail
8
7
6
5
4
3
2
1
ON STANDBY
1
2
3
4

Other manuals for National Instruments GPIB-USB-HS

Questions and Answers:

Question and Answer IconNeed help?

Do you have a question about the National Instruments GPIB-USB-HS and is the answer not in the manual?

National Instruments GPIB-USB-HS Specifications

General IconGeneral
BrandNational Instruments
ModelGPIB-USB-HS
CategoryComputer Hardware
LanguageEnglish

Related product manuals