Chapter 1 GPIB Hardware
© National Instruments 1-25 GPIB Hardware Guide
GPIB-ENET/1000
GPIB-ENET/1000 Installation
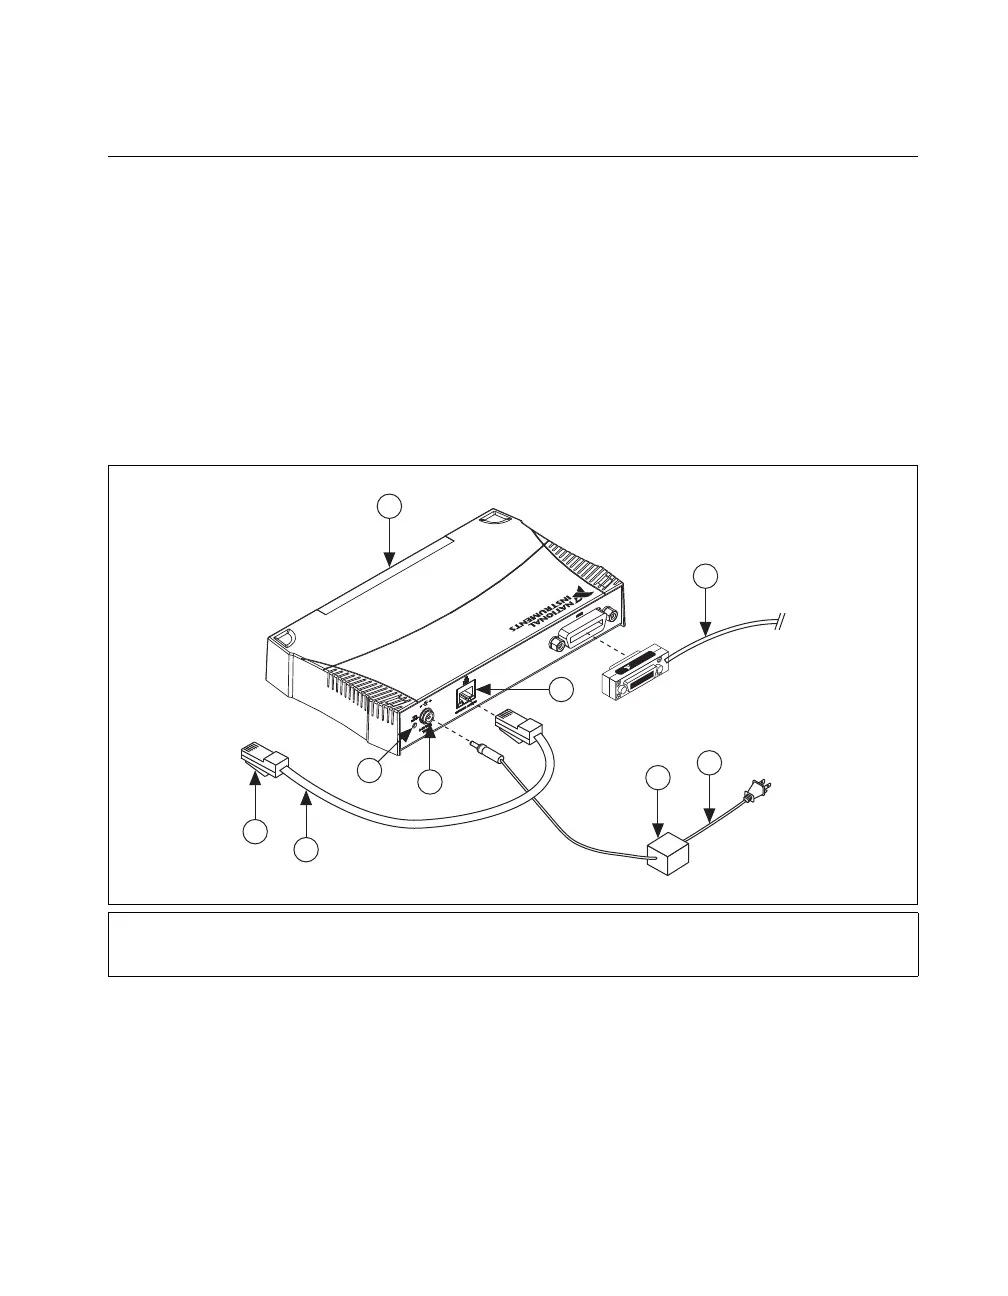
Follow these steps and refer to Figure 1-10 to install the
GPIB-ENET/1000:
1. Connect one end of your Ethernet cable to your GPIB-ENET/1000.
Connect the other end of the Ethernet cable to your Ethernet network.
2. Connect one end of the power cord to the power supply. Screw the
power connector on the other end of the power supply onto the power
jack of the GPIB-ENET/1000.
3. Plug the other end of the power cord into an AC outlet.
Figure 1-10. Installing the GPIB-ENET/1000
4. Refer to the Baseplate Identification Label on the base of the
GPIB-ENET/1000 and make a note of the serial number, MAC address
(Ethernet address), and default hostname. You will need this
information when you run some of the utilities.
1 Front Panel LEDs
2 GPIB Cable
3 Power Cord
4 Power Supply
5 Ethernet Connector
6 Power Connector
7 Configuration Reset Switch
8 Ethernet Cable
9 To Ethernet Network
NATIONAL
INSTRUMENTS
9
8
4
3
2
6
5
1
7
 Loading...