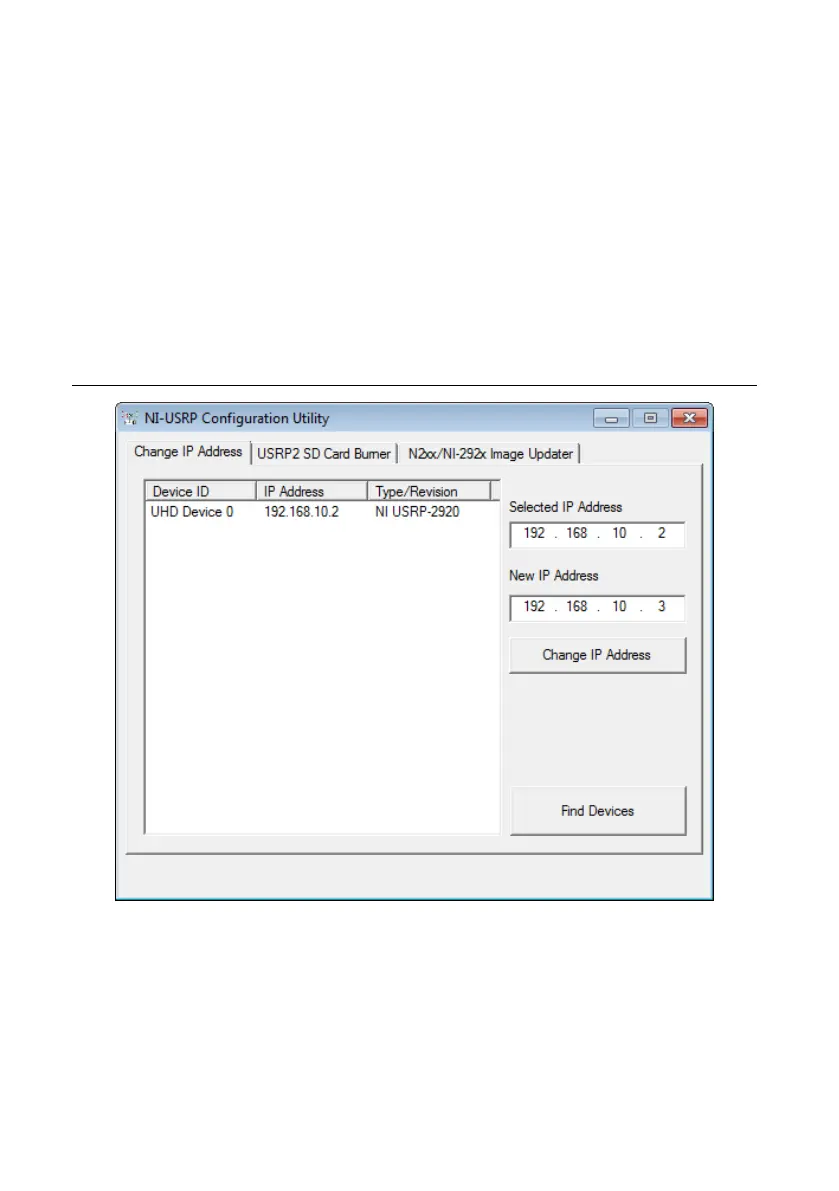
1. Verify that your device is powered on and connected to your computer using the gigabit
Ethernet interface.
2.
Select Start»All Programs»National Instruments»NI-USRP»NI-USRP
Configuration Utility to open the NI-USRP Configuration Utility.
3. Select the Change IP Address tab of the utility.
Your device should appear in the list on the left side of the tab.
4. In the list, select the device for which you want the change the IP address.
If you have multiple devices, verify that you selected the correct device.
The IP address of the selected device displays in the Selected IP Address textbox.
5. Enter the new IP address for the device in the New IP Address textbox.
The utility should appear similar to the following figure.
Figure 1. Changing the IP Address
6. Click the Change IP Address button or press <Enter> to change the IP address.
The IP address of the selected device displays in the Selected IP Address textbox.
7.
The utility prompts you to confirm your selection. Click OK if your selection is correct;
otherwise, click Cancel.
8. The utility displays a confirmation to indicate the process is complete. Click OK.
9. Power cycle the device to apply the changes.
NI USRP-29xx Getting Started Guide
| © National Instruments | 9
 Loading...