Page 11/40
3 Basic Operation
After switching on the device, the device can be operated via a touch-sensitive display. In the following
section, the most important device functions and screen elements are explained.
Please note that screen shots or references to test modules in this manual may not reflect the actual
configuration of your device.
3.1 Screen Layout
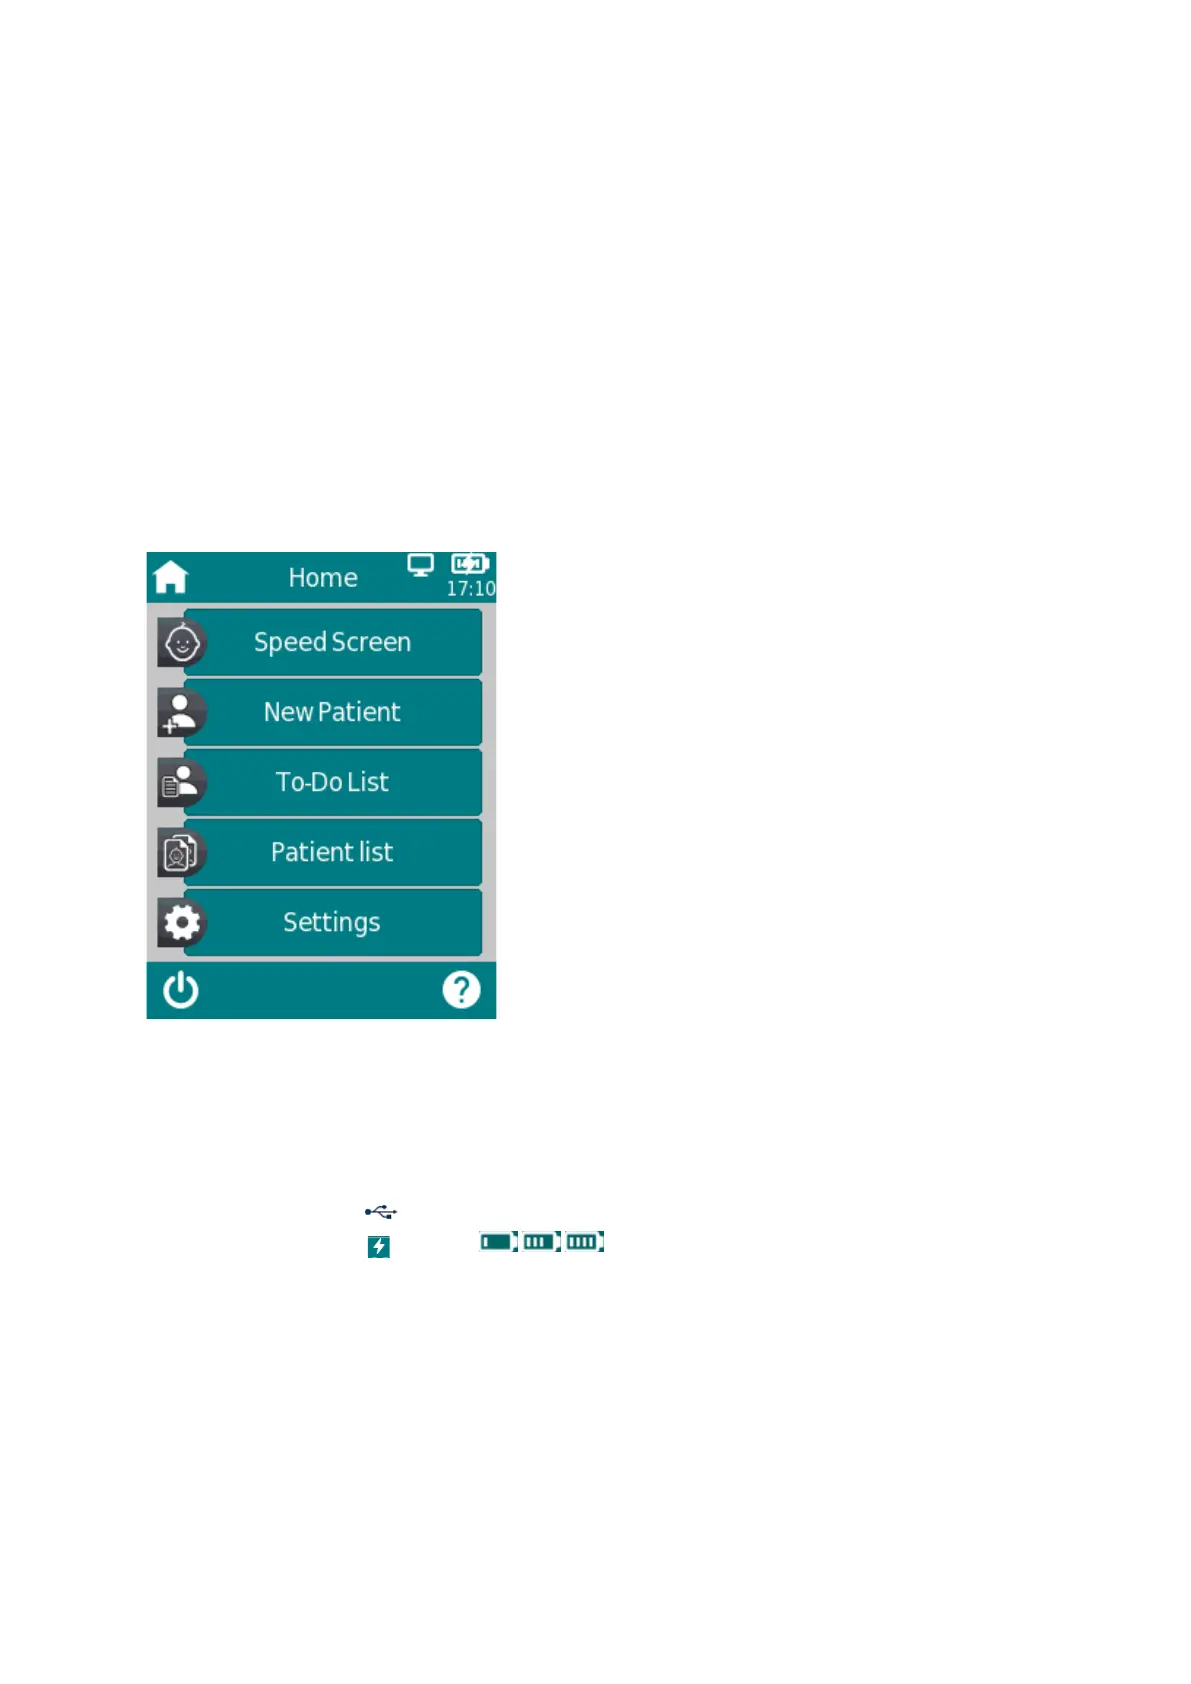
The device screen is divided into three main sections (see Figure 1):
Figure 1: Device screen layout
① Header, including the following elements:
- Device time (e.g. 12:00)
- Screen-related information (e.g. Tab you are currently viewing)
- USB connection ( is shown if USB cable is connected to a PC)
charging status indicator from empty to full) - Battery status (
② Main screen, including screen-related elements (e.g. Speed Screen, Patient list, Patient Selection or Settings)
③ Footer, including control elements (e.g. for switching off the device) and help
 Loading...