18
Replacing the Motor Control Board
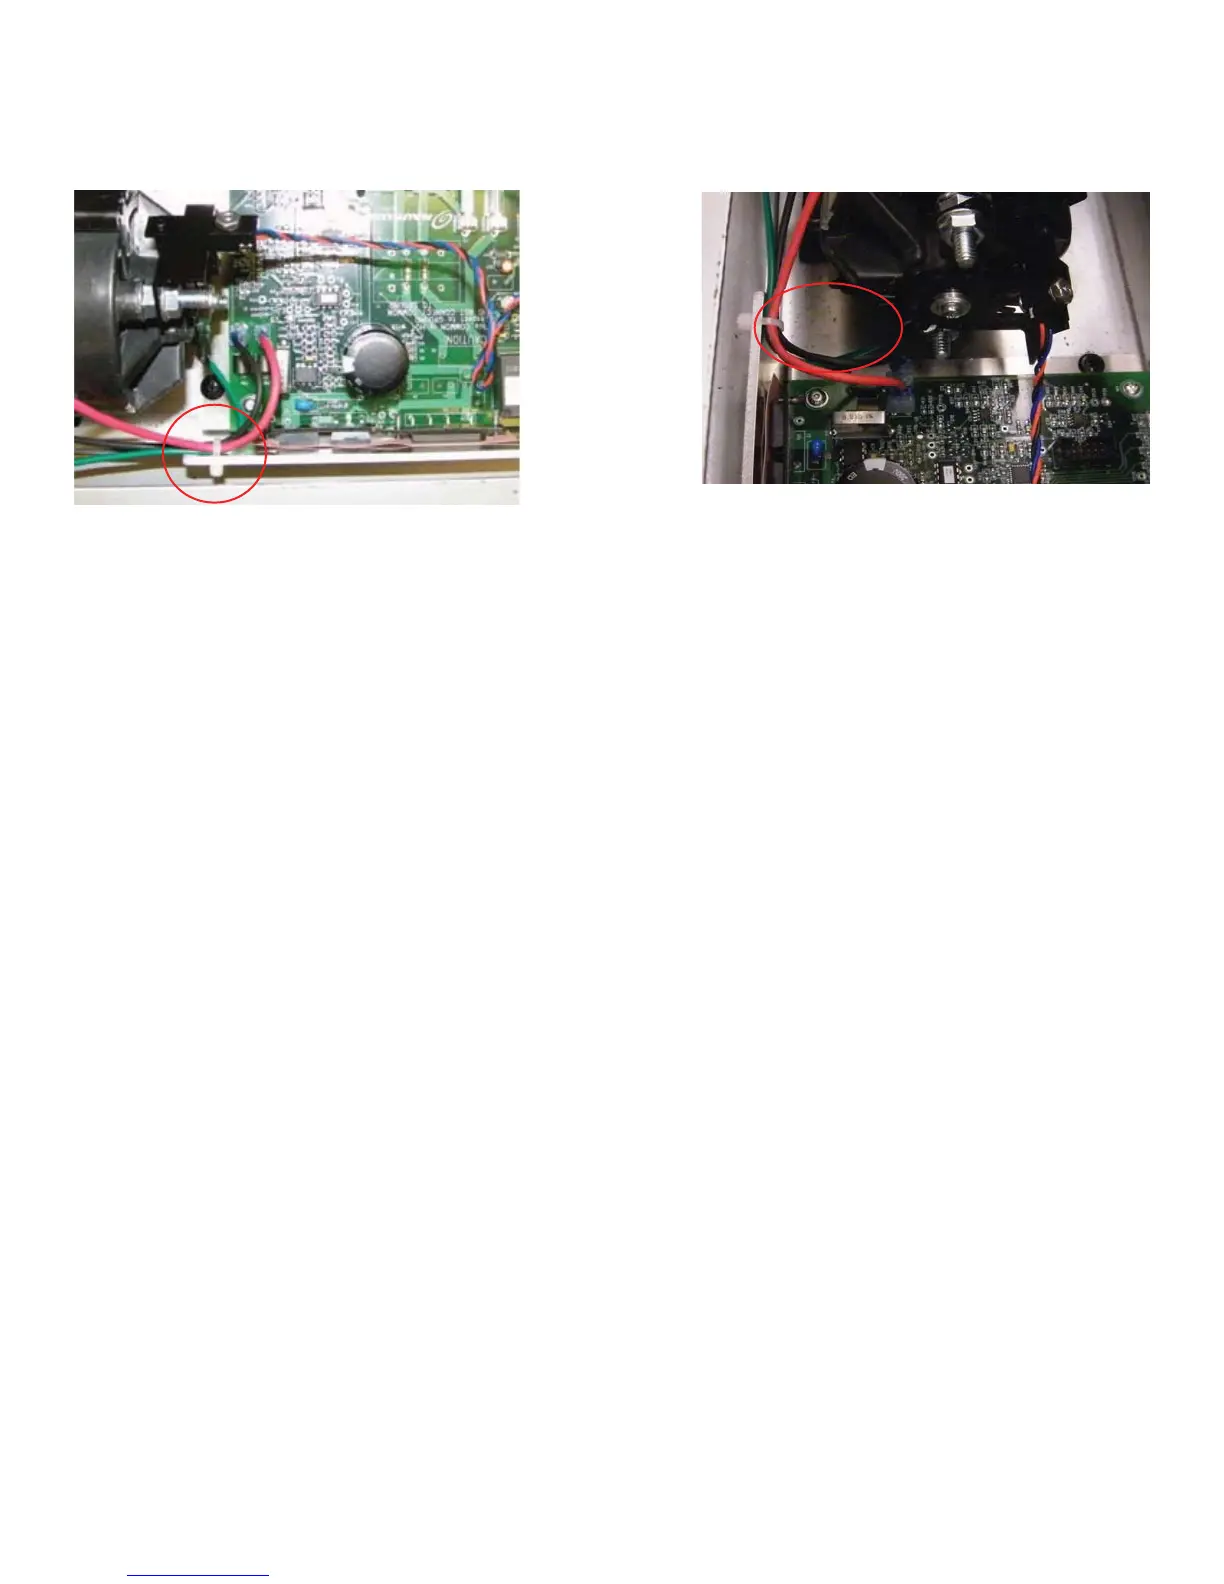
Figure 4
Instructions (continued):
9.
Secure motor power wires to Motor Control
Board using provided zip-tie (Figure 4). Be sure
wires are held away from Motor Tach Wheel
(Figure 5).
10.
Replace rear step and re-install 4 button head
screws removed in step 2.
11.
Replace power cord and test machine for proper
operation. NO CALIBRATION IS NECESSARY
for this model.
12.
Figure 5
13.
Replacing Parts
Removed grey plastic programmer and USB
cord from package and set aside for possible
later use. This unit can program software
revisions in the field if needed at a later date.
Please place defective motor control board in
the replacement board packaging and use
included, prepaid, next day air label to return to
Nautilus. This is very important as this board will
be repaired and used to build a second
prototype unit for each location
prototype unit for each location
Replacing the Motor Control Board
Figure 4
Instructions (continued):
9.
Secure motor power wires to Motor Control
Board using provided zip-tie (Figure 4). Be sure
wires are held away from Motor Tach Wheel
(Figure 5).
10.
Replace rear step and re-install 4 button head
screws removed in step 2.
11.
Replace power cord and test machine for proper
operation. NO CALIBRATION IS NECESSARY
for this model.
12.
Figure 5
13.
Replacing Parts
Removed grey plastic programmer and USB
cord from package and set aside for possible
later use. This unit can program software
revisions in the field if needed at a later date.
Please place defective motor control board in
the replacement board packaging and use
included, prepaid, next day air label to return to
Nautilus. This is very important as this board will
be repaired and used to build a second
prototype unit for each location
prototype unit for each location
9. Secure motor power wires to Motor Control Board using provided zip-tie. Be
sure wires are held away from Motor Tach Wheel.
10. Replace Rear Step and re-install 4 button head screws removed in step 2.
11. Replace Power Cord and test machine for proper operation. NO CALIBRATION
IS NECESSARY for this model.
 Loading...