6 7350 Narrow Core (R5N) Receipt Printer Upgrade
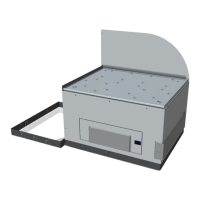
Removing Printer Shelf Assembly
To remove the Printer Shelf Assembly, follow these steps:
Note: Ensure that the Receipt Printer is removed. For more information, refer to
Removing Receipt Printer on the previous page.
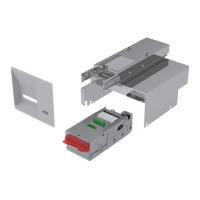
1. Remove and set aside the screw, bearing and washer from the linkage connecting the
Printer Bracket to the core wall, as shown in the image below.
2. Remove the I/O Box-PSU Bracket by doing the following:
Note: The I/O Box-PSU Bracket and the Printer Shelf Assembly are secured together
inside the Core Cabinet on the right side.
a. Loosen two (2) screws on the I/O Box-PSU Bracket.