English
English
08 09
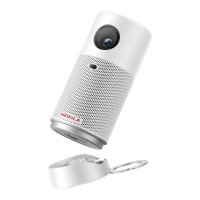
The Nebula Prizm comes with a flip stand. To use the flip stand:
①
Press the button.
The flip stand pops out.
②
After use, press the button again, and simultaneously
hold the stand to push it back to the slot.
Note: You can also install your projector in the following ways: from
the rear, front ceiling and rear ceiling. Make sure you select the
correct Projector Mode option in this projector’s menu setting.
2. Select Projection Distance
The distance between this projector and the projection surface
determinestheapproximatesizeoftheimage.Usethetablebelow
todetermineapproximatelyhowfartoplacethisprojectorfromthe
screen based on the size of the projected image.
Screen or image size Projection distance
30 inches (65 cm × 39 cm) 88 cm
60 inches (131.5 cm × 79 cm) 179 cm
72 inches (157.5 cm × 94.5 cm) 213 cm
84 inches (184.5 cm × 111cm ) 249 cm
3. Correct Keystone
It is unnecessary to tilt this projector towards the projection
surface. To correct the keystone, adjust the V. keystone values in
this projector’s menu settings.
4. PreparetheRemoteControl
The remote control comes with two AAA batteries.
①
For the first time use, remove the battery insulation tab to
activate the remote control batteries.
②
To replace the batteries, slide to open the battery compartment,
insertnewbatteries(matchingthepolarity(+/-)indicated),and
close the battery compartment.