E-6
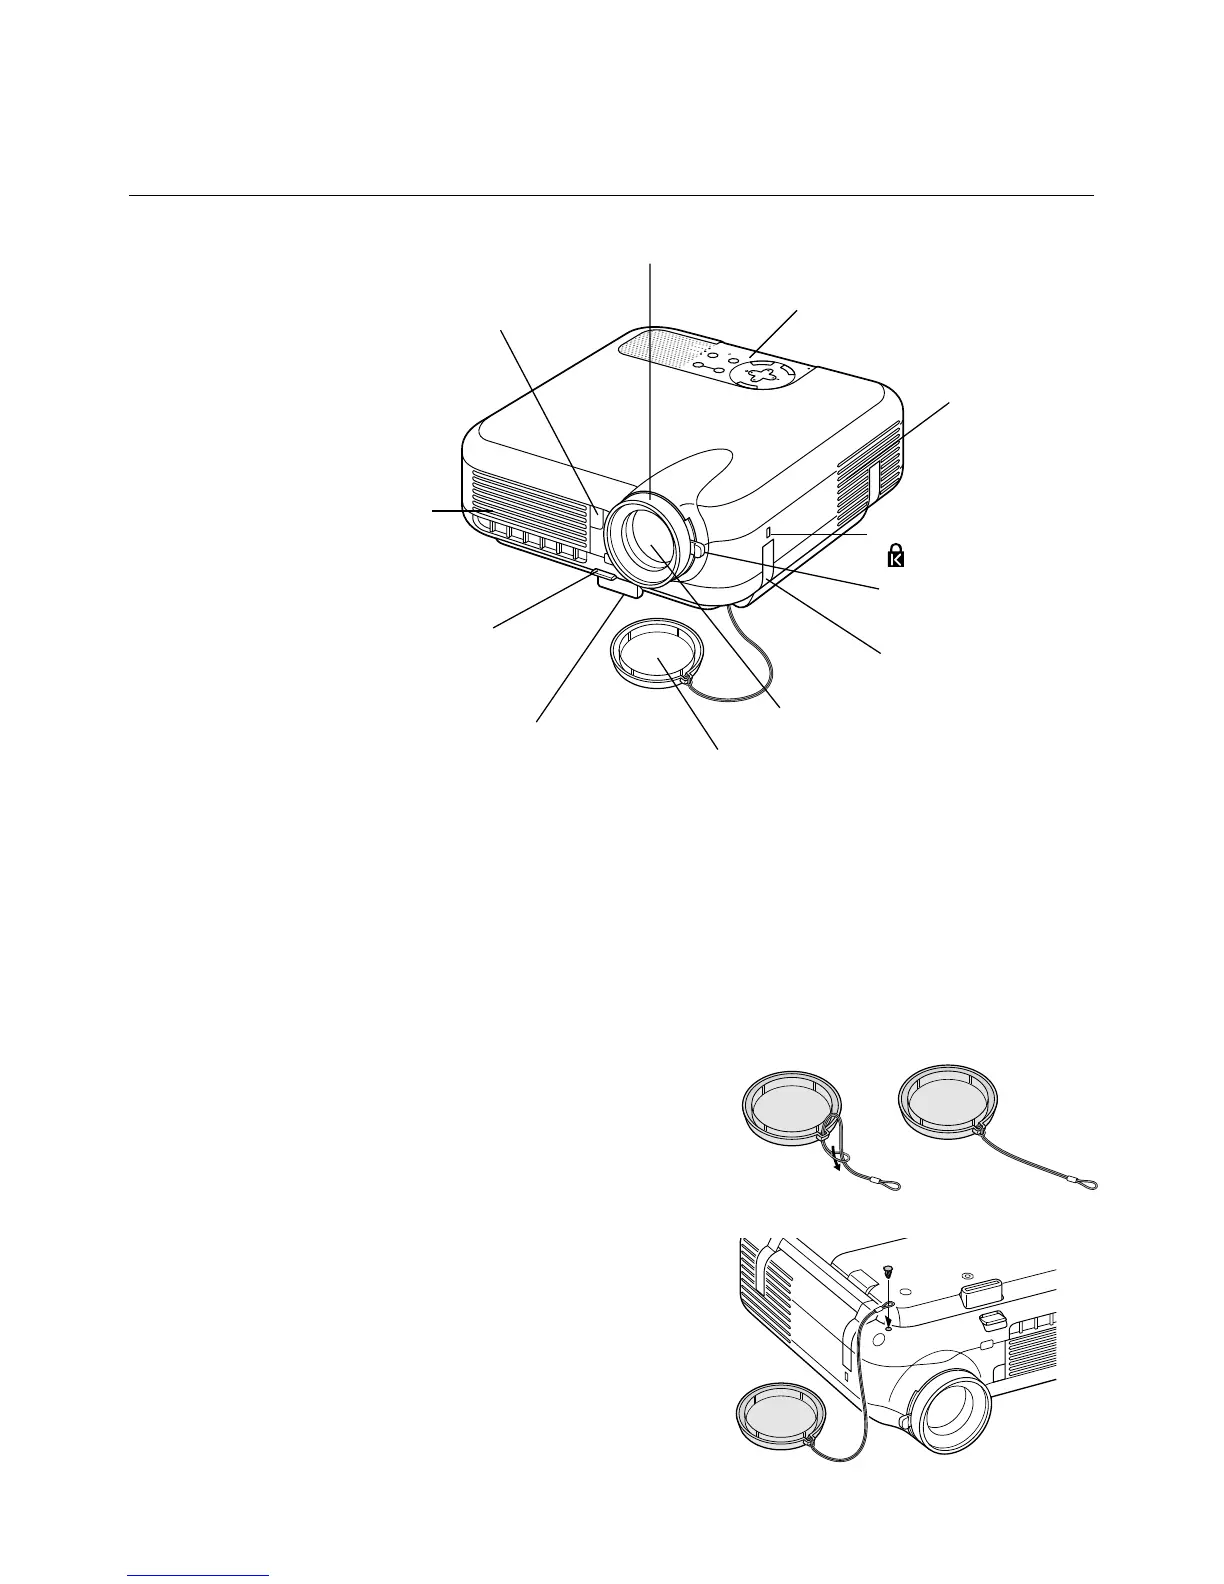
Part Names of the Projector
S
E
L
E
C
T
C
N
A
C
E
L
T
E
R
N
E
E
M
N
U
S
O
U
R
C
E
A
U
T
O
A
D
J
U
S
T
O
N
S
T
A
N
D
B
Y
S
T
A
T
U
S
P
O
W
E
R
L
A
M
P
A
L
I
G
N
M
E
N
T
P
C
-C
A
R
D
INTRODUCTION
⬎
Part Names of the Projector
Ventilation (outlet)
Heated air is exhausted
from here
* This security slot supports the MicroSaver
®
Security System.
MicroSaver
®
is a registered trademark of Kensington Microware Inc.
The logo is trademarked and owned by Kensington Microware Inc.
Built-in Security Slot
( )*
Adjustable Tilt Foot Lever
(See page E-43)
Attaching the lens cap
1. Thread the string through the hole
on the lens cap and then tie a knot
in the string.
2. Use the rivet to attach the string to
the bottom of the projector.
To attach the lens cap to the bottom with the supplied string and rivet:
Remote Sensor
(See page E-20)
Focus Ring
(See page E-44)
Controls
(See page E-8)
Ventilation (inlet)
Zoom Lever
(See page E-44)
Carrying Handle
Lens Cap
Lens
Adjustable Tilt Foot
(See page E-43)