129
6. Installation and Connections
PrepareaPhillipsscrewdriverbeforehand.
1. PressthePOWERbuttontoturnofftheprojectorandsetit
intostandbycondition,anddisconnectthepowercord.
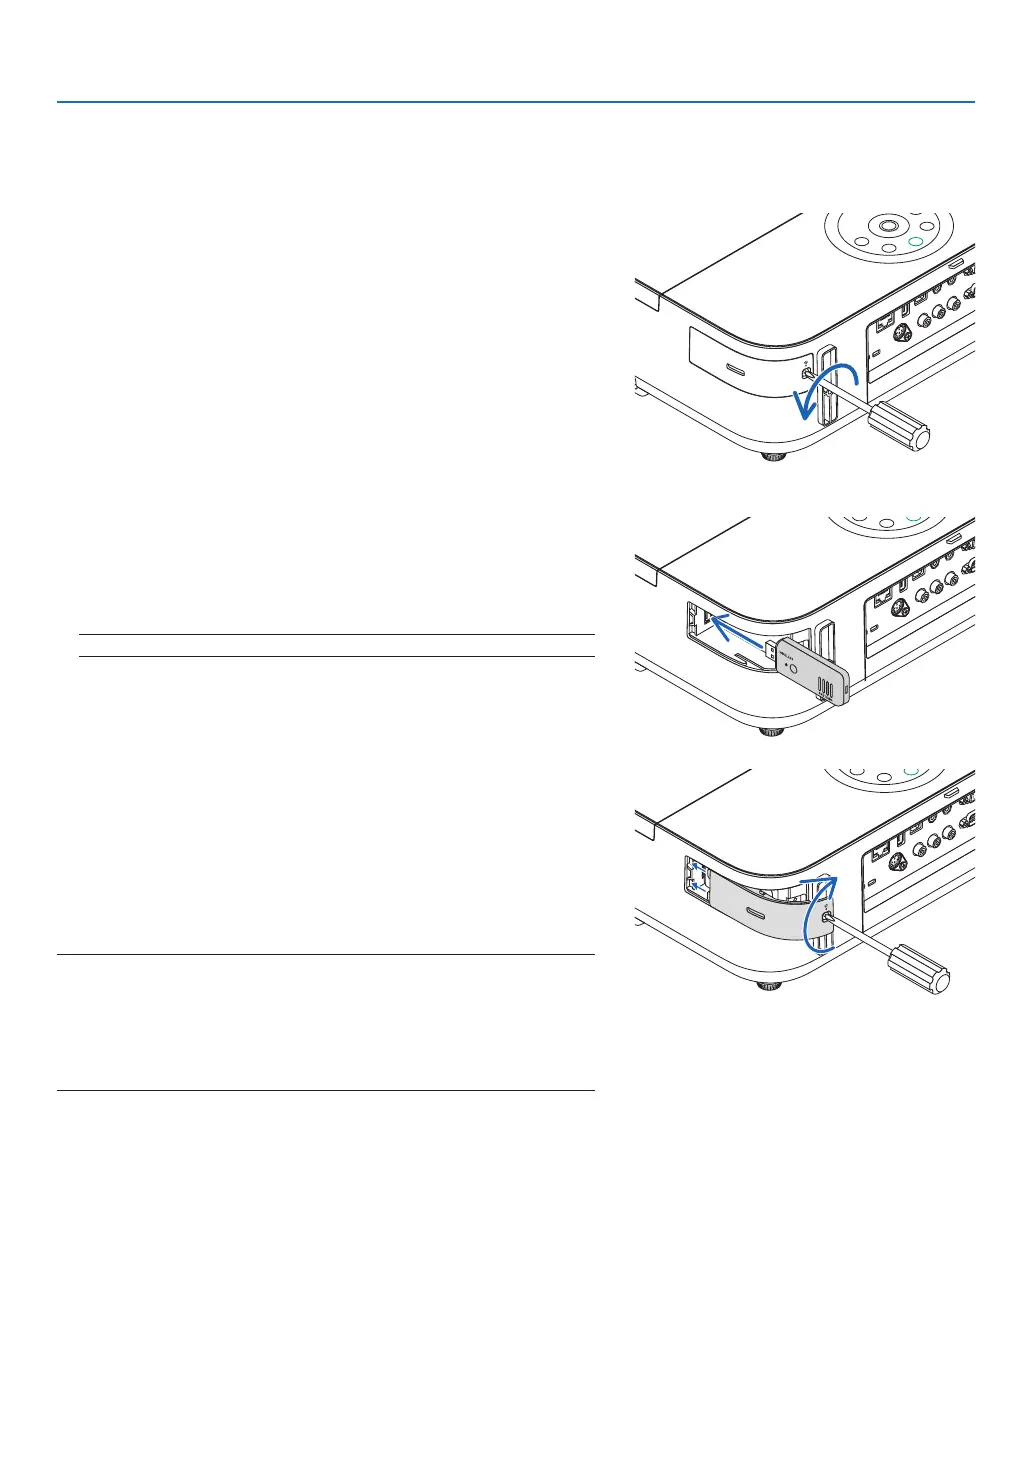
2. RemovetheUSB(LAN)portcover.
Loosen the screw securing the port cover.
•Thescrewisnotremovable.
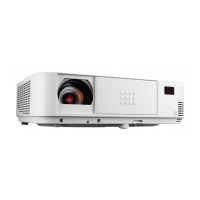
3. SlowlyinserttheUSBWirelessLANUnitintotheUSB(LAN)
port.
Remove the cap from the USB Wireless LAN Unit, and then insert
it with the surface (side of indicator) facing outward. Keep the cap
for later use.
NOTE:DonotforcetoinserttheUSBWirelessLANUnit.
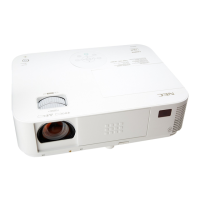
4. PuttheUSB(LAN)portcoverbackintoplace.
InsertthecatchoftheUSB(LAN)portcoverintothegrooveofthe
projector cabinet, and then tighten the screw to secure the port
cover.
ToremovetheUSBWirelessLANUnit,disconnectthepowercord
andusetheaboveprocedure.
NOTE:
• ThegreenLEDontheUSBWirelessLANUnitashestoshowthatWireless
LANUnitisworking.IftheUSBWirelessLANUnitisincorrectlyattached,
theblueLEDwillnotash.
• DonotpressthebuttonontheUSBWirelessLANUnit.Thebuttonwillnot
workwiththismodel.