117
6. Installation and Connections
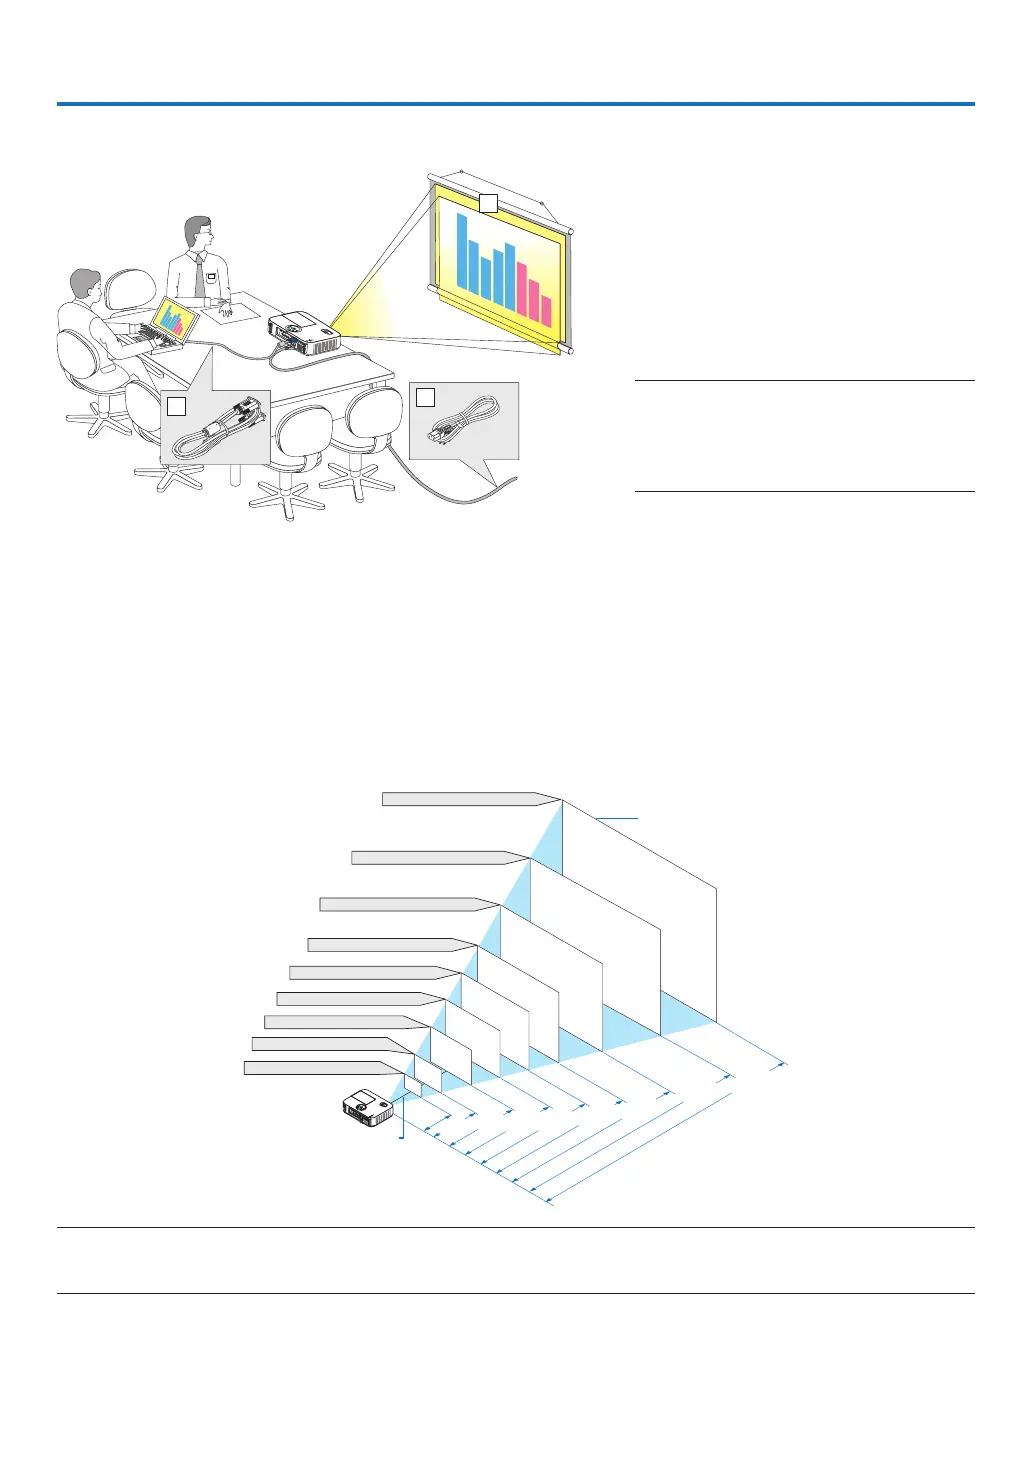
Thissectiondescribeshowtosetupyourprojectorandhowtoconnectvideoandaudiosources.
Yourprojectorissimpletosetupanduse.Butbeforeyougetstarted,youmustrst:
① Setupascreenandtheprojector.
② Connectyourcomputerorvideoequip-
menttotheprojector.
(→page122, 124, 125, 126, 127,
128)
③
Connectthesuppliedpower cord.
(→page14)
NOTE:Ensurethatthepowercordandanyother
cablesaredisconnectedbeforemovingthepro-
jector.Whenmovingtheprojectororwhenitis
notinuse,cover thelenswiththesliding lens
cover.
❶ Setting Up the Screen and the Projector
Selecting a Location
[M403X/M363X/M323X/M283X]
Thefurtheryourprojectorisfromthescreenorwall,thelargertheimage.Theminimumsizetheimagecanbeis
approximately30"(0.76m)measureddiagonallywhentheprojectorisroughly48inches(1.2m)fromthewallor
screen.Thelargesttheimagecanbeis300"(7.6m)whentheprojectorisabout499inches(12.7m)fromthewall
or screen.
300"
Distance
(Unit: m/inch)
Lens center
Screen Size
Screen Size (Unit: cm/inch)
200"
150"
120"
100"
80"
12.7/498
"
6.3/248
"
5.0/198
"
4.2/164
"
3.3/131
"
2.5/97
"
1.6/64
"
40"
8.4/331
"
60"
30"
1.2/47"
609.6(W)�457.2(H) / 240(W)�180(H)
406.4(W)�304.8(H) / 160(W)�120(H)
304.8(W)�228.6(H) / 120(W)�90(H)
243.8(W)�182.9(H) / 96(W)�72(H)
203.2(W)�152.4(H) / 80(W)�60(H)
162.6(W)�121.9(H) / 64(W)�48(H)
121.9(W)�91.4(H) / 48(W)�36(H)
81.3(W)�61.0(H) / 32(W)�24(H)
61.0(W)�45.7(H) / 24(W)�18(H)
TIP:
• Thedistancesareindicatedbyintermediatevaluesbetweenteleandwide.Useasaruleofthumb.
• Formoredetailsonthrowdistance,seepage120.
To the wall outlet.