English−25
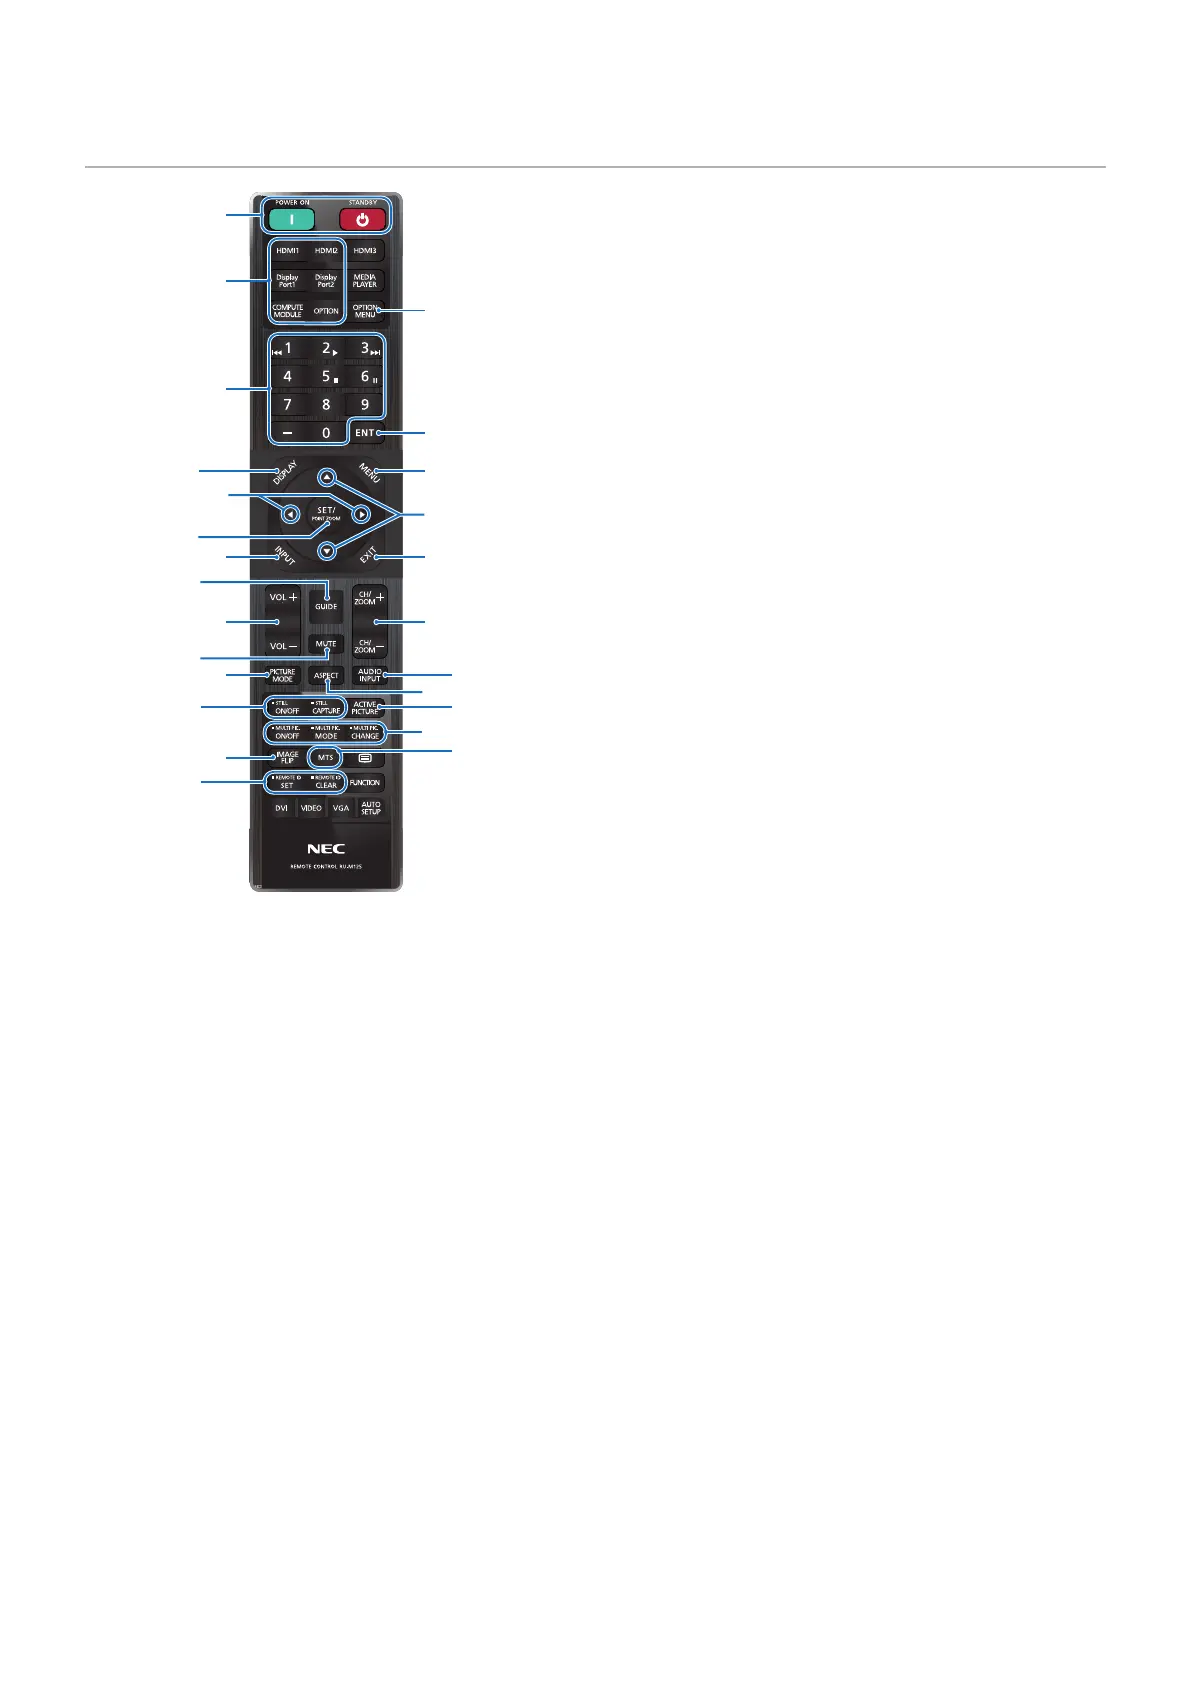
Wireless Remote Control
1
2
4
3
5
6 7
@
#
8
$
&
q
(
-
!
9
0
%
^
*
)
e
=
w
NOTE: • The buttons with no explanation are not used
with your monitor model.
• Some Remote Control buttons are used for
CEC (Consumer Electronics Control). The CEC
buttons are different based on whether the
current CEC setting is [MODE1] or [MODE2].
Please see page 32.
1
POWER ON and STANDBY Buttons
POWER ON resumes full power from low power mode.
STANDBY puts the monitor in low power mode.
See page 36.
2
DIRECT INPUT Button
Immediately changes the input to the one on the button
names.
The button names reect the factory preset name for the
input.
3
OPTION MENU Button
For use when an Option Board is installed. See page 23.
The function depends on which Option Board is installed in the monitor.
4
KEYPAD
Press the buttons to set and change passwords, change the
channel and set the REMOTE ID. See page 61.
5
ENT Button
Makes selections.
For use with an Option Board. The function depends on
which Option Board is installed in the monitor.
6
DISPLAY Button
Shows/Hides the information OSD. See page 41.
Unlocks the remote control’s buttons if they have been
locked in the [LOCK SETTINGS] in the [PROTECT] menu.
Press and hold the DISPLAY button for more than ve
seconds to unlock the remote. See page 54.
7
MENU Button
Opens and closes the OSD menu. See page 41.
8
EXIT Button
Acts as a back button within the OSD to move to the
previous OSD menu.
Acts as an EXIT button to close the OSD menu when on the
main menu.
9
/ Button (up/down button)
Act as navigation buttons, within the OSD menu to move the
highlighted area up or down.
0
/ Button (left/right button)
Act as navigation buttons, within the OSD menu to move the
highlighted area left or right.
Increases or decreases the adjustment level within the
selected OSD menu setting.
!
SET/POINT ZOOM Button
SET: When the OSD menu is open, this button acts as a set
button when you make a selection.
POINT ZOOM: When the OSD menu is closed, this button
acts as a point zoom button. See page 40.
@
INPUT Button
Cycles through the inputs.
The input names reect the factory preset name for the input
unless they are manually renamed in the OSD menu.
#
VOLUME +/– Button
Increases or decreases the audio output level.
$
CH/ZOOM +/– Button*
Increases or decreases the point zoom level. Please refer to
the Point Zoom instructions. See page 40.
*: When using with an Option Board, the function depends on which Option
Board is installed in the monitor.