EasyManua.ls Logo

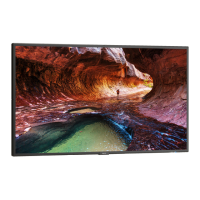
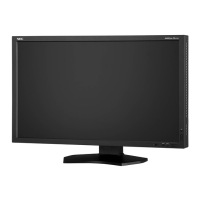
NEC MultiSync P462

NEC MultiSync P462
43 pages
To Next Page IconTo Next Page
Loading...
Users Manual
MultiSync P402
MultiSync P462
MultiSync P552

Questions and Answers:

NEC MultiSync P462 Specifications

General IconGeneral
Panel life- h
Pixel pitch0.53 x 0.53 mm
Response time8 ms
Display diagonal46 \
Display brightness500 cd/m²
Display technologyLCD
Vertical scan range50 - 85 Hz
Horizontal scan range31.5 - 91.1 kHz
Display number of colors16.78 million colors
Active display area (W x H)1018.1 x 572.7 mm
Ethernet LANYes
Multi-display supported-
Product colorBlack
Product designDigital signage flat panel
Panel mounting interface300 x 300 mm
Power consumption (standby)1 W
Power consumption (typical)155 W
Storage temperature (T-T)-20 - 60 °C
Operating temperature (T-T)5 - 40 °C
Storage relative humidity (H-H)10 - 90 %
Operating relative humidity (H-H)20 - 90 %
Weight and Dimensions IconWeight and Dimensions
Depth103 mm
Width1055.4 mm
Height608.6 mm
Weight23800 g

Summary

Declaration of Conformity

Important Information

Declaration of the Manufacturer

Manufacturer's certification of product compliance with EU directives and safety standards.

Safety Precautions, Maintenance & Recommended Use

Recommended Use

Guidelines for optimal performance, eye comfort, and screen longevity.

Cleaning the LCD Panel

Instructions for cleaning the LCD panel using a soft cloth, avoiding harsh cleaners.

Cleaning the Cabinet

Procedures for cleaning the monitor cabinet using mild detergent and water.

Installation

Mounting

Recommendations for professional installation and safety precautions for mounting.

Mounting location

Considerations for selecting a suitable and safe mounting location for the monitor.

Attaching Mounting Accessories

Ventilation Requirements

Requirements for adequate ventilation around the monitor to prevent overheating.

Prevent Tipping

Measures to prevent the monitor from tipping over when using the table stand.

Parts Name and Functions

Control Panel

Detailed explanation of the monitor's control panel buttons and their functions.

Terminal Panel

RS-232 C (D-Sub 9 pin)

Connectors for serial communication control via RS-232C interface.

DisplayPort connector

Connector for digital video signals via DisplayPort.

DVI (DVI-D)

Connector for digital video signals via DVI-D.

HDMI connector

Connector for digital video signals via HDMI.

VGA IN (mini D-Sub 15 pin)

Connector for analog RGB signals from PCs or other equipment.

Option board slot

Wireless Remote Control

INPUT button

Button to select the input signal source for the monitor.

MENU button

Button to turn the OSD menu mode on or off.

UPDOWN button

Buttons to navigate through OSD menus and adjust values.

MINUSPLUS (-+) button

Buttons to adjust settings values within the OSD menu.

PICTURE MODE button

Button to select predefined picture modes for optimal viewing.

Operating Range for the Remote Control

Handling the remote control

Precautions and tips for handling the remote control properly.

Setup

Determine the installation location

Crucial steps and cautions for selecting the monitor's installation site.

Connect external equipment

Guidance on connecting external devices to the monitor.

Connect the supplied power cord

Steps for connecting the monitor to the power outlet.

Recommended Adjustments

Adjust the screen

Connections

Wiring Diagram

Visual representation of how to connect various equipment to the monitor.

Connecting a Personal Computer

Connecting a DVD Player or Computer with HDMI out

Basic Operation

Power ON and OFF Modes

Explanation of the monitor's power states and indicator lights.

Picture Aspect

Selecting a video source

Picture Mode

AMBIENT Mode

OSD (On-Screen-Display) Controls

PICTURE

ADJUST

AUDIO

SCHEDULE

PIP

OSD

MULTI DISPLAY

EXTERNAL CONTROL

LAN SETTING

DISPLAY PROTECTION

ADVANCED OPTION

INPUT DETECT

Methods for detecting and switching between multiple input sources.

TERMINAL SETTING

Settings for specific input terminals like DVI, BNC, and HDMI.

OVER SCAN

NOTE 1: CREATING A SCHEDULE

NOTE 2: IMAGE PERSISTENCE

REMOTE CONTROL ID FUNCTION

MONITOR ID and IR CONTROL

WIRED REMOTE CONTROL FUNCTION

Controlling the LCD monitor via RS-232 C Remote Control

Controlling the LCD monitor via LAN Control

Network Setting by Using an HTTP Browser

Network Settings

Alert Mail Setting

Alert error message list

Features

Troubleshooting

Specifications - P402

Specifications - P462

Specifications - P552

Pin Assignment

Manufacturers Recycling and Energy Information

Related product manuals