Nedap SmartFlow / Installation manual
Version 00.001 / September 2020 / EN
11
Dairy Farming
Notwithstanding all due precaution by Nedap, Nedap Animal Identification may not function optimally due
to devices that emit radio waves, such as (but not limited to) variable frequency drives, electronic ballasts of
lighting systems, power supplies, electronic converters of solar panels/windmills and (long) wave radio stations,
which may cause interference with Nedap Animal Identification.
No claims, representations or warranties, whether expressed or implied, are made by Nedap as to the
performance, reliability, durability and safety of Nedap Animal Identification used in conjunction with
abovementioned or other devices.
In order to achieve optimal performance of Nedap Animal Identification, the electrical installation on the farm
needs to meet the conditions that are shown below.
• Maximum allowed environmental noise level: 10 dBµA/m quasi peak, according to CISPR 16-1-1.
• Maximum allowed conducted noise: according to EN55032: 2015.
3.2 Installation overview
Assemble and install the system according to the steps below. Each step will be fully explained in the next
sections.
1. Mount the SmartFlow (page 11).
2. Configure the Velos software (page 23).
3. Calibrate and validate the SmartFlow (page 23).
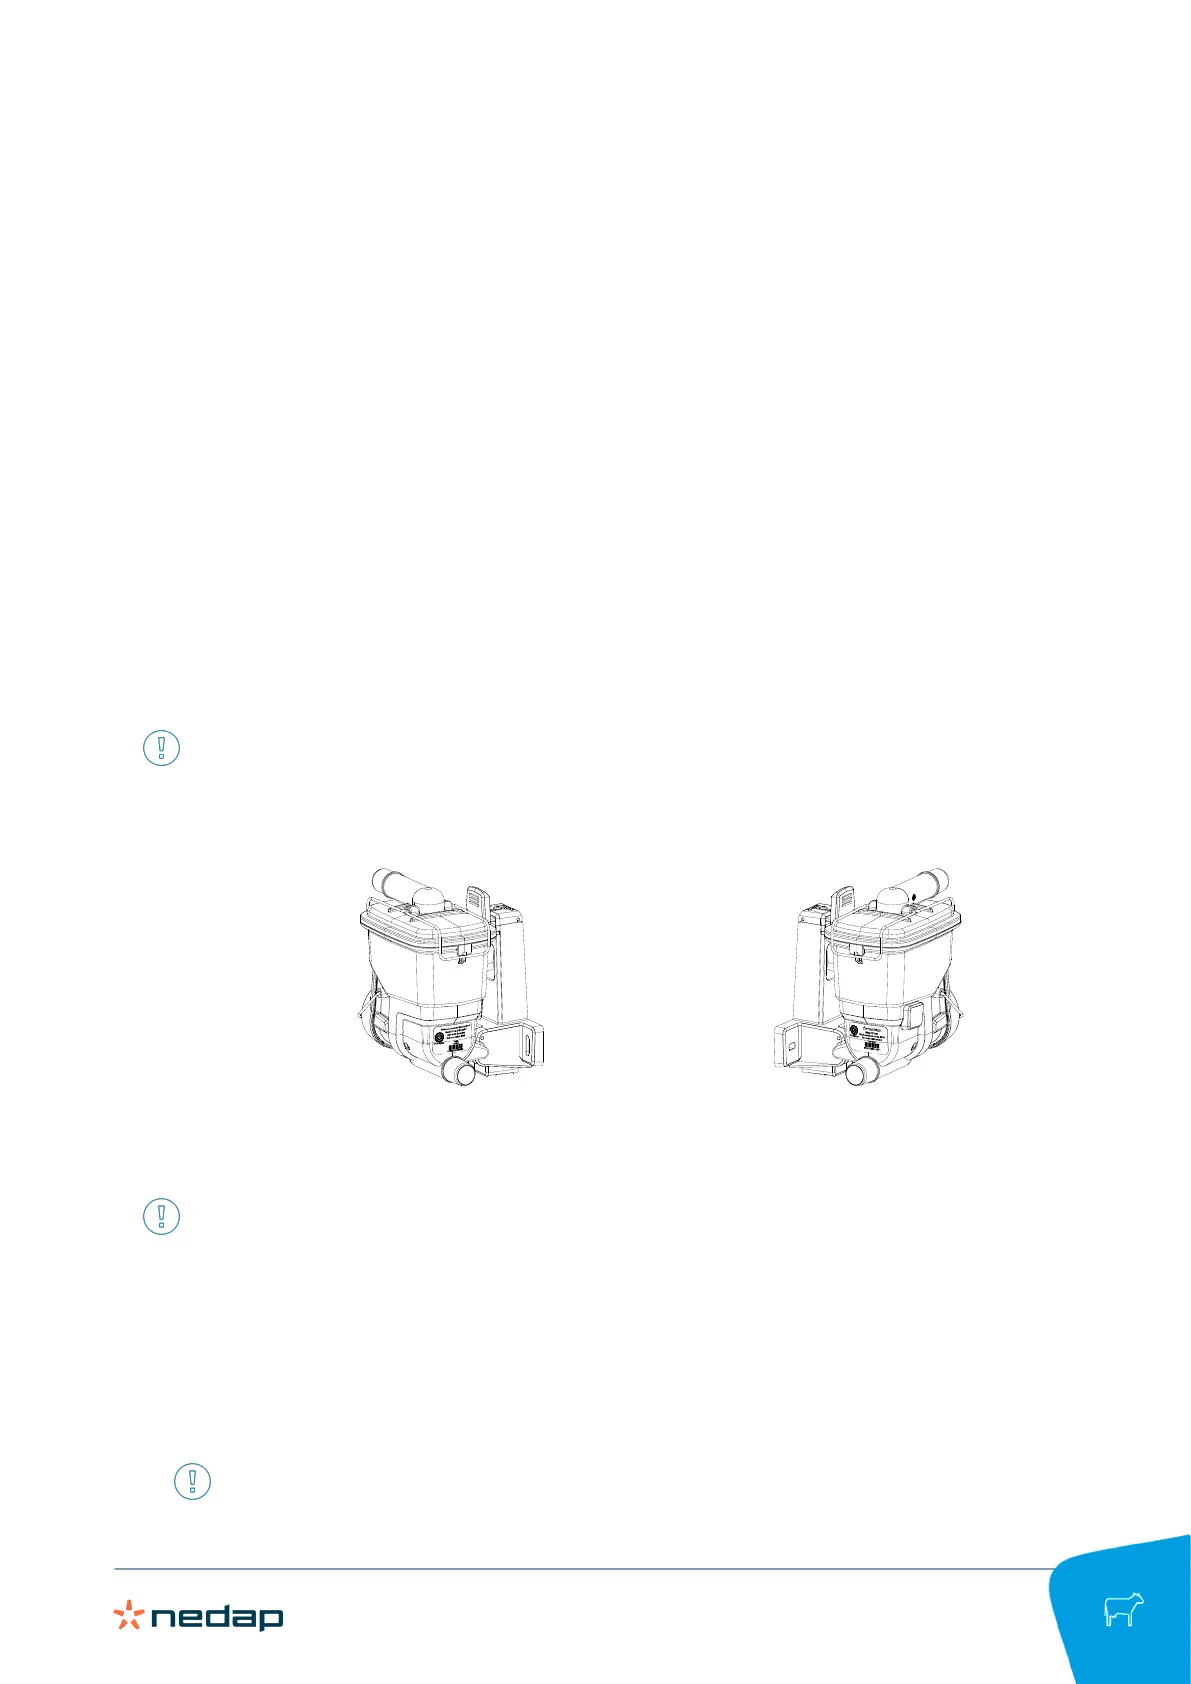
The SmartFlow can be mounted in two configurations: The milk outlet is positioned either on the right side or
the left side of the Smartflow. The mounting procedure only shows illustrations of the right side configuration,
but is applicable for the left side configuration as well.
Figure3:Right and left side configuration of the milk outlet on the SmarttFlow
The installation of the VP8002 VPU and VP4102 UHF reader with antenna is described in the installation
manuals of these products. This documentation can be obtained from your dealer or on our Business portal:
http://www.nedap.com/livestockmanagement-portal.
3.3 Mount the components
3.3.1 Mount the SmartFlow
1. Mount the bracket on a flat surface, for example a wall or a plate. Use appropriate mounting material.
Make sure there is at least 10 cm free space above the bracket.