Steam en
15
7.
Slowly slide the control panel downwards and then
push it away from you until it is closed completely.
8.2 Refilling the water tank
When "Fill water tank" appears on the display, you
must refill the water tank.
Notes
¡ Steam, Dough proving, Defrost and Reheat func-
tions: If you do not refill the water tank, the appli-
ance will stop. Refill the water tank.
¡ Steam-assisted heating: If you do not refill the water
tank, the appliance will continue to heat but without
injecting steam into the cooking compartment.
1.
Open the control panel.
2.
Remove and refill the water tank.
3.
Insert the full water tank and close the control panel.
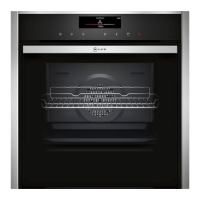
8.3 Steam heating functions
Your appliance has several steam heating functions:
¡ Steam
¡ Dough proving
¡ Sous-vide
¡ Defrost
¡ Reheat
Steam
With the "Steam" heating function, the food is envel-
oped by hot steam, which helps to retain the nutrients.
This cooking method also helps to retain the shape,
colour and typical flavour of the food.
Configuring the Steam heating function
1.
Fill the water tank.
→"Filling the water tank", Page14
2.
Press to switch the appliance on.
3.
Press .
4.
Swipe left or right to set "Steam" .
5.
Press the bottom row to select the temperature.
6.
Swipe left or right to select the required temperat-
ure.
7.
Press the bottom row to select the cooking time.
8.
Swipe left or right to select the required cooking
time.
9.
Press to start the steaming process.
→"Pausing operation", Page13
→"Cancelling operation", Page13
a If the water tank runs dry during the steaming pro-
cess, steaming will be paused.
→"Refilling the water tank", Page15
a Once the cooking time has elapsed, an audible sig-
nal will sound and the appliance will stop heating.
→"Switching off the appliance", Page13
10.
Press any button to end the audible signal.
11.
Empty the water tank and dry the cooking compart-
ment.
→"After every steam operation", Page17
Dough proving
Yeast dough will prove considerably more quickly us-
ing the "Dough proving" heating function than at room
temperature, and it will not dry out.
Configuring the Dough proving heating function
Requirement:The cooking compartment must have
cooled down completely.
1.
Fill the water tank.
→"Filling the water tank", Page14
2.
Press to switch the appliance on.
3.
Swipe left or right to set "Dough proving" .
4.
To select the setting, press "1" in the bottom row.
5.
To set setting 2, swipe left.
6.
Press to save your settings.
7.
Press to select the proving time.
8.
Swipe left or right to select the required proving
time.
9.
Press to save your settings.
10.
Press to start the dough proving process.
→"Pausing operation", Page13
→"Cancelling operation", Page13
a If the water tank runs dry during the dough proving
process, dough proving will be paused.
→"Refilling the water tank", Page15
a Once the duration has elapsed, an audible signal
will sound and the appliance will stop heating.
→"Switching off the appliance", Page13
11.
Press any button to end the audible signal.
12.
Empty the water tank and dry the cooking compart-
ment.
→"After every steam operation", Page17
Sous-vide
"Sous-vide" is a type of low-temperature cooking during
which vacuum-sealed food is cooked at temperatures
between 50 and 95°C and with 100% steam. Sous-
vide is suitable for meat, fish, vegetables and desserts.
A chamber vacuum-packing machine is used to heat-
seal the food in special air-tight, heat-resistant vacuum-
sealing bags. The protective vacuum-sealing bags re-
tain the nutrients and flavours.
Configuring the Sous-vide heating function
Notes
¡ During sous-vide cooking, more condensate forms
on the cooking compartment floor than for other
types of heating.
¡ If the water tank runs dry while sous-vide cooking,
the operation is interrupted.
Requirement:The cooking compartment must have
cooled down completely.
1.
ATTENTION!
Risk of damage to kitchen units
▶ Do not fill the water tank a second time for the
sous-vide cooking.
Fill the water tank completely.
→"Filling the water tank", Page14
2.
Press to switch the appliance on.
3.
Swipe left or right to set "Sous-vide" .
4.
Press the temperature to select it.
5.
Swipe left or right to select the required temperat-
ure.
6.
Press to select the duration.
7.
Swipe left or right to select the required duration.