Appliance door en
23
17.3 Removing the door panes
To facilitate cleaning, you can remove the door pane.
WARNING‒Risk of injury!
Components inside the appliance door may have sharp
edges.
▶
Wear protective gloves.
Requirement:The appliance door is detached.
→"Detaching the appliance door", Page20
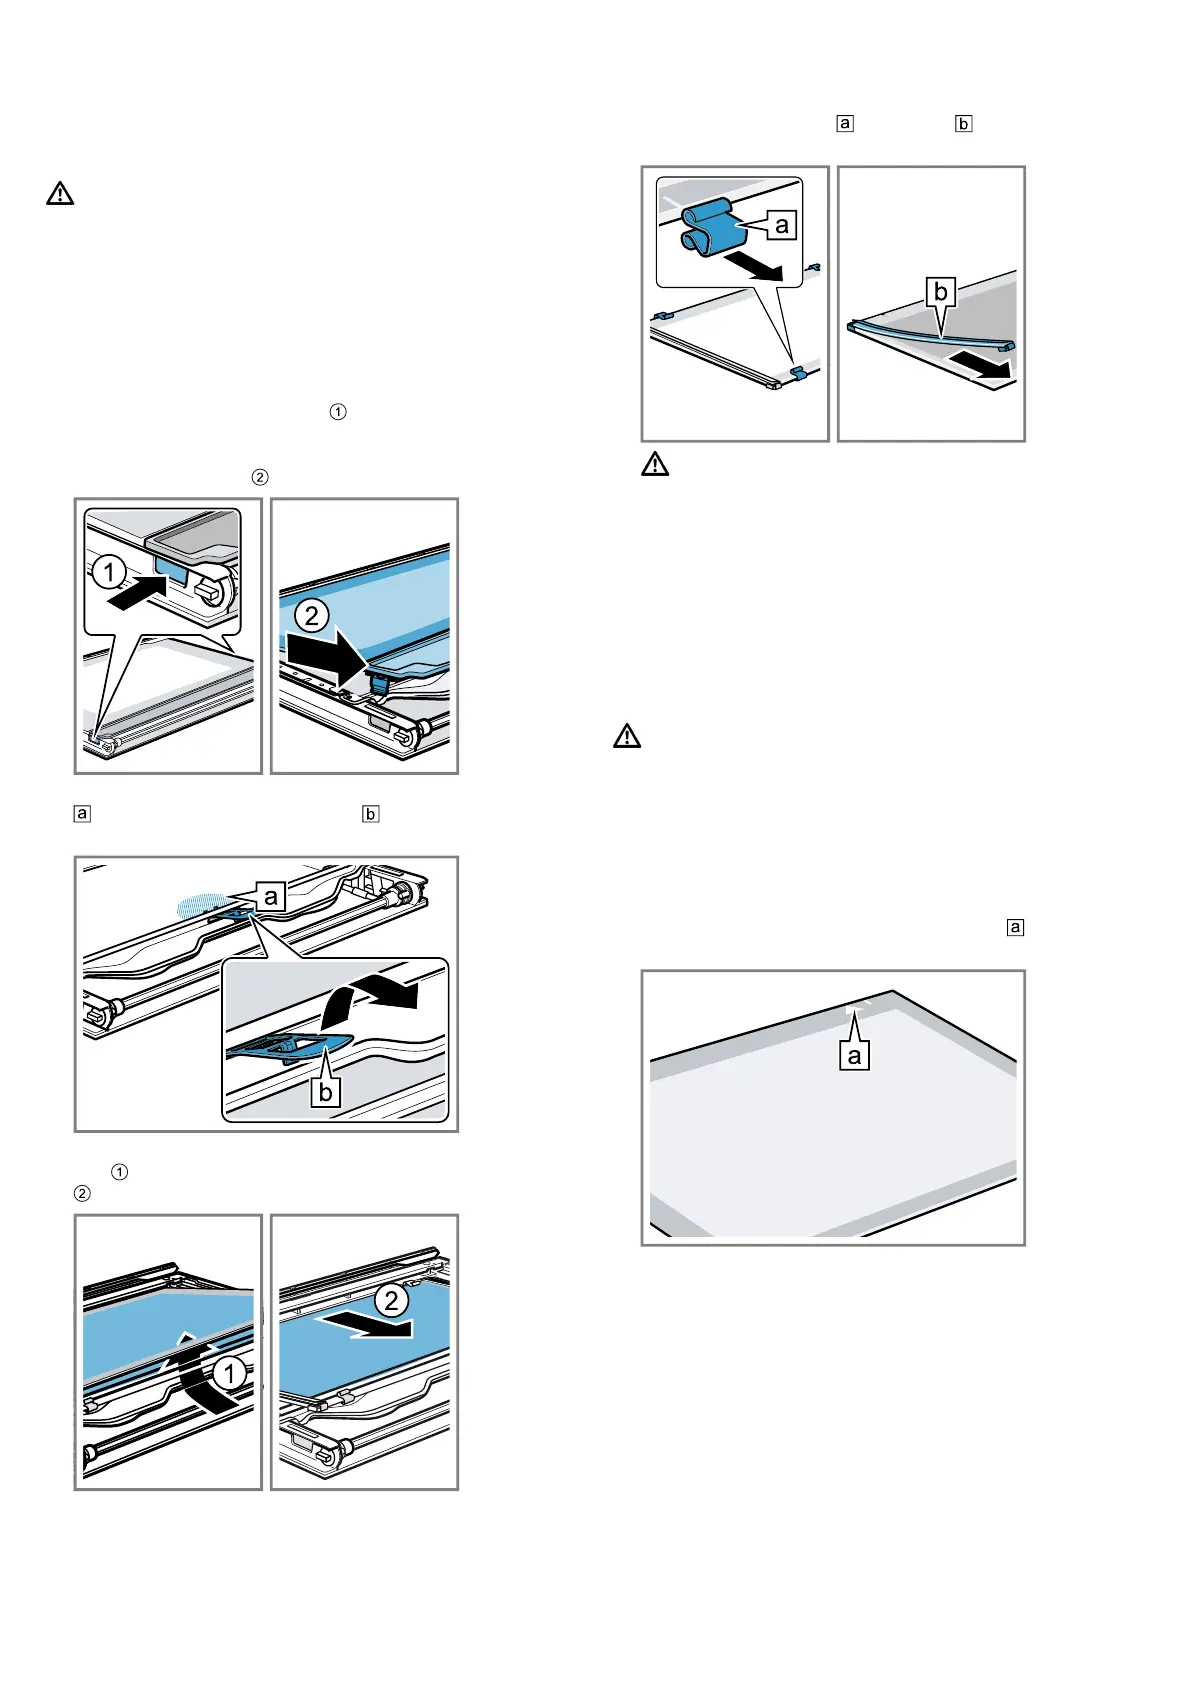
1.
Lay the appliance door with the front side facing
down on a flat surface that is soft and clean.
2.
Push on the left- and right-hand side of the appli-
ance door from the outside until the inner pane is
released on both sides.
3.
Carefully lift the inner pane and remove it in the dir-
ection of the arrow .
4.
Push down on the intermediate pane in the area of
, and carefully lift the retainer until you are able
to pull it out.
5.
Lift the first and second intermediate panes from be-
low and remove them in the direction of the arrow
.
6.
Remove the spacers and seals for cleaning, if
required.
7.
WARNING‒Risk of injury!
Scratched glass in the appliance door may develop
into a crack.
▶
Do not use glass scrapers, sharp or abrasive
cleaning aids, or harsh cleaning products.
Clean the door panes on both sides with glass
cleaner and a soft cloth.
8.
Dry the door panes and refit them.
→"Fitting the door panes", Page23
17.4 Fitting the door panes
WARNING‒Risk of injury!
If a door pane or appliance door has not been installed
correctly, this is dangerous.
▶
Make sure that all of the door panes and the appli-
ance door have been correctly fitted before you
switch the appliance back on again.
1.
Tip:When fitting the door panes, make sure that
they are in the original order.
Insert the intermediate pane so that the arrow on
the right-hand side is pointing upwards.
 Loading...