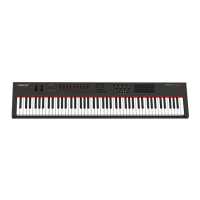
www.nektartech.com Nektar Impact LX49, LX61 & LX88 User Guide 27
MIDI Out from USB (G#2) (LX88 only)
The MIDI out jack on the back of the Impact LX88 (not available on other Impact models) can be used to route MIDI
messages directly from the Impact LX88 keyboard and controls to external hardware. This is the default operation.
It’s also possible to use the MIDI out as a USB to MIDI interface which means that if you are using music application on your
computer, you can route MIDI messages from the application to external hardware, via the build-in MIDI port. Here is how
you change the port setting:
Press the G#2 key on your keyboard to toggle the on/off setting for USB Out from USB
When the display reads {On} the MIDI output acts as a USB to MIDI interface.
The change is immediate so you can check if the setting is correct before leaving the Setup menu
USB Port Setup (A2)
Impact LX has one physical USB port however there are 2 virtual ports as you may have discovered during the MIDI setup of
your music software. The additional virtual port is used by the Impact DAW software to handle communication with your
DAW. You only need to change the USB Port Setup setting if the Impact LX setup instructions for your DAW specifically
advises that this should be done.
Setting the Virtual USB Port for Layer & Split (A2) (LX88 only)
You can set the virtual USB port output independently for Layer and Split on the Impact LX88. This allows you to for example
route the main port to one computer music application and the second output to another, but play both by just switching
layer or split on. Here is how you set the USB output port:
Press the A2 key on your keyboard to select USB Port Setup. The display show the current value {0,1 or 2}
Press and hold the [Layer] or [Split] button. The selected button will now blink and the display reads {LP1} for Layer or
{SP1} for split. By default port 1 is selected for both Layer and Split
Change the value to {LP2} or {SP2} (depending on the function you selected) using the keys with the -/+ symbols
screened above (C3/C#3)
Press Enter (C5) to accept the change
Note: If you are using Nektar DAW integration it’s not possible to route the second port to another application. Both ports are
required for the DAW integration to work correctly.
 Loading...