2
INSTALLATION REQUIREMENTS
Locate a level floor position ahead of piping into water heater for placement.
Unit must be installed at least 10 feet ahead of the inlet to a water heater to prevent damage due to back-up hot
water. DO NOT install the unit in an area of direct sunlight or where freezing temperatures may occur!
Locate the unit near an unswitched, 120 volt / 60 Hz grounded electrical outlet.
Check for distance and proper drain installation (e.g. floor drain, washing machine standpipe). Determine type and
size of piping required for filter connection (e.g. copper, galvanized, PVC plastic).
NOTE: If household plumbing is galvanized and you intend to make the installation with copper (or vice versa),
obtain dielectric unions to prevent dissimilar metal corrosion.
CAUTION: If sweat soldering copper pipe (remember to always use lead free solder and flux), cover yoke and
bypass valve with wet rags to prevent heat damage to connections and control valve. If using PVC or plastic pipe,
primers and solvent cements specifically recommended for use with potable water are required.
NOTE: All plumbing lines not requiring “soft” water should be connected “upstream” of the softener, if installed.
(See Typical Installation Diagrams.)
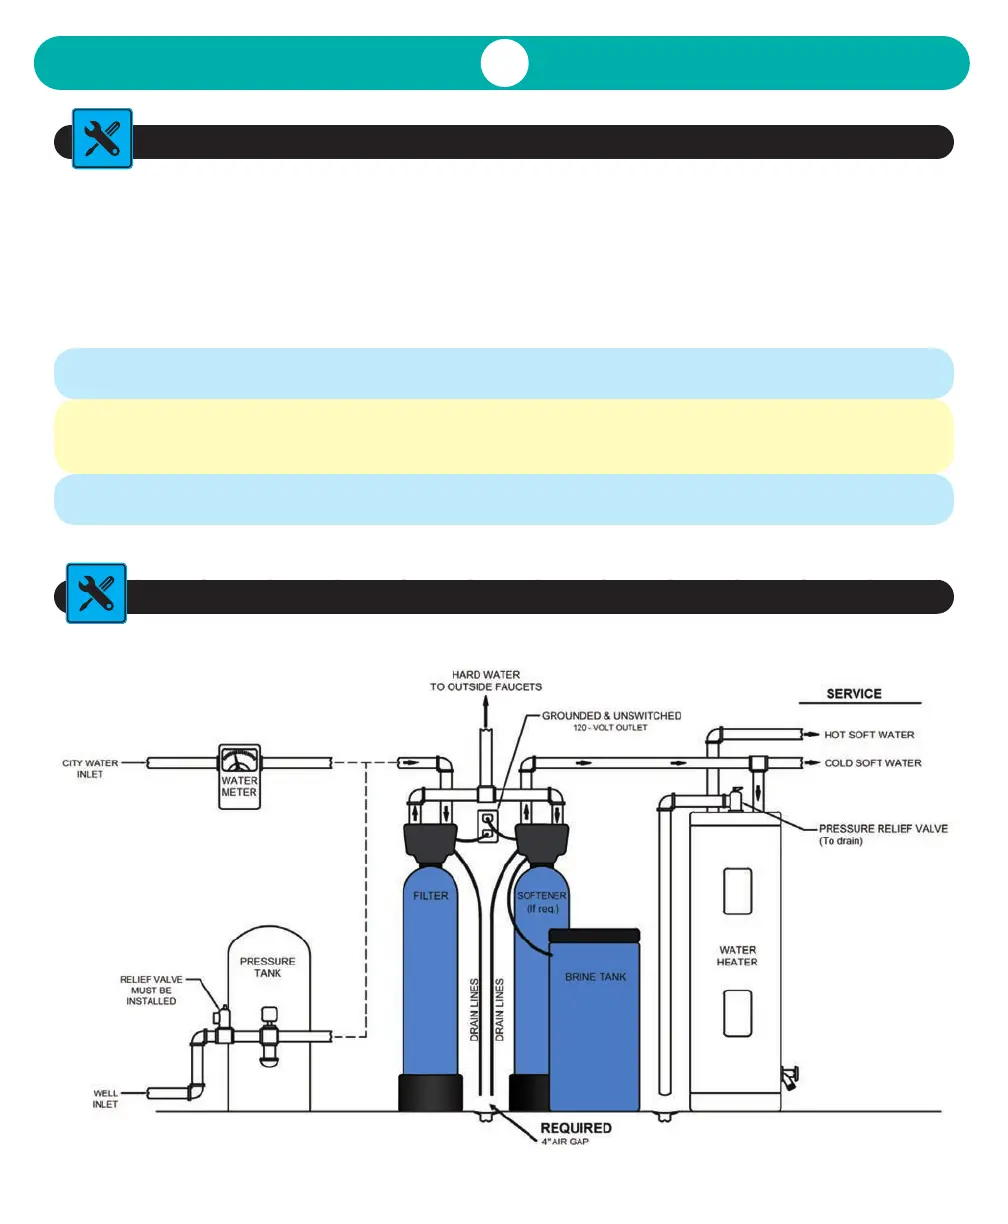
TYPICAL TWO SYSTEM ILLUSTRATION
(Incoming Water From Left Side)
Installation Requirements AIO Plus Connected Series
 Loading...