11
Questions? Call Neogen at 800/234-5333 or 517/372-9200
Park optics
Selecting Park optics will move the optical head to a position where
it can be removed for service purposes. This option should only be
used by Neogen Technical Services.
Network settings
Network settings allow the user to configure the reader’s Ethernet
connection. Users can choose between DHCP or a static network, en-
ter an IP address and enter a subnet mask.
The default setting is DHCP. To switch to a static IP address:
1. Touch the gears (Settings) icon on the Home screen.
2. Touch the Administrator settings icon. Enter the password
and press the green check mark to confirm.
3. Select Network.
4. Select Static by touching the box next to the word. It will turn
white once selected.
5. Using the touch screen keypad, input the IP address and the
subnet mask.
6. Press the green check mark to save the settings.
Reset to factory default
For Neogen Technical Services use only.
Factory settings
For Neogen Technical Services use only.
6.6 Running a test
Prior to placing the sample in the reader:
1. Touch the test tube (Run test) icon.
2. Touch the Test type icon and select the appropriate test (e.g.,
ANSR for Salmonella). Once the desired choice has been se-
lected, touch the green check mark to confirm or the red X to
choose a different test.
3. The screen will display the selected test type. Touch the green
check mark to confirm or the red X to go back and select a dif-
ferent test type.
4. Enter the test name by using the touch screen. Once the name
is input, press the
green check mark to
confirm. NOTE: The bar
code scanner function
is not yet validated.
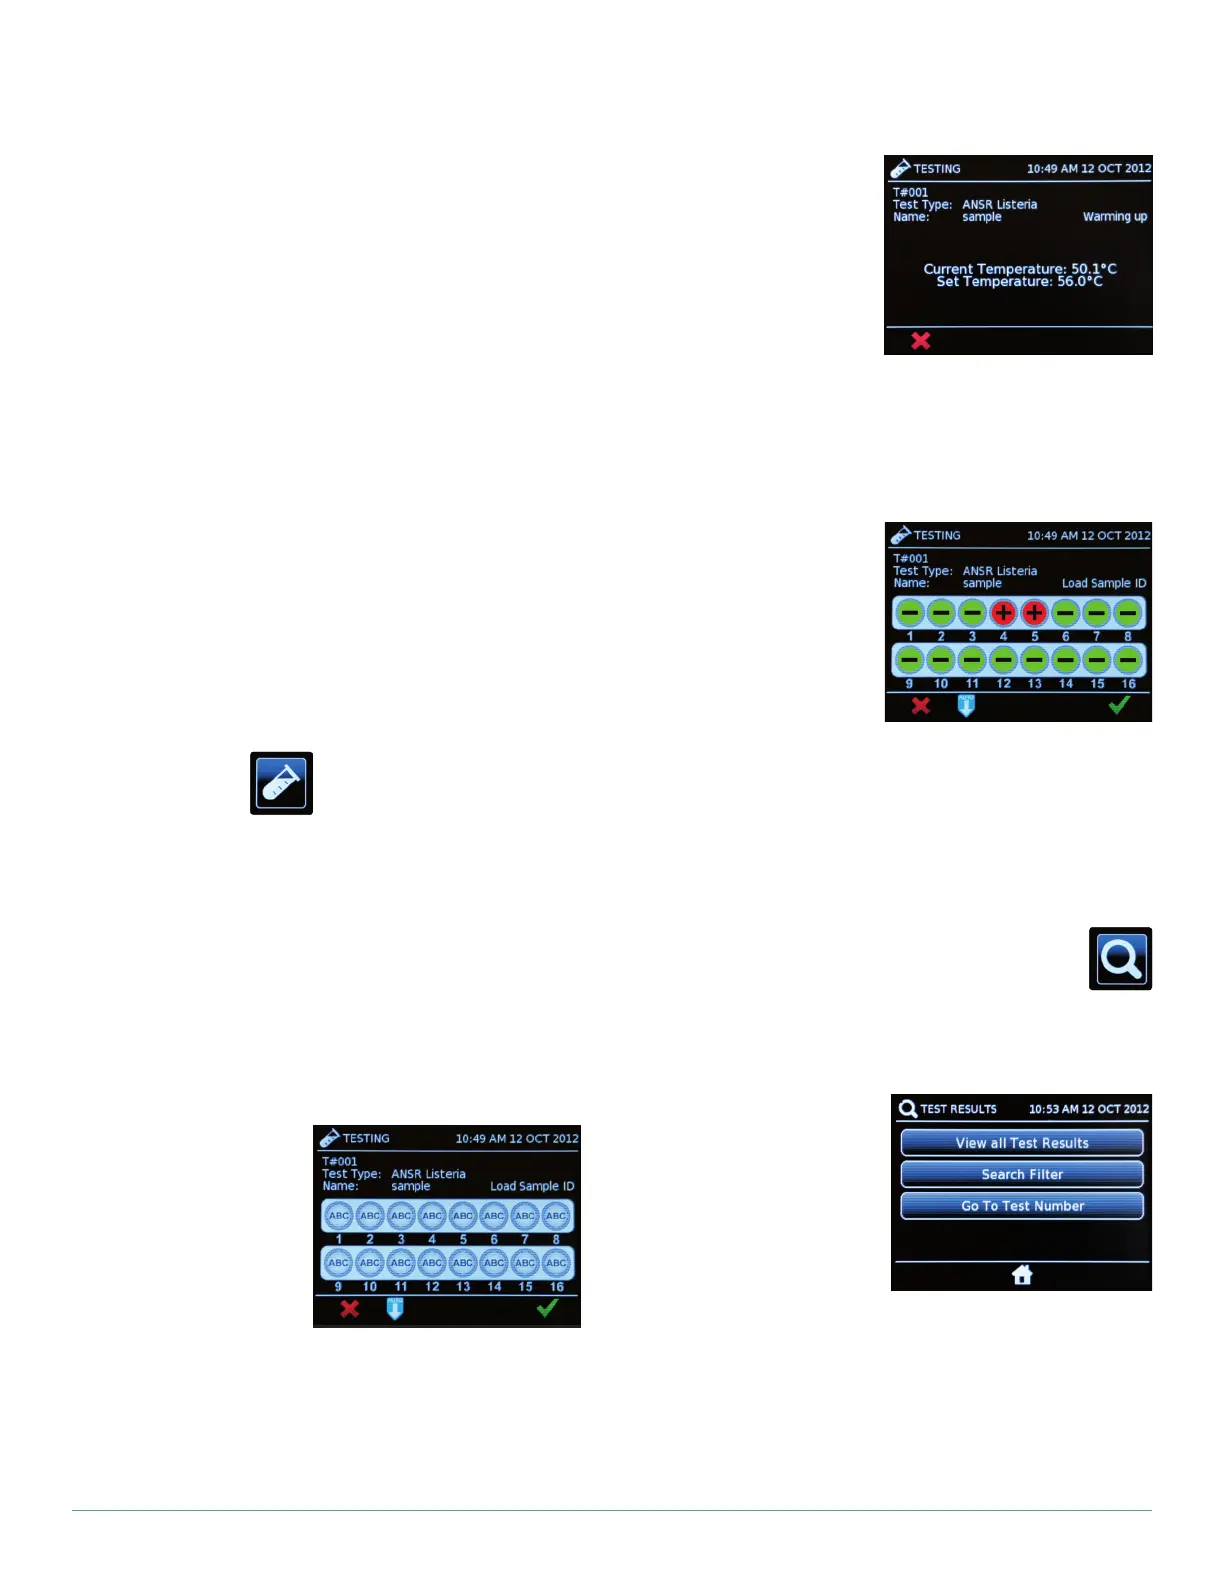
5. The screen will dis-
play the individual test
tubes. Touch the de-
sired tubes and input
the sample ID using the touch screen. Press the green check
mark to confirm. NOTE: Users also may use the Autofill option
to fill in sample IDs. To do this, enter the sample ID of the first
test tube by using the touch screen. Once the sample ID is
confirmed, touch the blue Autofill button at the bottom center
of the screen. This will autofill the remaining test tube IDs with
sequential numbers from the first tube. This option only is avail-
able when beginning from the first tube. The sample ID must
have a number at the end to use Autofill.
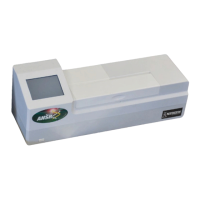
6. Once the reader reach-
es 56°C and the start
button appears, place
the samples into the
reader. NOTE: For in-
structions on preparing
samples and reagents,
and on loading them
into the reader, see the
instructions that came with the ANSR test kit. Ensure the per-
manent caps are placed onto the tubes to avoid contamina-
tion.
7. To begin running the test, press the green Start test arrow on
the touch screen.
8. Once the test has been
completed, the touch
screen will display the
results. To view data
and a graph for a spe-
cific tube, touch the
tube on the screen and
then press the graph
icon in the lower left
corner. To return to the overall results, press the white back
arrow in the lower left corner of the screen.
9. To print results, press the Print icon in the lower right corner of
the touch screen. NOTE: Printing must be set up prior to using
this function. For instructions, see Section 6.2.
6.7 Search
The Search function is marked by a magnifying glass icon
on the Home screen.
View all test results
This function shows the test results of the most recent test run. Users
can use the arrows to see other tests in order of newest to oldest.
1. Touch the magnifying
glass (Search) icon on
the Home screen.
2. Select View all test
results.
3. Use to the arrows to
scroll through the tests
and select the desired
choice.
Search filter
This option allows the user to search by test name, test type, test
number and by sample ID.
1. Touch the magnifying glass (Search) icon on the Home screen.
2. Select Search filter.
 Loading...