Steps
1. If you are not already grounded, properly ground yourself.
2. Open the air duct:
a. Press the locking tabs on the sides of the air duct in toward the middle of the controller module.
b. Slide the air duct toward the back of the controller module, and then rotate it upward to its completely
open position.
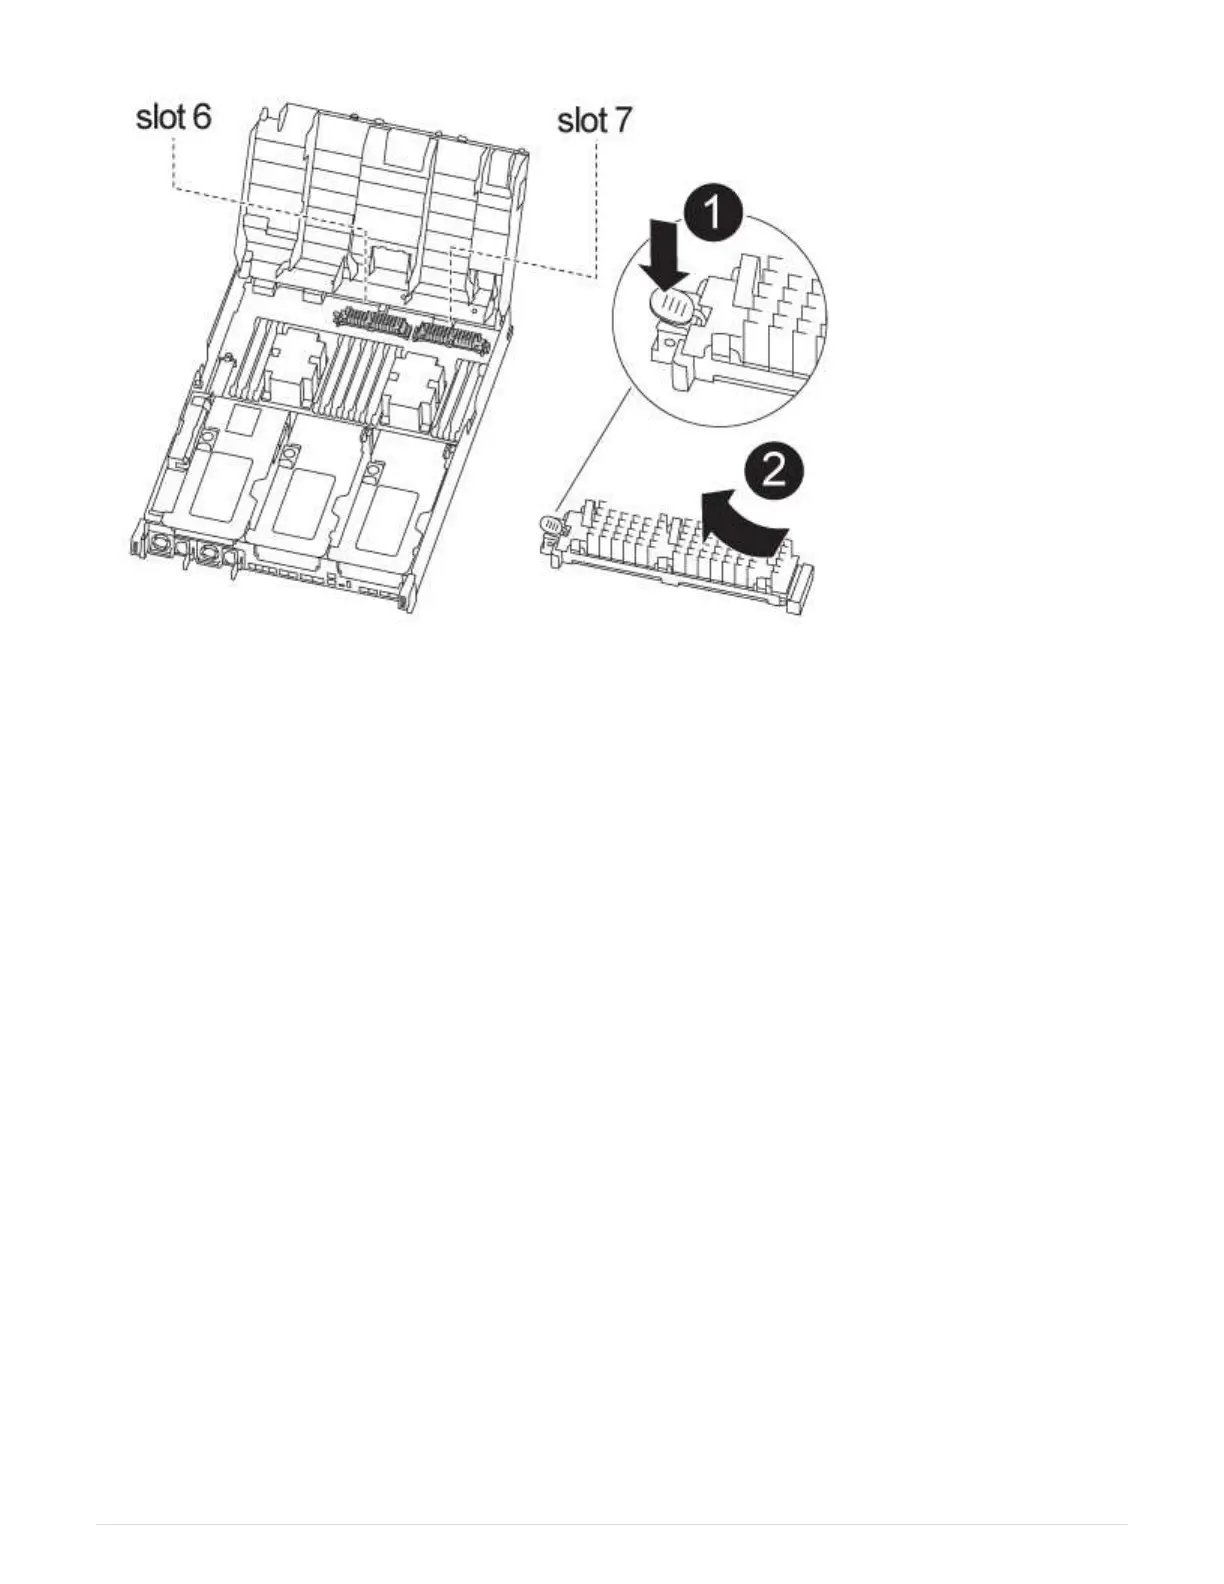
3. Using the FRU map on the controller module, locate the failed caching module and remove it:
Depending on your configuration, there may be zero, one, or two caching modules in the controller module.
The failed caching module’s LED is lit.
a. Press the blue release tab.
The caching module end rises clear of the release tab.
b. Rotate the caching module up and slide it out of the socket.
4. Install the replacement caching module:
a. Align the edges of the replacement caching module with the socket and gently insert it into the socket.
b. Rotate the caching module downward toward the motherboard.
c. Placing your finger at the end of the caching module by the blue button, firmly push down on the
caching module end, and then lift the locking button to lock the caching module in place.
5. Close the air duct:
a. Rotate the air duct down to the controller module.
b. Slide the air duct toward the risers to lock it in place.
1345
 Loading...


