A configuration with two quad-port SAS HBAs and two stacks of disk shelves with IOM12 modules is used
for the worksheet examples.
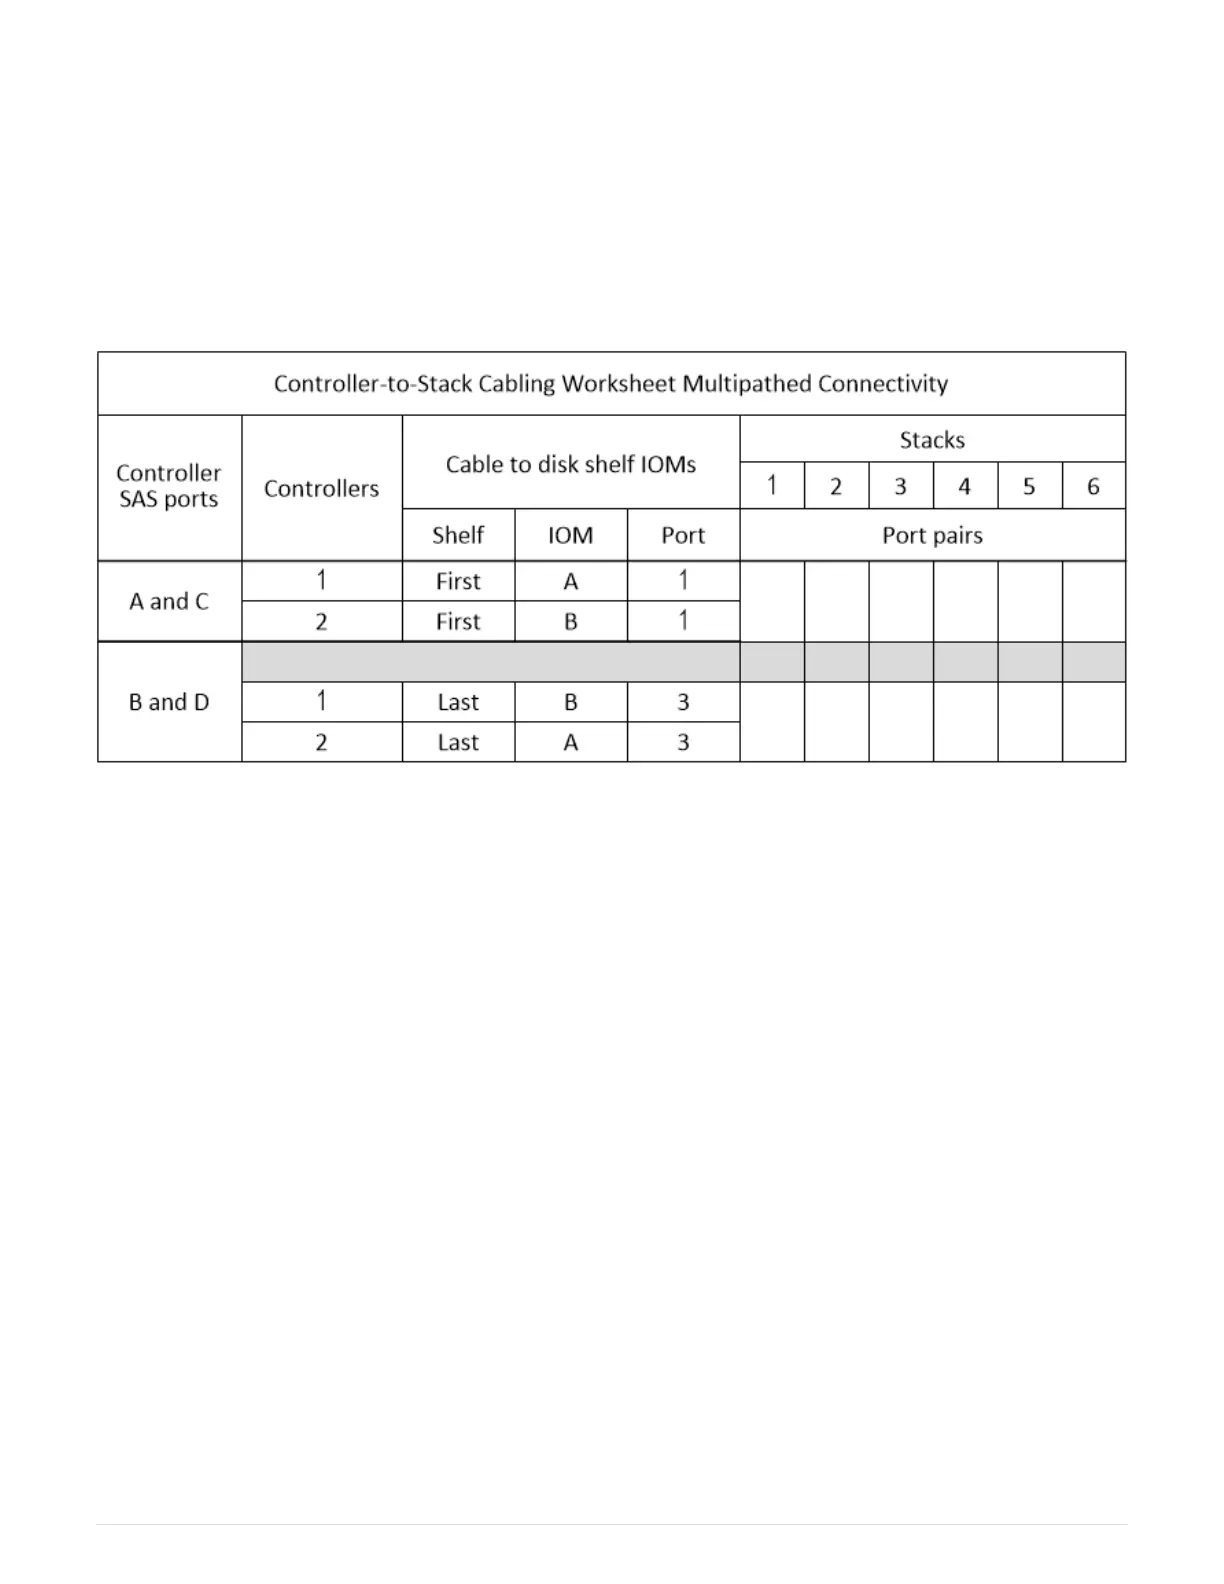
• The worksheet template allows for up to six stacks; you need to add more columns if needed.
• If needed, you can refer to the
SAS cabling rules for information about supported configurations, the
controller slot numbering convention, shelf-to-shelf connectivity, and controller-to-shelf connectivity
(including use of port pairs).
• If needed, after you complete the worksheet, you can refer to
How to read a worksheet to cable controller-
to-stack connections for multipathed connectivity
Steps
1. In the boxes above the gray boxes, list all SAS A ports on your system, and then all SAS C ports on your
system in sequence of slots (0,1, 2, 3, and so on).
For example: 1a, 2a, 1c, 2c
2. In the gray boxes, list all SAS B ports on your system, and then all SAS D ports on your system in
sequence of slots (0,1, 2, 3 and so on).
For example: 1b, 2b, 1d, 2d
3. In the boxes below the gray boxes, rewrite the D and B port list so that the first port in the list is moved to
the end of the list.
For example: 2b, 1d, 2d, 1b
4. Circle (designate) a port pair for each stack.
When all port pairs are being used to cable the stacks in your system, circle port pairs in the order in which
they are defined (listed) in the worksheet.
For example, in a multipath HA configuration with eight SAS ports and four stacks, port pair 1a/2b is cabled
to stack 1, port pair 2a/1d is cabled to stack 2, port pair 1c/2d is cabled to stack3, and port pair 2c/1b is
cabled to stack 4.
1603
 Loading...


