Leave the cables in the cable management device so that when you reinstall the cable management
device, the cables are organized.
4. Remove and set aside the cable management devices from the left and right sides of the controller module.
5. Remove the controller module from the chassis:
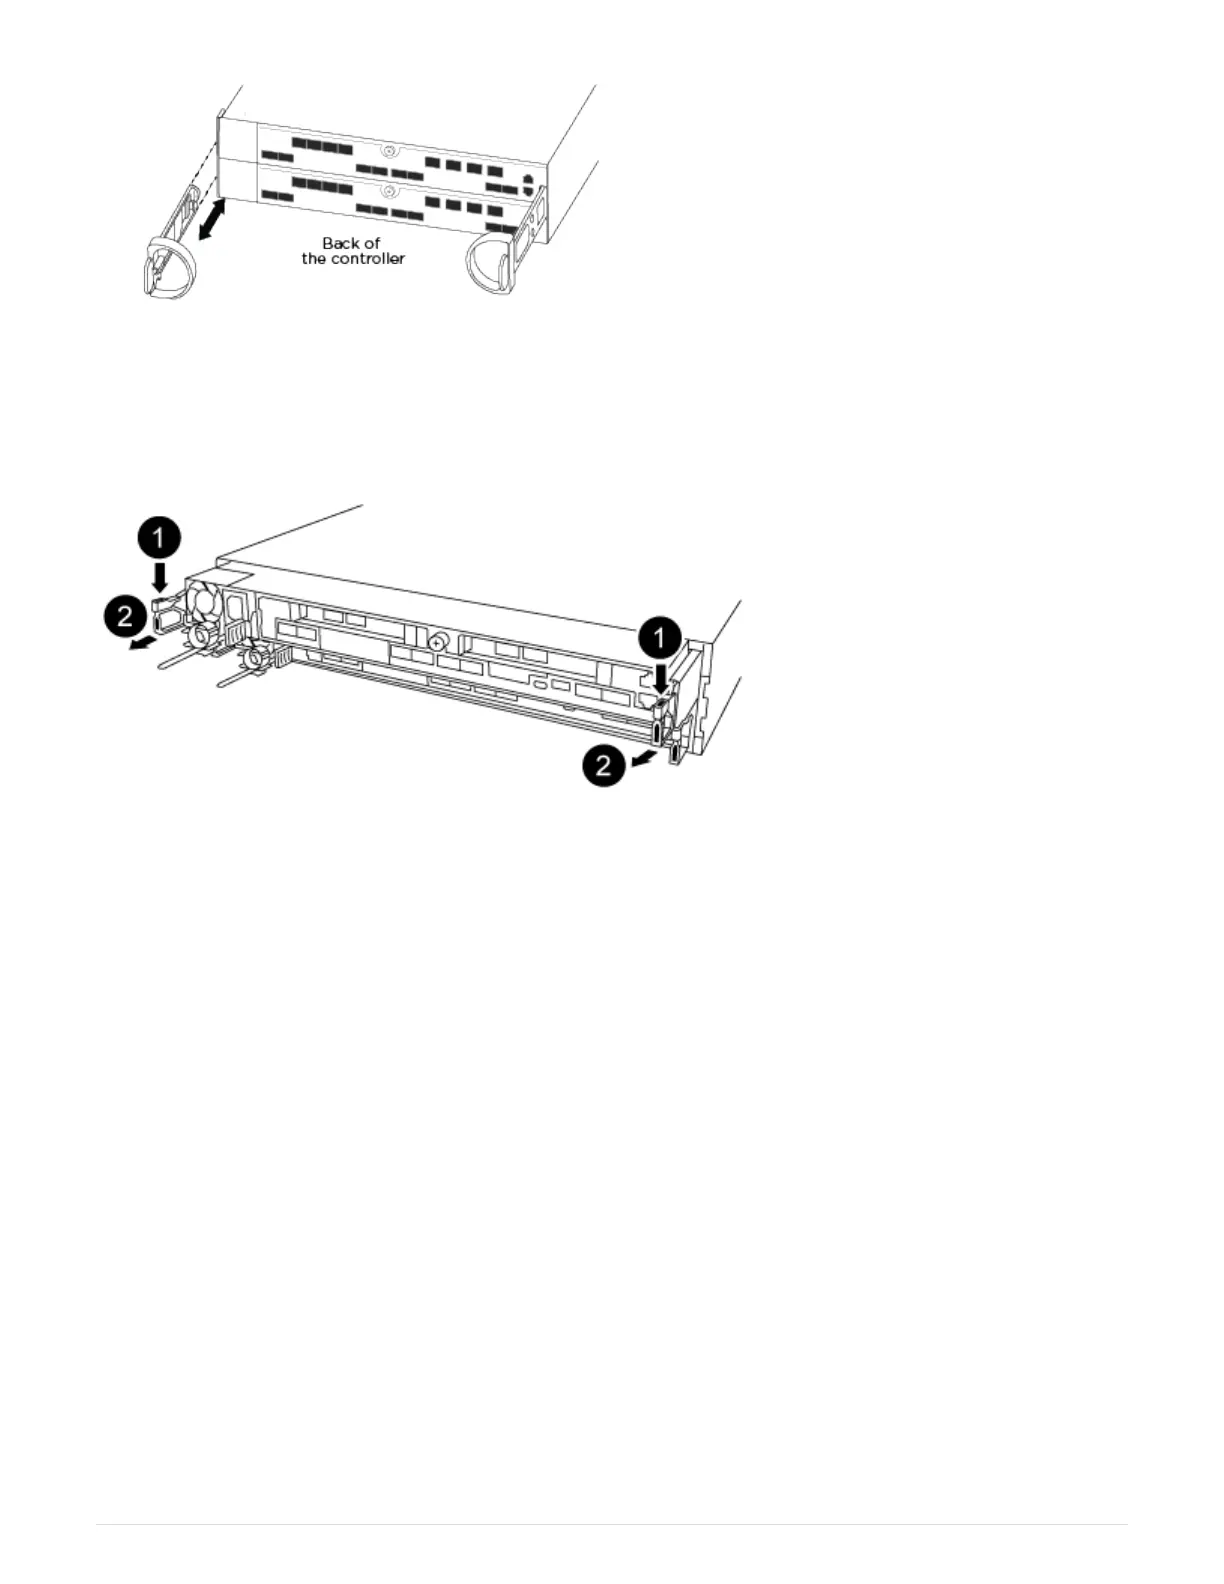
a. Insert your forefinger into the latching mechanism on either side of the controller module.
b. Press down on the orange tab on top of the latching mechanism until it clears the latching pin on the
chassis.
The latching mechanism hook should be nearly vertical and should be clear of the chassis pin.
c. Gently pull the controller module a few inches toward you so that you can grasp the controller module
sides.
d. Using both hands, gently pull the controller module out of the chassis and set it on a flat, stable surface.
Step 3: Replace system DIMMs
Replacing a system DIMM involves identifying the target DIMM through the associated
error message, locating the target DIMM using the FRU map on the air duct or the lit LED
on the motherboard, and then replacing the DIMM.
1. Rotate the air duct to the open position.
2. Locate the DIMMs on your controller module.
442
 Loading...


