◦ For SANtricity System Manager (version 11.60 and above) — Download the CLI package (zip file)
from System Manager. Go to Settings
› System › Add-ons › Command Line Interface. You can then
issue CLI commands from an operating system prompt, such as the DOS C: prompt.
◦ For SANtricity Storage Manager/Enterprise Management Window (EMW) — Follow the instructions
in the express guide to download and install the software. You can run CLI commands from the EMW
by selecting Tools
› Execute Script.
Duplex configuration requirements
If the controller shelf has two controllers (duplex configuration), you can replace a controller canister while your
storage array is powered on and performing host I/O operations, as long as the following conditions are true:
• The second controller canister in the shelf has Optimal status.
• The OK to remove field in the Details area of the Recovery Guru in SANtricity System Manager displays
Yes, indicating that it is safe to remove this component.
Simplex configuration requirements
If you have only one controller canister (simplex configuration), data on the storage array will not be accessible
until you replace the controller canister. You must stop host I/O operations and power down the storage array.
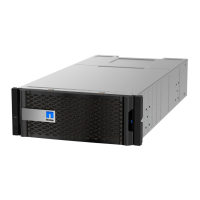
Add second controller canister in E2800
You can add a second controller canister in the E2800 array.
About this task
This task describes how to add a second controller canister to the simplex version of either a E2812 controller
shelf, E2824 controller shelf, or EF280 flash array. This procedure is also referred to as a simplex-to-duplex
conversion, which is an online procedure. You can access data on the storage array while you perform this
procedure.
What you’ll need
• A new controller canister with the same part number as the currently installed controller canister. (See step
1 to verify the part number.)
• A new HIC that is identical to the HIC in the currently installed controller canister (only necessary if the
currently installed controller canister includes a host interface card).
• An ESD wristband, or take other antistatic precautions.
• A #1 Phillips screwdriver.
• Labels to identify the new cables. For information about compatible hardware, refer to the
NetApp
Interoperability Matrix
or the NetApp Hardware Universe.
• All cables, transceivers, switches, and host bus adapters (HBAs) needed to connect the new controller
ports.
• A management station with a browser that can access SANtricity System Manager for the controller. (To
open the System Manager interface, point the browser to the controller’s domain name or IP address.)
Step 1: Verify the new controller’s part number
Confirm that the new controller has the same part number as the currently installed controller.
Steps
118
 Loading...


