8. Place the drive on an antistatic, cushioned surface away from magnetic fields.
9. Wait 30 seconds for the software to recognize that the drive has been removed.
If you accidentally remove an active drive, wait at least 30 seconds, and then reinstall it. For
the recovery procedure, refer to the storage management software.
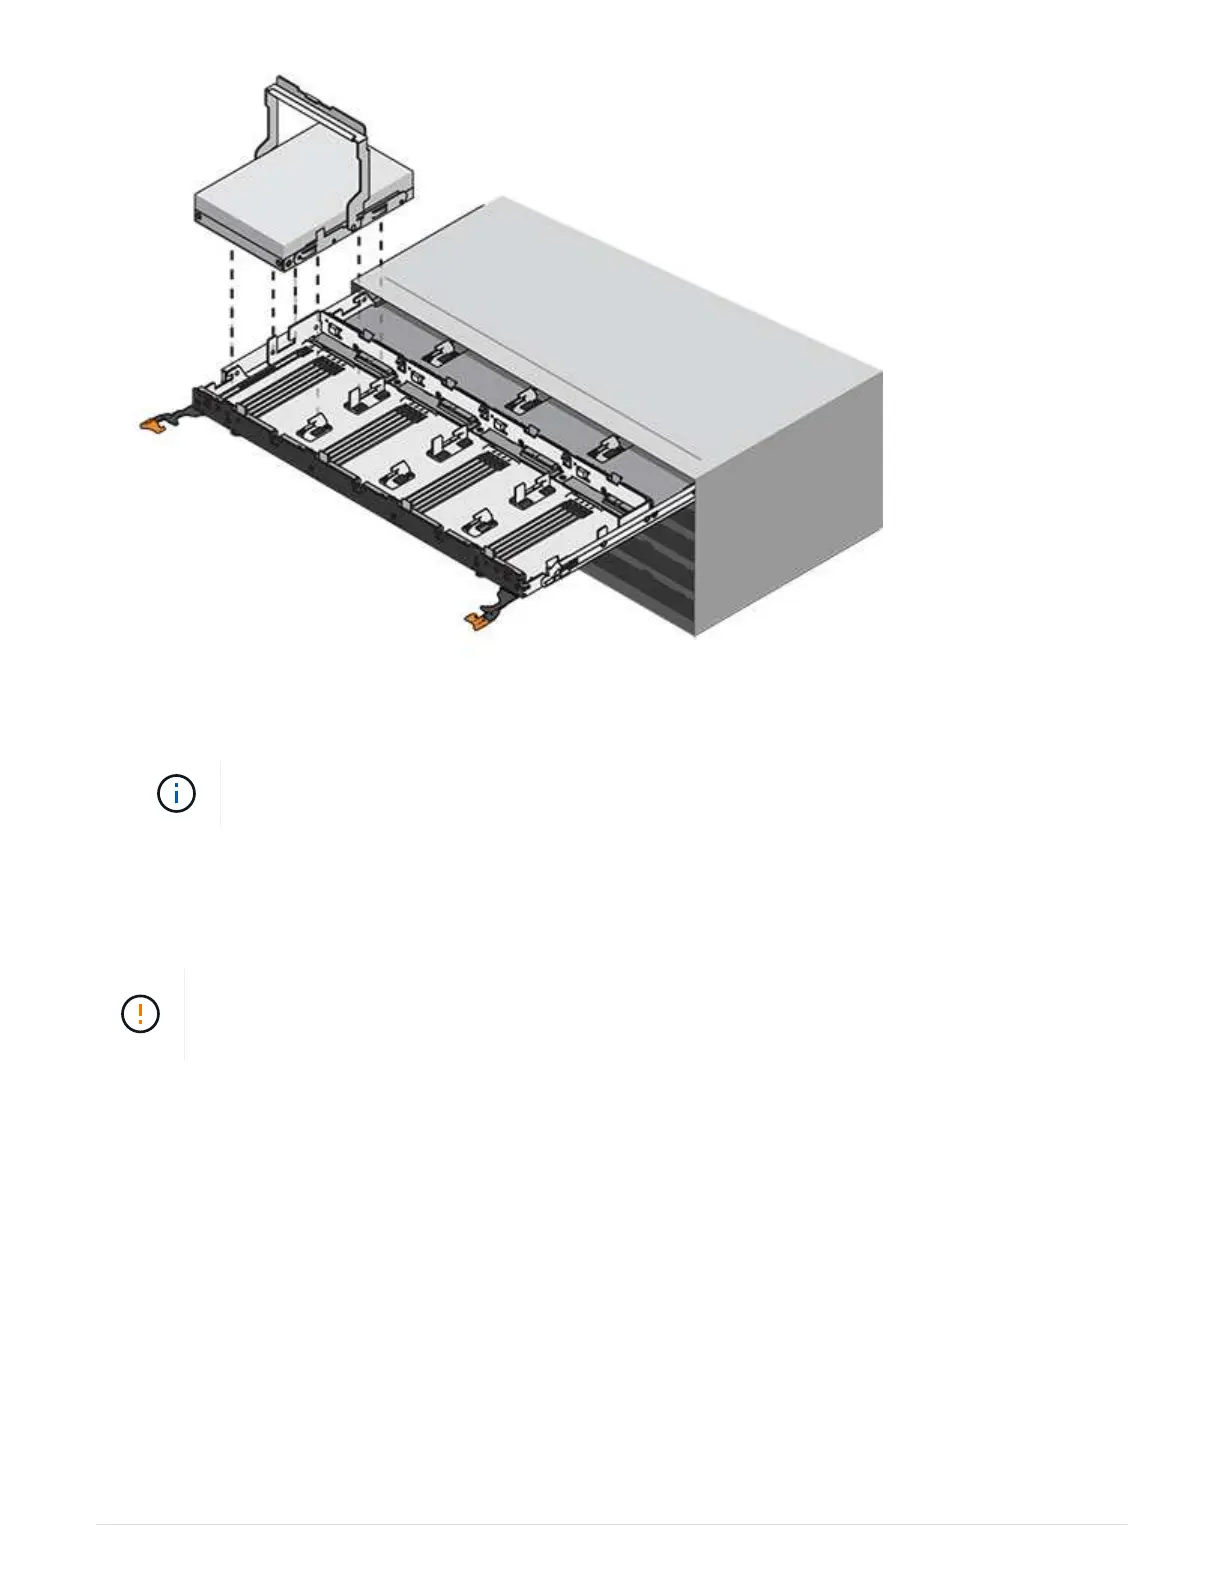
Step 3: Install new drive (60-drive)
Install a new drive to replace the failed one.
Possible loss of data access — When pushing the drive drawer back into the enclosure, never
slam the drawer shut. Push the drawer in slowly to avoid jarring the drawer and causing damage
to the storage array.
Steps
1. Raise the cam handle on the new drive to vertical.
2. Align the two raised buttons on each side of the drive carrier with the matching gap in the drive channel on
the drive drawer.
47
 Loading...


