• If a warning is displayed indicating that this command could not be completed, you must stop host I/O activity before
removing the drawer. The warning is displayed because one or more drives in the affected drawer are in volume groups
or disk pools that do not have Drawer Loss Protection. To avoid losing data, you must complete the next steps to stop
host I/O activity and to power off the drive shelf and the controller shelf.
4. Ensure that no I/O operations are occurring between the storage array and all connected hosts. For example, you can perform
these steps:
• Stop all processes that involve the LUNs mapped from the storage to the hosts.
• Ensure that no applications are writing data to any LUNs mapped from the storage to the hosts.
• Unmount all file systems associated with volumes on the array.
Note: The exact steps to stop host I/O operations depend on the host operating system and the configuration, which are
beyond the scope of these instructions. If you are not sure how to stop host I/O operations in your environment, consider
shutting down the host.
Attention: Possible data loss – If you continue this procedure while I/O operations are occurring, the host application
might lose data because the storage array will not be accessible.
5.
If the storage array participates in a mirroring relationship, stop all host I/O operations on the secondary storage array.
6. Wait for any data in cache memory to be written to the drives.
The green Cache Active LED on the back of each controller is on when cached data needs to be written to the drives. You
must wait for this LED to turn off.
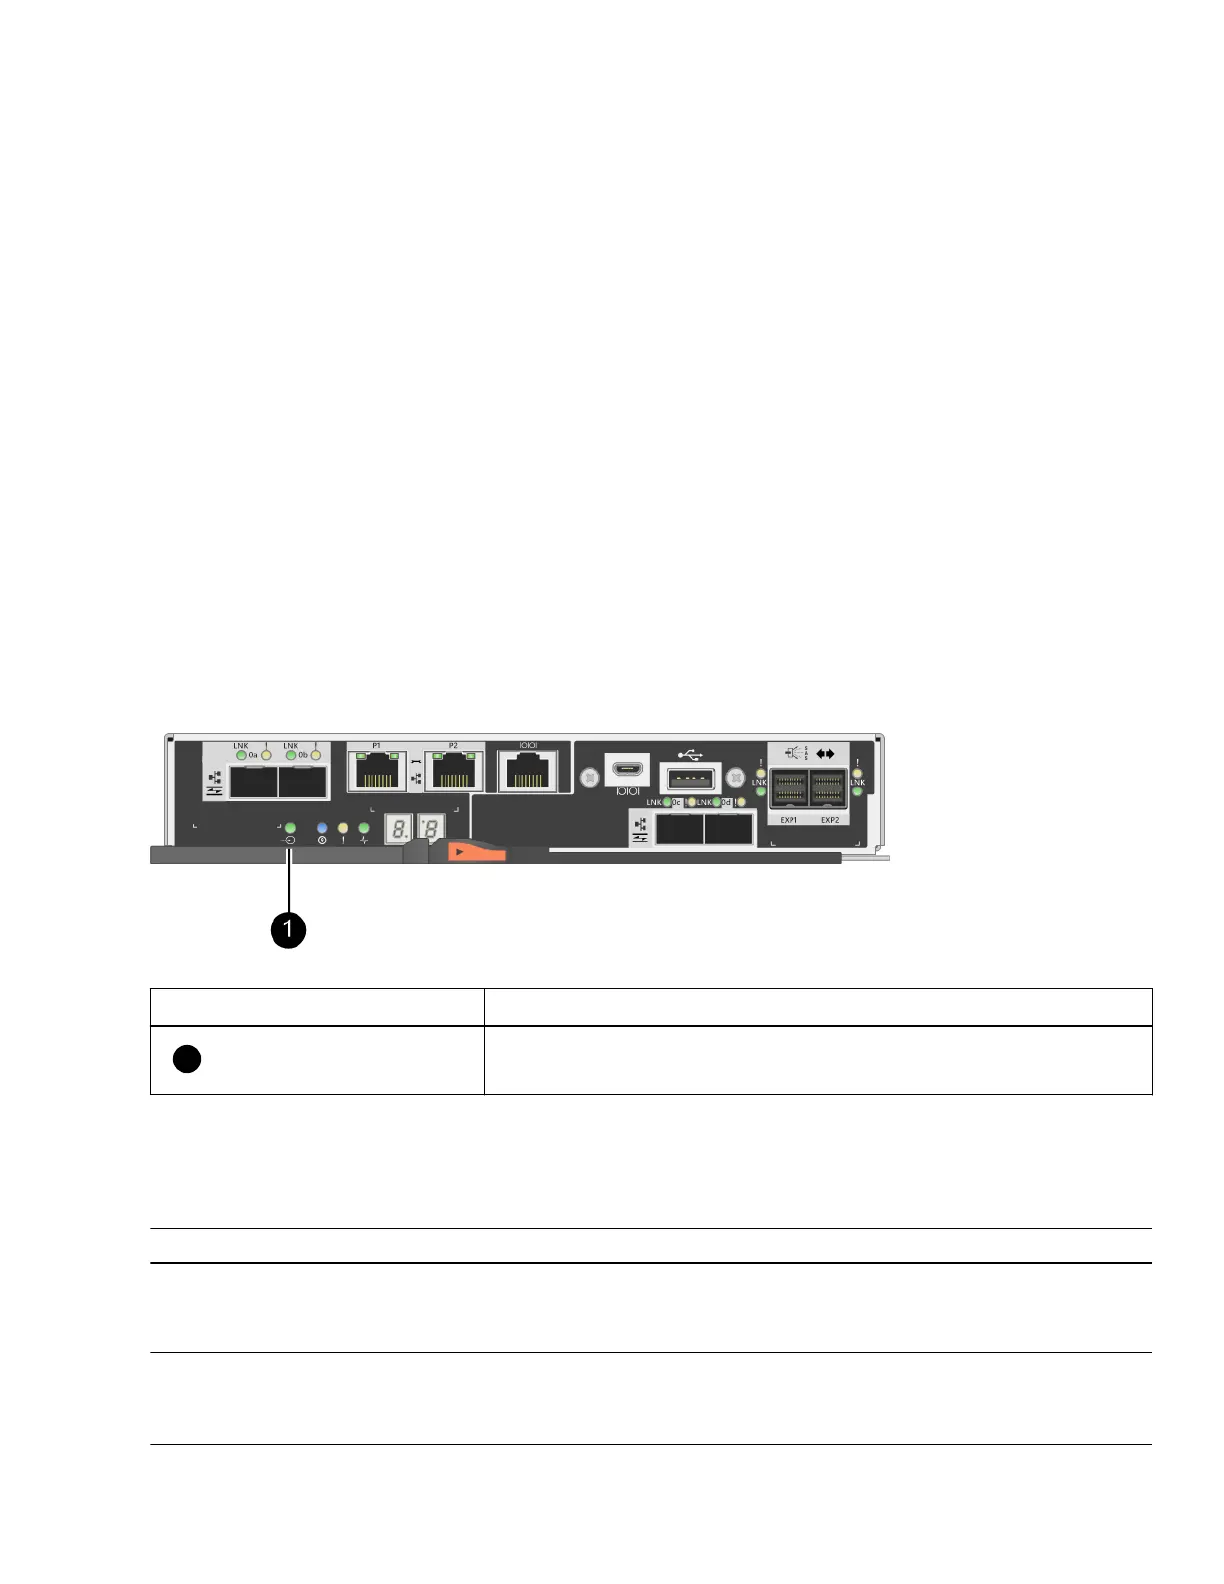
Callout
Type of host ports
Cache Active LED
7. From the Home page of SANtricity System Manager, select View Operations in Progress.
8. Wait for all operations to complete before continuing with the next step.
9. Power off the shelves as follows:
If you are...
Follow these steps...
Replacing a drive drawer in a
controller shelf or expansion shelf
WITH Drawer Loss Protection
There is NO need to power off any of the shelves. This operation can be done online, because
the Set Drawer Service Action Allowed Indicator CLI command completed
successfully.
Replacing a drive drawer in a
controller shelf without Drawer Loss
Protection
a. Turn off both power switches on the controller shelf.
b. Wait for all LEDs on the controller shelf to go dark.
4
 Loading...


