Removing a drive drawer
After removing the right and left cable chains, you can remove the drive drawer from the drive tray. Removing a drive drawer
entails sliding the drawer part of the way out, recording the locations of the drives, removing the drives, and removing the drive
drawer.
Before you begin
• You have removed the right and left cable chains for the drive drawer.
• You have replaced the right and left fan canisters.
• You have obtained a permanent marker to note the exact location of each drive as you remove the drive from the drawer.
Steps
1.
Remove the bezel from the front of the drive tray.
2.
Unlatch the drive drawer by pulling out on both levers.
3.
Using the extended levers, carefully pull the drive drawer out until it stops. Do not completely remove the drive drawer from
the drive tray.
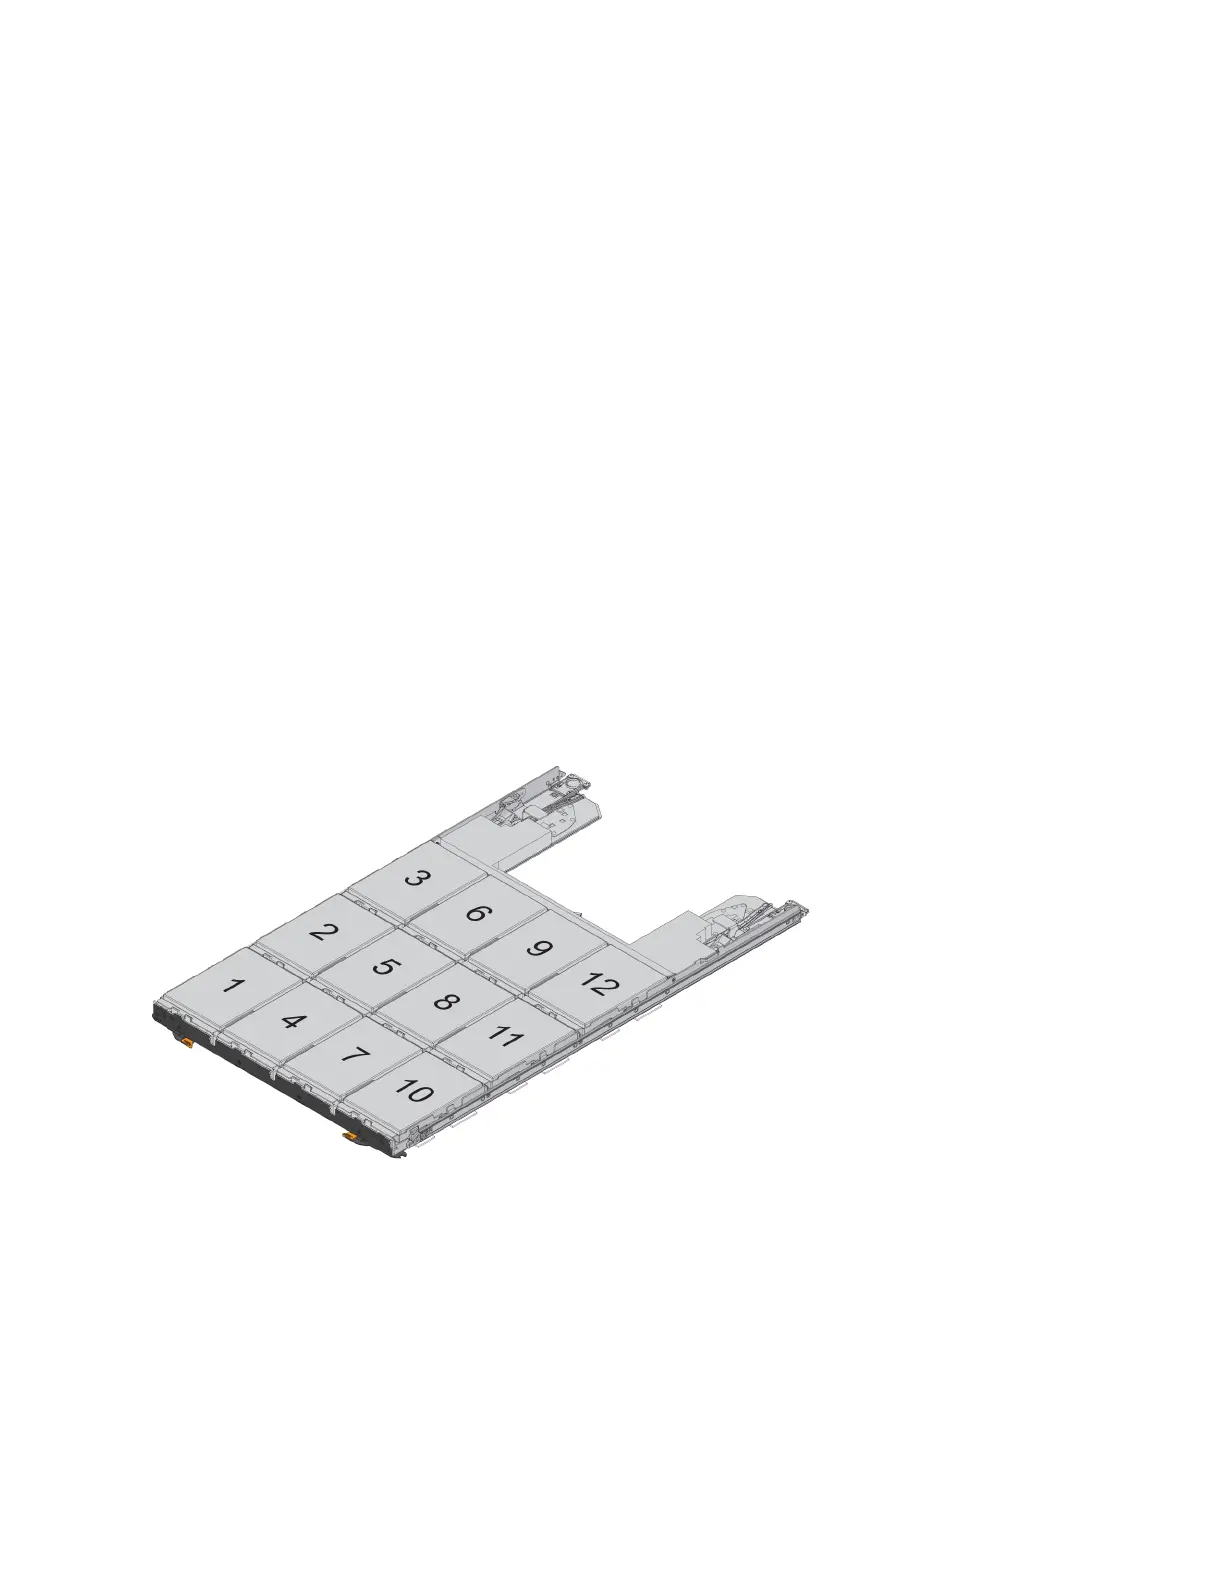
4. If logical unit numbers (LUNs) have already been created and assigned, use a permanent marker to note the exact location of
each drive. For example, using the following drawing as a reference, write the appropriate slot number on the top of each
drive.
Attention: Possible loss of data access – Make sure to record the exact location of each drive before removing it.
5. Follow these steps to remove the drives from the drive drawer:
a. Raise the drive handle to vertical.
b. Use the handle to lift the drive from the drive drawer.
Removing a drive drawer
9