Do you have a question about the NETGEAR RAX200 and is the answer not in the manual?
Details on unpacking the router, power adapter, and Ethernet cable from the package.
Information on the status LEDs and buttons located on the router's top panel.
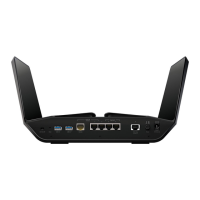
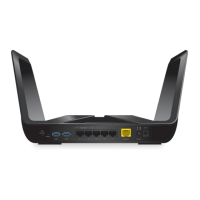
Diagram and description of the rear panel connectors and buttons on the router.
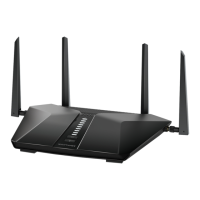
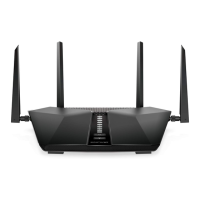
Instructions on how to extend the router's antennas before installation.
Details about the information found on the router's label, including login credentials.
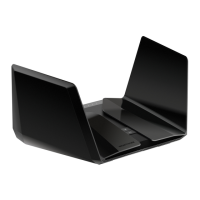
Guidelines for optimal router placement to ensure good WiFi signal strength and performance.
Step-by-step instructions on how to connect the router to a modem and power source.
Explains ways to connect to the router's WiFi or wired networks for initial setup.
Steps to connect a computer to the router using an Ethernet cable for wired network access.
Guide on locating and connecting to the router's WiFi network name (SSID) and password.
Instructions for connecting WPS-enabled devices to the router's WiFi network using the WPS button.
Explanation of different login types associated with the router and internet service.
Guide on using the Nighthawk app for router installation, management, and updates.
Instructions on accessing the router's web interface via a web browser for configuration.
Steps for automatically configuring the router's Internet connection using the setup wizard.
Procedure for logging into the router's web interface using admin credentials.
How to change the display language of the router's web interface from Auto to a selected language.
Guide to using the setup wizard to automatically detect and configure Internet settings.
Steps for manually configuring the router's Internet connection settings.
Configuration steps for setting up an Internet connection that does not require a login.
Configuration steps for setting up an Internet connection that requires a login.
Instructions for configuring the Multi-Gig port for high-speed Internet connections.
Guide to setting up Internet port aggregation for multi-gigabit speeds.
Steps to configure the router for IPv6 Internet connectivity.
Guidelines and rules for correctly formatting IPv6 addresses.
Instructions for automatically detecting and configuring IPv6 Internet connection settings.
Steps to establish an IPv6 connection using a 6to4 tunnel.
Configure the router to act as a Layer 2 switch for IPv6 packets.
Steps to configure the router with fixed IPv6 addresses for the WAN connection.
Configure the router for an IPv6 Internet connection using DHCP.
Steps to configure the router for an IPv6 PPPoE Internet connection.
Guide to setting up an IPv6 Internet connection via auto configuration.
Information and steps for managing the Maximum Transmission Unit (MTU) size.
Explanation of MTU and its role in data packet transmission across networks.
Instructions on how to adjust the MTU size setting in the router's WAN setup.
Configure rules to permit or deny Internet access for devices on the network.
Set up rules to block specific Internet sites using keywords or domain names.
Configure rules to block specific Internet services or applications by type.
Instructions on how to remove keywords from the list of blocked Internet sites.
How to exempt a specific trusted computer from Internet access blocking rules.
Manage rules (ACLs) that control network access for devices, allowing or blocking them.
Set up schedules for blocking Internet sites and services on specific days and times.
Configure the router to send email alerts for security events and log activities.
Configure and view Wide Area Network (WAN) settings for Internet connectivity.
Configure a DMZ server to forward all other incoming protocols to a specific local computer.
Instructions on how to change the router's device name displayed on the network.
Modify the router's Local Area Network (LAN) IP address and subnet mask settings.
Configure the range of IP addresses assigned by the router's DHCP server.
Steps to disable the router's built-in DHCP server feature.
Assign permanent IP addresses to devices by reserving them through the DHCP server.
Procedure to reserve a specific IP address for a computer on the LAN.
How to modify the settings of an already reserved IP address entry.
Procedure for removing a reserved IP address entry from the DHCP server.
Guide to easily add WPS-enabled devices to the WiFi network without a password.
Configure fundamental WiFi settings such as network name (SSID) and security.
Options to adjust WiFi mode for 2.4 GHz and 5 GHz bands for performance.
Adjust WiFi mode settings for 2.4 GHz and 5 GHz bands when AX WiFi is active.
Adjust WiFi mode settings for 2.4 GHz and 5 GHz bands when AX WiFi is inactive.
How to change the WiFi network password (Network Key) and security options.
Create a separate WiFi network for guests, with optional different security.
Manage the router's WiFi radios, turning them on or off via button or interface.
Schedule specific times for the router's WiFi signal to be turned off automatically.
Configure settings related to Wi-Fi Protected Setup (WPS) for device connections.
Configure the router to operate as a Wireless Access Point (AP) on the local network.
Configure bridging for port groups or VLAN tags for specific network traffic.
Configure a dedicated IPTV port for direct Internet Protocol television access.
Add, edit, or delete custom static routes for advanced network configurations.
Configure implicit beamforming to improve WiFi signal quality by using client information.
Manage airtime fairness to ensure equal WiFi network time for all clients.
Configure MU-MIMO to improve performance with multiple MU-MIMO-capable WiFi clients.
Configure the router to act as a bridge for wireless connectivity at faster 802.11ac speeds.
Aggregate two Ethernet ports to improve file transfer speed and network performance.
Utilize Dynamic Quality of Service (QoS) for better traffic management and congestion resolution.
Steps to enable Dynamic QoS for optimizing Internet traffic management.
Control whether the router automatically updates its QoS database for performance optimization.
Instructions for manually updating the router's dynamic QoS database.
Enable UPnP to help devices like game consoles and computers access network resources.
Configure WMM QoS to prioritize WiFi voice and video traffic for better performance.
Activate or deactivate AX WiFi features for improved network capacity and speed.
Configure Smart Connect to automatically select the fastest WiFi band for devices.
Procedures for checking and installing new router firmware for improved performance and security.
Steps to check for available firmware updates and initiate the update process.
Instructions for uploading a specific firmware file to the router.
How to change the router's administrator password for enhanced security.
Set up a password recovery feature to help regain access if the admin password is forgotten.
Steps to recover the router's admin password using the enabled recovery feature.
Access router status, Internet port status, and WiFi settings with color-coded indicators.
View detailed statistics for the WAN, LAN, and WLAN ports, including status and traffic.
Verify the router's Internet connection status, IP address, and lease information.
Access and manage router logs, which record website access and other router actions.
See a list of all computers and devices currently connected to the router's network.
Use traffic metering to monitor and set limits for Internet traffic volume and connection time.
Backup, erase, or restore the router's configuration settings.
Save the current router configuration settings to a file on your computer.
Reset all router configurations to their factory default settings.
Load previously saved router configuration settings from a backup file.
Access and manage the router's settings over the Internet.
Configure the router for remote access over the Internet, specifying allowed IP addresses.
Instructions on how to access the router's web interface remotely over the Internet.
Utilize the Nighthawk app for remote access and management of router settings.
Control router LED behavior, disabling blinking or turning off LEDs except Power.
Configure the router's time zone and daylight saving time settings.
Configure the Network Time Protocol (NTP) server for network time synchronization.
Configure the router to act as a DLNA media server for media playback on compatible devices.
Steps to reset the router to its original factory default configuration settings.
Procedure for resetting the router to factory defaults using the physical Reset button.
Reset the router's configuration to factory default settings via the web interface.
Information on compatible USB storage devices and file system types supported by the router.
Steps to connect a USB storage device (flash drive, HDD) to the router's USB port.
How to access USB storage devices connected to the router from a Windows computer.
Steps to map a USB storage device as a network drive in Windows.
How to access USB storage devices connected to the router from a Mac computer.
Use ReadySHARE Vault software for centralized, continuous backup of Windows computers.
Use Time Machine to back up Mac computers onto a USB hard drive connected to the router.
Instructions for formatting a USB hard drive and specifying partitions for Time Machine backups.
Recommended procedures to prepare a Mac for backing up large amounts of data with Time Machine.
Steps to use Time Machine to back up Mac computers onto a router-connected USB hard drive.
Configure FTP access to allow faster download and upload of large files within the network.
How to view network folders and their settings on a USB storage device connected to the router.
Steps to add a new network folder to a USB storage device connected to the router.
How to modify the settings of an existing network folder on a USB storage device.
Procedure to safely disconnect a USB storage device from the router by taking it offline first.
Configure Dynamic DNS to access the home network using a domain name instead of an IP address.
Steps to enable FTP access to the router's USB storage device via the Internet.
Use Dynamic DNS to set up a personal FTP server for remote network access.
Steps to get a NETGEAR Dynamic DNS domain name and configure FTP server settings.
How to access USB storage devices connected to the router remotely over the Internet.
Use ReadyCLOUD to remotely access files stored on USB devices connected to the router.
Steps to create a ReadyCLOUD account for remote access to USB storage devices.
Procedure to register your router with your ReadyCLOUD account for remote access.
Establish a Virtual Private Network (VPN) connection for secure remote access to your network.
Configure the router's VPN service settings, including service type and port number.
Instructions for installing OpenVPN client software on Windows, Mac, iOS, and Android devices.
Steps to install OpenVPN client software on a Windows computer for VPN connections.
Steps to install OpenVPN client software on a Mac computer for VPN connections.
Steps to install OpenVPN client software on an iOS device for VPN connections.
Steps to install OpenVPN client software on an Android device for VPN connections.
Open a VPN tunnel from a Windows computer to the router for secure remote access.
Access router USB devices and media remotely via VPN on a Windows-based computer.
Use a VPN connection to access your home Internet service when away from home.
Configure the router to allow VPN clients to access the Internet through your home network.
Restrict VPN clients from accessing the Internet, allowing only home network access.
Establish a VPN tunnel to access your home Internet service while away from home.
Configure rules to allow specific incoming Internet traffic to reach servers on your local network.
Steps to set up port forwarding rules to make local servers accessible from the Internet.
Add custom port forwarding rules for applications not listed in the default services.
How to modify the settings of an existing port forwarding service entry.
Procedure for removing a port forwarding rule from the router's configuration.
Example of using port forwarding to make a local web server accessible over the Internet.
Explanation of the sequence showing the effects of a port forwarding rule on network traffic.
Configure port triggering for applications that require dynamic opening of ports.
Steps to add a new port triggering service with specific connection and port information.
Activate port triggering functionality to dynamically open inbound ports for specific applications.
Example illustrating port triggering for an Internet Relay Chat (IRC) session.
Provides quick tips and sequences for troubleshooting common router problems.
Recommended sequence for safely restarting your modem and router to resolve network issues.
Verify secure connections of the power adapter and Ethernet cables for proper router operation.
Ensure WiFi network names (SSIDs) and security settings match between the router and devices.
Verify computer and mobile device network settings, ensuring IP addresses are on the same subnet.
Use router LEDs as indicators to diagnose and troubleshoot problems.
Describes the normal sequence of LED activity when the router is powered on.
Troubleshooting steps when the router's Power LED is off or blinking.
Indicates a potential router fault if all LEDs remain on after startup.
Troubleshooting steps when Internet or Ethernet LAN port LEDs are not lit.
Troubleshooting steps if the router's WiFi LED is off, possibly due to the WiFi On/Off button.
Steps to resolve issues preventing login to the router's web interface.
Troubleshooting steps when the router is accessible but Internet access is unavailable.
Diagnose and resolve issues preventing web page loading even with Internet connectivity.
Troubleshooting steps if router configuration changes are not being saved.
Isolate and resolve problems with connecting to the router's WiFi network.
Use the ping utility to diagnose network connectivity and path issues.
Verify the Local Area Network path to the router by pinging it from a computer.
Use ping to test network connectivity to remote devices like DNS servers.
Information on returning the router to its original factory default configuration.
Provides detailed technical specifications for the router, including hardware and protocols.
| USB Ports | 2x USB 3.0 |
|---|---|
| Beamforming | Yes |
| MU-MIMO | Yes |
| OFDMA | Yes |
| WiFi Technology | 802.11ax |
| Processor | 1.8GHz Quad-Core Processor |
| Ethernet Ports | 1x 2.5G WAN, 4x 1G LAN |
| Security | WPA3 |
| Memory | 512MB NAND flash, 1GB RAM |
| Antenna | 8x High-Performance Antennas |